Garlic Parmesan Chicken Meatloaves bake up with a crisp, cheesy top and a tender center that stays juicy instead of turning dry and crumbly. The smaller shape gives you more of that golden edge on every portion, which is exactly what makes these disappear faster than a standard loaf ever could.
The trick is in the balance: enough parmesan and panko to hold the chicken together, but not so much that the mixture gets dense. A quick brush of garlic butter before baking gives the tops a head start on browning, and the final sweep after baking keeps the meatloaves glossy and fragrant right when they hit the table.
Below you’ll find the specific cue I watch for when mixing ground chicken, plus the easiest way to keep the loaves from spreading on the pan. I also included a few variations for swapping the binders or turning this into a lighter dinner without losing the garlicky parmesan finish.
The parmesan crust turned golden and the chicken stayed moist all the way through. I baked them for 24 minutes and the garlic butter at the end made them taste like something from a nice restaurant.
Love these golden garlic parmesan chicken meatloaves? Save them for an easy sheet-pan dinner with crisp edges and a buttery parmesan finish.
The Secret to Keeping Chicken Meatloaves Juicy Instead of Dense
Ground chicken behaves differently from beef or pork. It has less fat, which means it can dry out quickly and turn tight if you overmix or pack it too firmly. The goal here is a mixture that just holds together when shaped, not one that looks whipped or paste-like.
The parmesan helps with flavor and structure, but the panko matters too. It absorbs a little moisture and keeps the loaves from collapsing into a soft puddle on the sheet pan. If your mixture feels sticky, that’s normal. Wet hands and a light touch are better than trying to add more breadcrumbs until it feels stiff.
- Ground chicken — Use standard ground chicken, not extra-lean if you can avoid it. A little bit of fat keeps the loaves tender and helps the edges brown instead of drying out.
- Parmesan — Grated parmesan does two jobs here: it seasons the meat from the inside and helps form that salty, crisp top. Pre-grated works in a pinch, but a finer grate melts into the mixture better.
- Panko breadcrumbs — Panko gives these a lighter texture than regular breadcrumbs. If you need a gluten-free version, use gluten-free panko and keep the amount the same.
- Garlic and parsley — Fresh garlic gives the meatloaves their backbone, while parsley keeps the flavor from feeling heavy. Dried parsley won’t bring the same fresh lift, so use fresh if you have it.
What Each Layer Is Doing on the Pan

The garlic butter on top is more than garnish. It helps the parmesan brown, keeps the surface from looking dry, and carries the garlic flavor right into the crust. Brush it on before baking so it can catch the oven heat and start caramelizing.
The extra parmesan on top is what gives you those crisp little edges. Press it lightly into the buttered surface so it sticks. If you just scatter it loosely, most of it will slide off onto the parchment instead of forming a crust.
- Egg — This is the glue that keeps the mixture from crumbling when you slice into it. One egg is enough here; too much egg makes the texture rubbery.
- Italian seasoning — This rounds out the garlic and parmesan with herbs so the meatloaves taste complete, not flat. If yours is heavy on rosemary or thyme, use a little less so it doesn’t overpower the chicken.
- Butter — Melted butter is the easiest way to carry the garlic over the top of each loaf. Olive oil works for a dairy-free version, but you lose some of the rich finish.
- Fresh parsley — Add it at the end for color and freshness. Cooking it hard in the oven dulls the flavor, so save the final pinch for serving.
Shaping, Baking, and Knowing Exactly When They’re Done
Mix Just Until the Chicken Comes Together
Combine everything in one bowl and stop as soon as the ingredients are evenly distributed. The mixture should look cohesive but still soft. If you keep stirring, the proteins tighten up and the finished loaves turn springy instead of tender.
Form Four Loose Ovals
Divide the mixture into four equal portions and shape them on the parchment-lined pan with lightly damp hands. Keep them compact enough to hold their shape, but don’t press them into hard little bricks. A slightly rounded top gives you better browning and a better texture in the center.
Brush Before the Oven, Not After
That first layer of garlic butter helps the parmesan crust start early. Bake at 400°F until the tops are deeply golden and the centers reach 165°F. If the tops are browning too fast before the centers are done, move the pan one rack lower for the last few minutes.
Finish with More Garlic Butter
When the meatloaves come out, brush them again with the remaining butter and scatter over fresh parsley. This is when they smell the best and look glossy instead of dry. Let them rest for a few minutes before serving so the juices settle back into the meat.
How to Adapt These Garlic Parmesan Chicken Meatloaves
Gluten-Free Panko Swap
Use gluten-free panko in the same amount. It keeps the texture light and still absorbs enough moisture to hold the meatloaves together. Regular gluten-free breadcrumbs work too, but they can make the mixture a little tighter, so don’t add extra.
Dairy-Free Version
Swap the parmesan in the meat mixture for a dairy-free parmesan alternative and use olive oil instead of butter for the topping. You’ll lose a little richness, but the garlic, herbs, and browning still carry the dish. Add a pinch more salt if your substitute parmesan is mild.
Make It Spicier
Stir red pepper flakes into the meat mixture or into the garlic butter if you want the heat to sit on top instead of running through every bite. A little goes a long way here because the parmesan already brings a sharp edge.
Storage and Reheating
- Refrigerator: Store in an airtight container for up to 4 days. The crust softens a little, but the flavor holds well.
- Freezer: These freeze well. Cool completely, wrap individually, and freeze for up to 2 months. Thaw in the fridge before reheating so the centers warm evenly.
- Reheating: Reheat in a 325°F oven, covered loosely with foil, until hot. The oven keeps the parmesan topping from turning rubbery, which can happen in the microwave.
Answers to the Questions Worth Asking
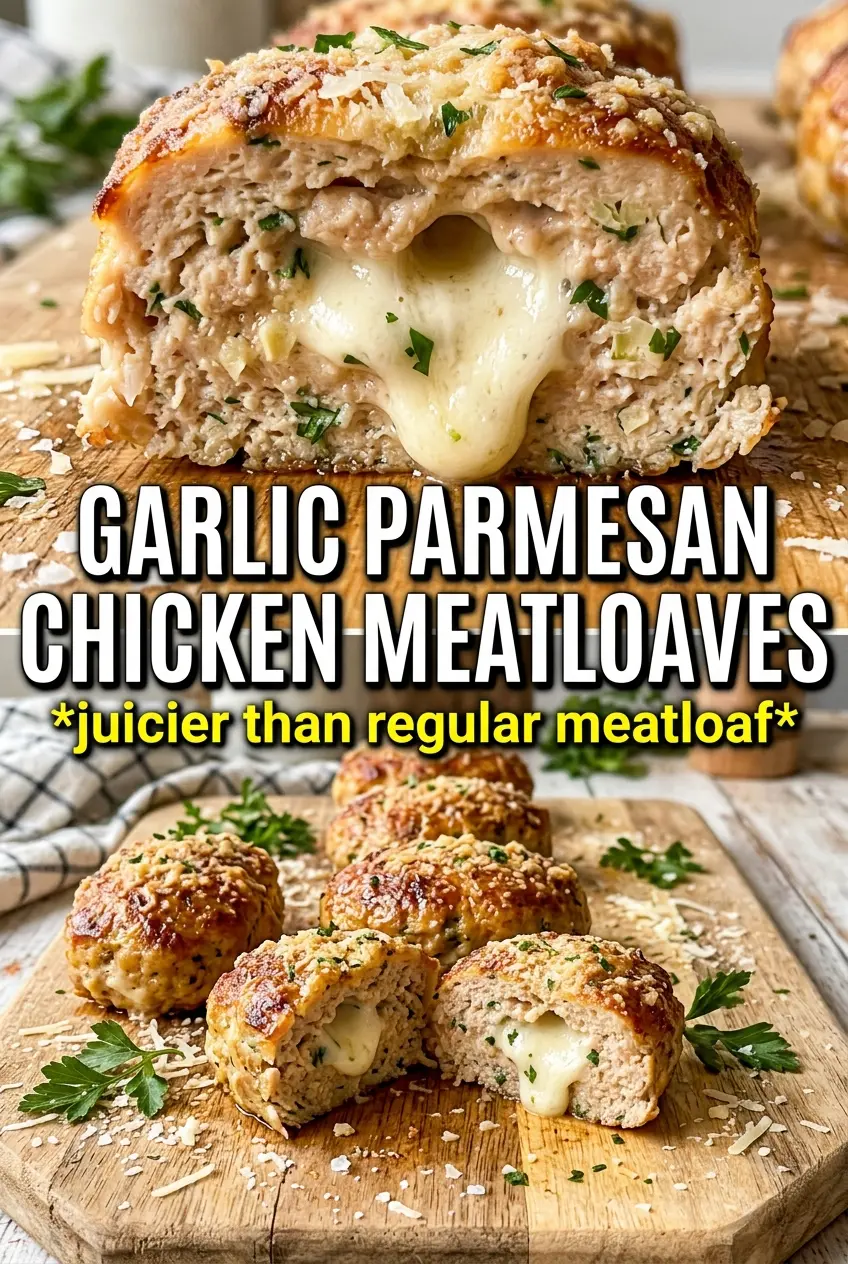
Garlic Parmesan Chicken Meatloaves
Ingredients
Equipment
Method
- Preheat the oven to 400°F and line a sheet pan with parchment for easy cleanup.
- Combine ground chicken, parmesan, panko, garlic, egg, parsley, Italian seasoning, garlic powder, salt, and pepper, then mix until just combined so it stays tender.
- Divide the mixture into 4 equal portions and shape into oval loaves on the prepared pan.
- Mix melted butter with garlic and brush over each meatloaf, then press extra parmesan on top for a golden crust.
- Bake at 400°F for 22–25 minutes until cooked through and golden on top.
- Brush with the remaining garlic butter, garnish with fresh parsley, and serve.