Summer is here, and for me, that means one thing: homemade ice cream! There’s nothing quite like a cold, creamy scoop made right in your kitchen. I’ve gathered my favorite easy ice cream recipes so you can make delicious frozen treats for everyone.
Whether you like classic chocolate, fruity blends, or something a bit different, I have a recipe here that you will enjoy. Making ice cream at home is simple and so rewarding. Let’s get scooping!
Jump to Recipe:
- 1. Easy Classic Chocolate Ice Cream Recipe
- 2. Easy Creamy Keto Ice Cream Recipe
- 3. Easy Fresh Georgia Peach Ice Cream Recipe
- 4. Easy Homemade Blackberry Ice Cream Recipe
- 5. Easy Homemade Blue Moon Ice Cream Recipe
- 6. Easy Homemade Butter Pecan Ice Cream Recipe
- 7. Easy Homemade Cherry Garcia Ice Cream Recipe
- 8. Easy Homemade Chocolate Chip Cookie Dough Ice Cream
- 9. Easy Homemade Cottage Cheese Peanut Butter Ice Cream
- 10. Easy Homemade Eggnog Ice Cream Recipe
- 11. Easy Homemade Mint Chocolate Chip Ice Cream Recipe
Easy Classic Chocolate Ice Cream Recipe
A classic for a reason, this chocolate ice cream recipe is smooth and rich. You’ll love the deep cocoa flavor in every spoonful.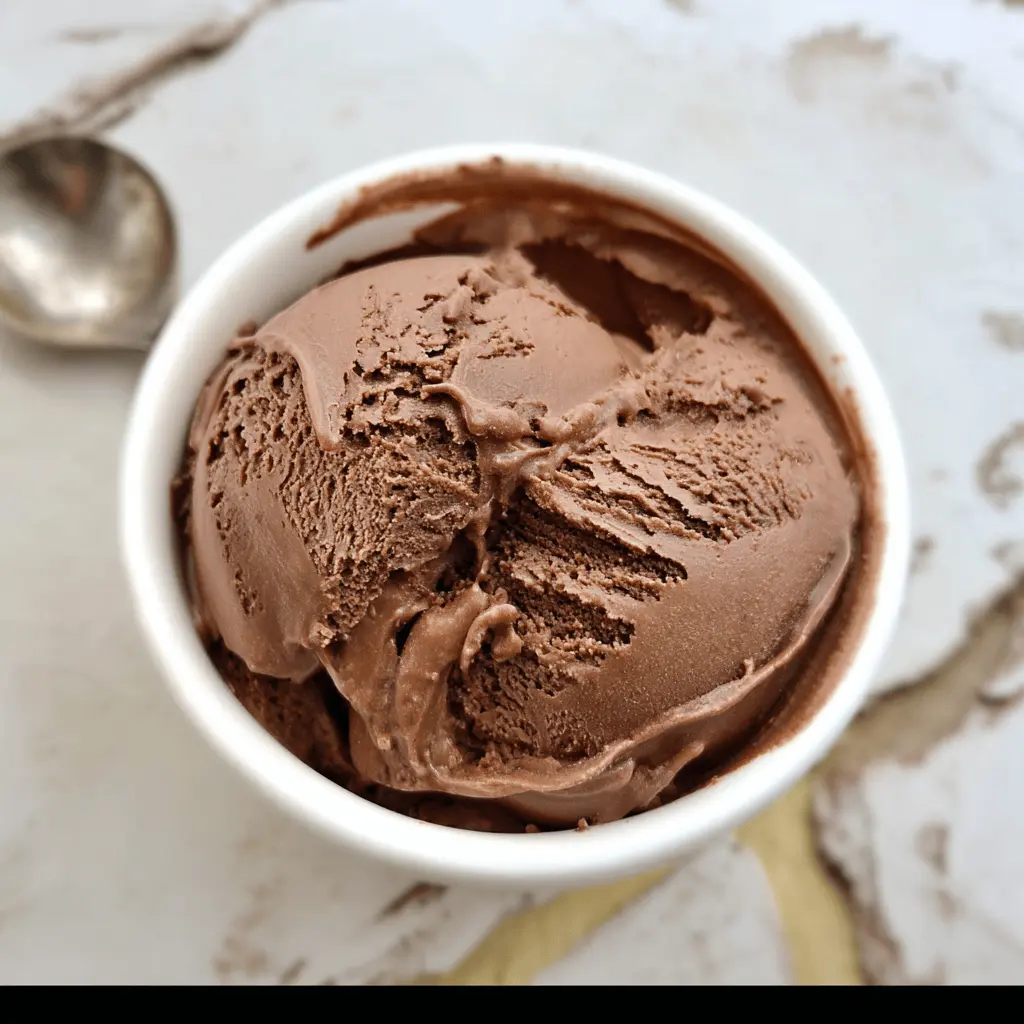
Key Ingredients & Tips
- Quality Cocoa: Use unsweetened cocoa powder for a deep chocolate taste.
- Chill Time: Make sure your ice cream base is fully chilled before churning for the best texture.
What You Need
- Heavy cream
- Granulated sugar
- Unsweetened cocoa powder
⏱️ Time: 4-6 hours🍽️ Yields: 6 servings
How to Make It
Step 1: Prep Your Chocolate Ice Cream Base
In a large bowl, whisk together your liquid ingredients like heavy cream, milk, sugar, and cocoa powder until well combined and smooth.
Step 2: Churn the Ice Cream
Pour the chilled ice cream base into your ice cream maker. Churn according to your machine’s instructions until it reaches a soft-serve consistency, usually 20-30 minutes.
Step 3: Freeze for Firmness
Transfer the churned ice cream to a freezer-safe container. Cover tightly and freeze for at least 4 hours, or until it’s firm enough to scoop easily.
📝 Final Note
For the best scoop, take your ice cream out of the freezer about 10 minutes before serving to soften slightly.
Easy Creamy Keto Ice Cream Recipe
If you’re looking for a low-carb option, this creamy keto ice cream is perfect. It’s sweet and satisfying without the extra sugar.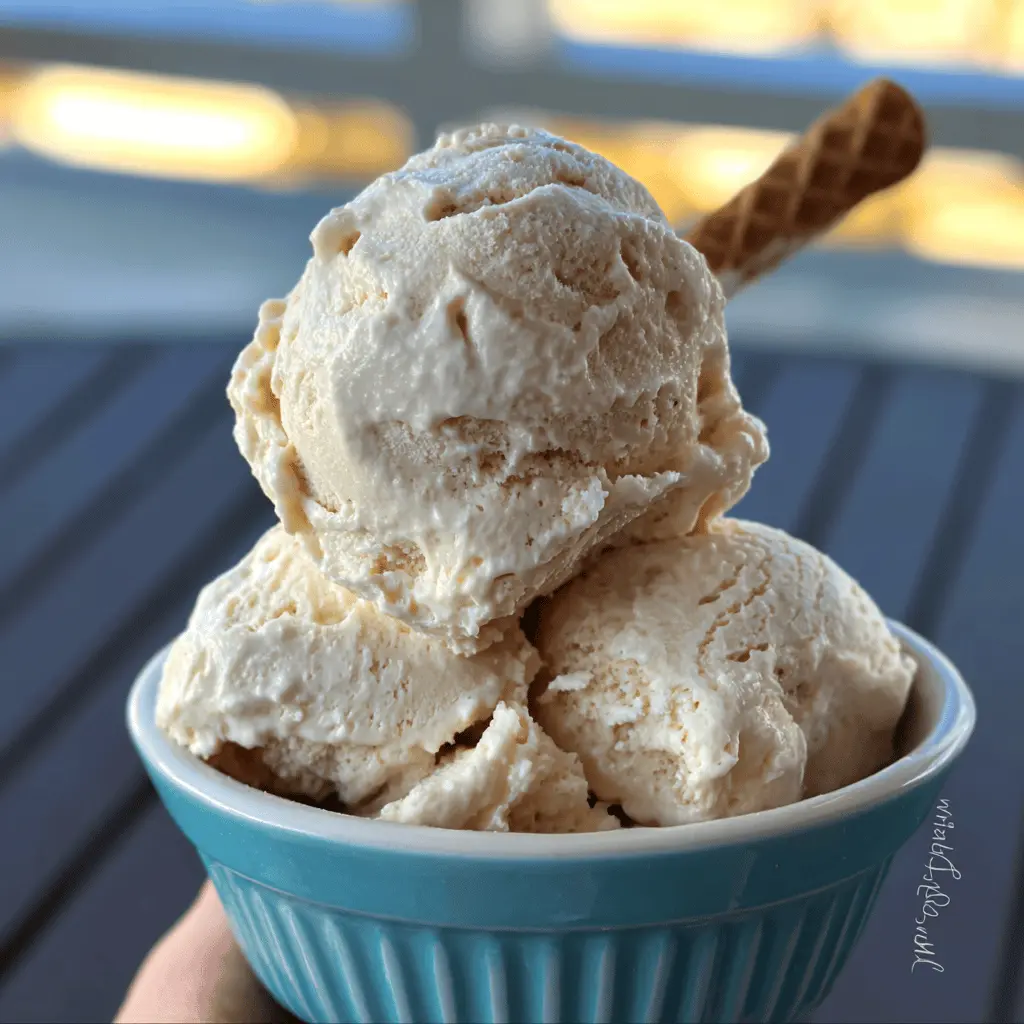
Key Ingredients & Tips for Keto Ice Cream
- Sweetener Choice: Pick a keto-friendly sweetener like erythritol or monk fruit that measures cup-for-cup like sugar.
- Full Fat Cream: Use heavy cream and full-fat dairy to achieve the creamy texture without sugar.
What You Need for Keto Ice Cream
- Heavy cream
- Keto-friendly sweetener
- Almond milk
⏱️ Time: 4-6 hours🍽️ Yields: 6 servings
How to Make Keto Ice Cream
Step 1: Prep Your Keto Base
In a large bowl, whisk together heavy cream, almond milk, and your chosen keto sweetener until everything is dissolved and smooth.
Step 2: Churn the Ice Cream
Pour the chilled keto ice cream base into your ice cream maker. Churn according to your machine’s instructions until it reaches a soft-serve consistency, usually 20-30 minutes.
Step 3: Freeze for Firmness
Transfer the churned ice cream to a freezer-safe container. Cover tightly and freeze for at least 4 hours, or until it’s firm enough to scoop easily.
📝 Final Note
For the best scoop, take your ice cream out of the freezer about 10 minutes before serving to soften slightly.
Easy Fresh Georgia Peach Ice Cream Recipe
Nothing says summer like fresh peaches, and this peach ice cream captures that sunny flavor. It’s light, fruity, and so refreshing.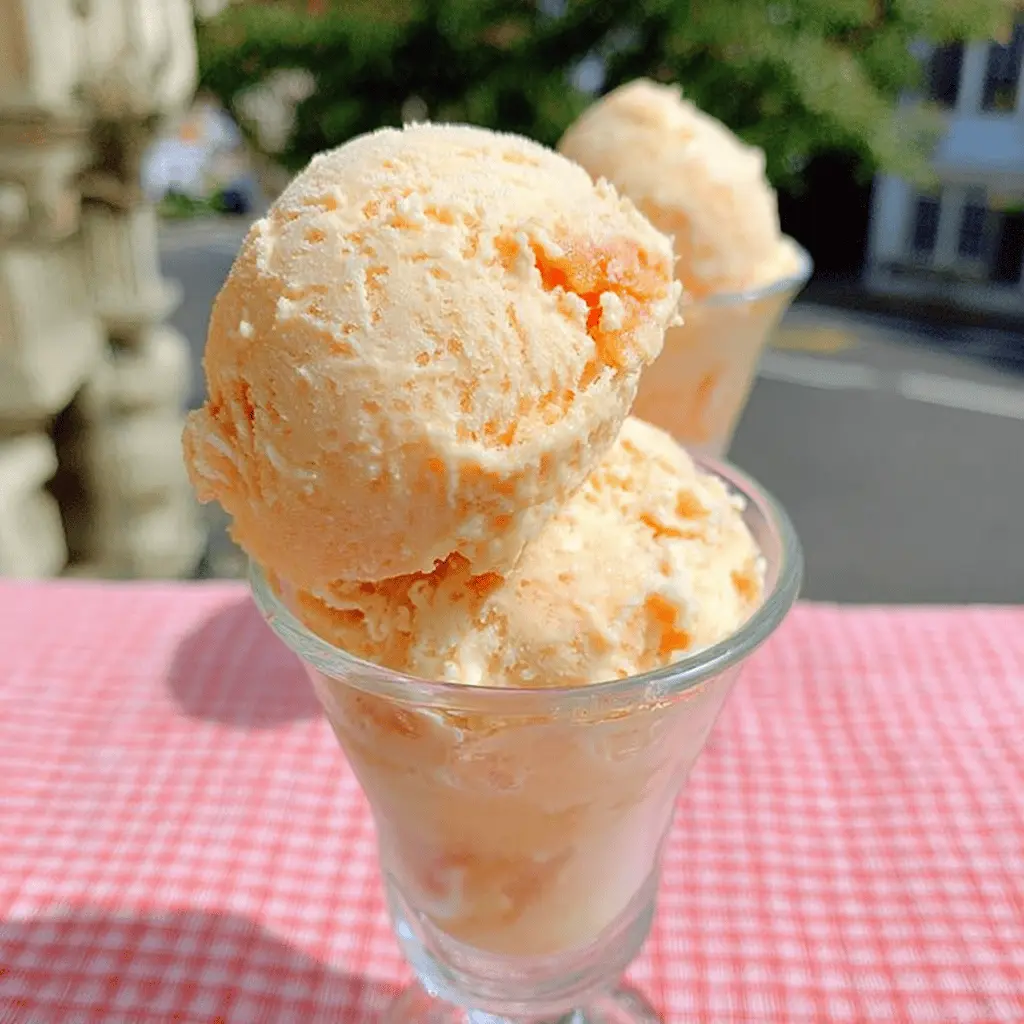
Key Ingredients & Tips for Peach Ice Cream
- Ripe Peaches: Use very ripe, fragrant Georgia peaches for the best flavor.
- Gentle Mixing: Fold in the peach pieces gently after churning to keep them intact.
What You Need for Peach Ice Cream
- Heavy cream
- Granulated sugar
- Fresh peaches
⏱️ Time: 4-6 hours🍽️ Yields: 6 servings
How to Make Peach Ice Cream
Step 1: Prep Your Peach Ice Cream Base
In a large bowl, whisk together heavy cream, milk, and sugar. Mix in pureed or finely chopped fresh peaches, ensuring the base is well combined.
Step 2: Churn the Ice Cream
Pour the chilled ice cream base into your ice cream maker. Churn according to your machine’s instructions until it reaches a soft-serve consistency, usually 20-30 minutes.
Step 3: Freeze for Firmness
Transfer the churned ice cream to a freezer-safe container. Cover tightly and freeze for at least 4 hours, or until it’s firm enough to scoop easily.
📝 Final Note
For the best scoop, take your ice cream out of the freezer about 10 minutes before serving to soften slightly.
Easy Homemade Blackberry Ice Cream Recipe
This blackberry ice cream is bursting with real fruit taste. The tartness of the berries balances the sweetness perfectly.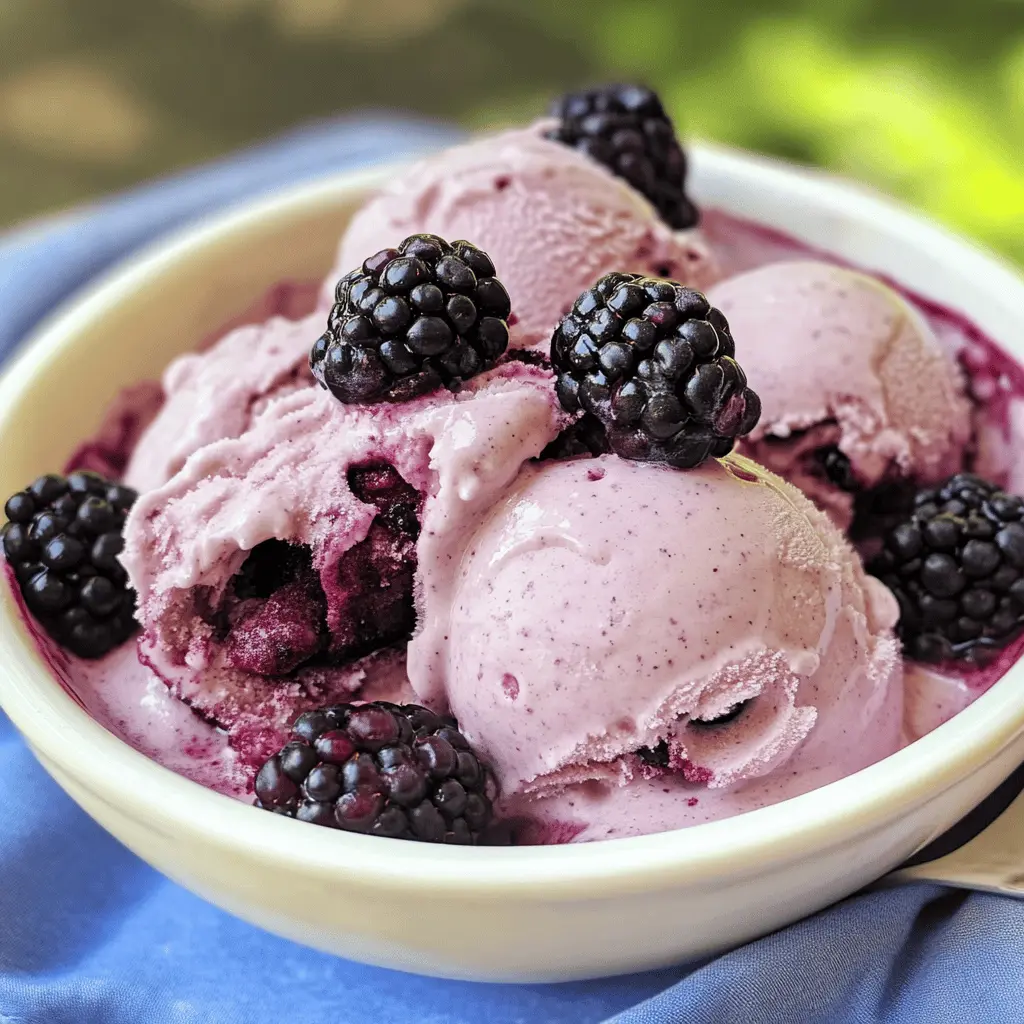
Key Ingredients & Tips for Blackberry Ice Cream
- Fresh Blackberries: Fresh berries work best, but frozen can be used if thawed and drained.
- Strain Seeds: For a smoother ice cream, you can strain the blackberry puree to remove seeds.
What You Need for Blackberry Ice Cream
- Heavy cream
- Granulated sugar
- Fresh blackberries
⏱️ Time: 4-6 hours🍽️ Yields: 6 servings
How to Make Blackberry Ice Cream
Step 1: Prep Your Blackberry Ice Cream Base
In a large bowl, whisk together heavy cream, milk, and sugar. Stir in pureed fresh blackberries, making sure the base is smooth.
Step 2: Churn the Ice Cream
Pour the chilled ice cream base into your ice cream maker. Churn according to your machine’s instructions until it reaches a soft-serve consistency, usually 20-30 minutes.
Step 3: Freeze for Firmness
Transfer the churned ice cream to a freezer-safe container. Cover tightly and freeze for at least 4 hours, or until it’s firm enough to scoop easily.
📝 Final Note
For the best scoop, take your ice cream out of the freezer about 10 minutes before serving to soften slightly.
Easy Homemade Blue Moon Ice Cream Recipe
Get ready for a fun, bright blue ice cream that tastes like a dream. This Blue Moon recipe is a playful treat for all ages.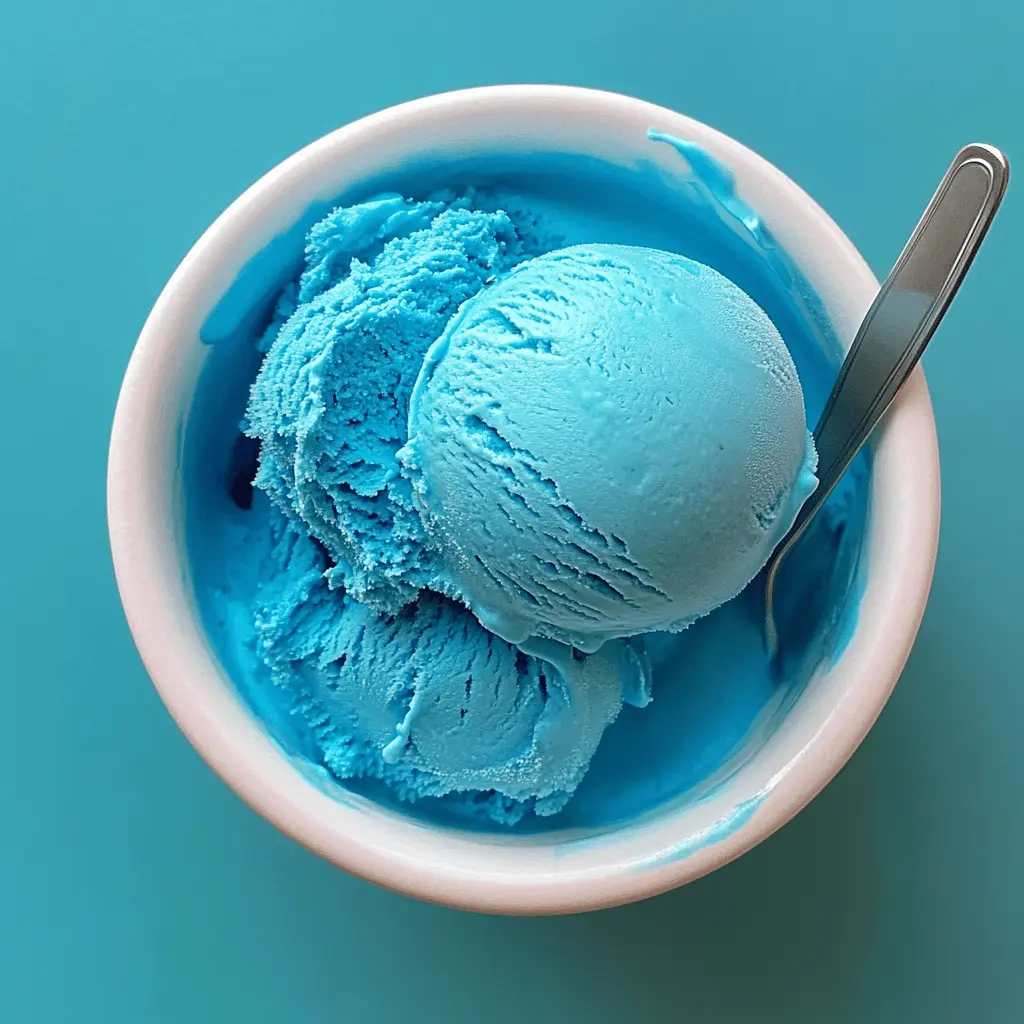
Key Ingredients & Tips for Blue Moon Ice Cream
- Flavor Extract: Almond and vanilla extracts often form the base of Blue Moon flavor; adjust to your liking.
- Food Coloring: Use gel food coloring to get that vibrant blue color without adding much liquid.
What You Need for Blue Moon Ice Cream
- Heavy cream
- Granulated sugar
- Blue food coloring
⏱️ Time: 4-6 hours🍽️ Yields: 6 servings
How to Make Blue Moon Ice Cream
Step 1: Prep Your Blue Moon Ice Cream Base
In a large bowl, whisk together heavy cream, milk, and sugar. Add blue food coloring and any flavor extracts until the desired color and taste are reached.
Step 2: Churn the Ice Cream
Pour the chilled ice cream base into your ice cream maker. Churn according to your machine’s instructions until it reaches a soft-serve consistency, usually 20-30 minutes.
Step 3: Freeze for Firmness
Transfer the churned ice cream to a freezer-safe container. Cover tightly and freeze for at least 4 hours, or until it’s firm enough to scoop easily.
📝 Final Note
For the best scoop, take your ice cream out of the freezer about 10 minutes before serving to soften slightly.
Easy Homemade Butter Pecan Ice Cream Recipe
The toasted pecans and buttery base make this butter pecan ice cream a comforting classic. It’s nutty and incredibly rich.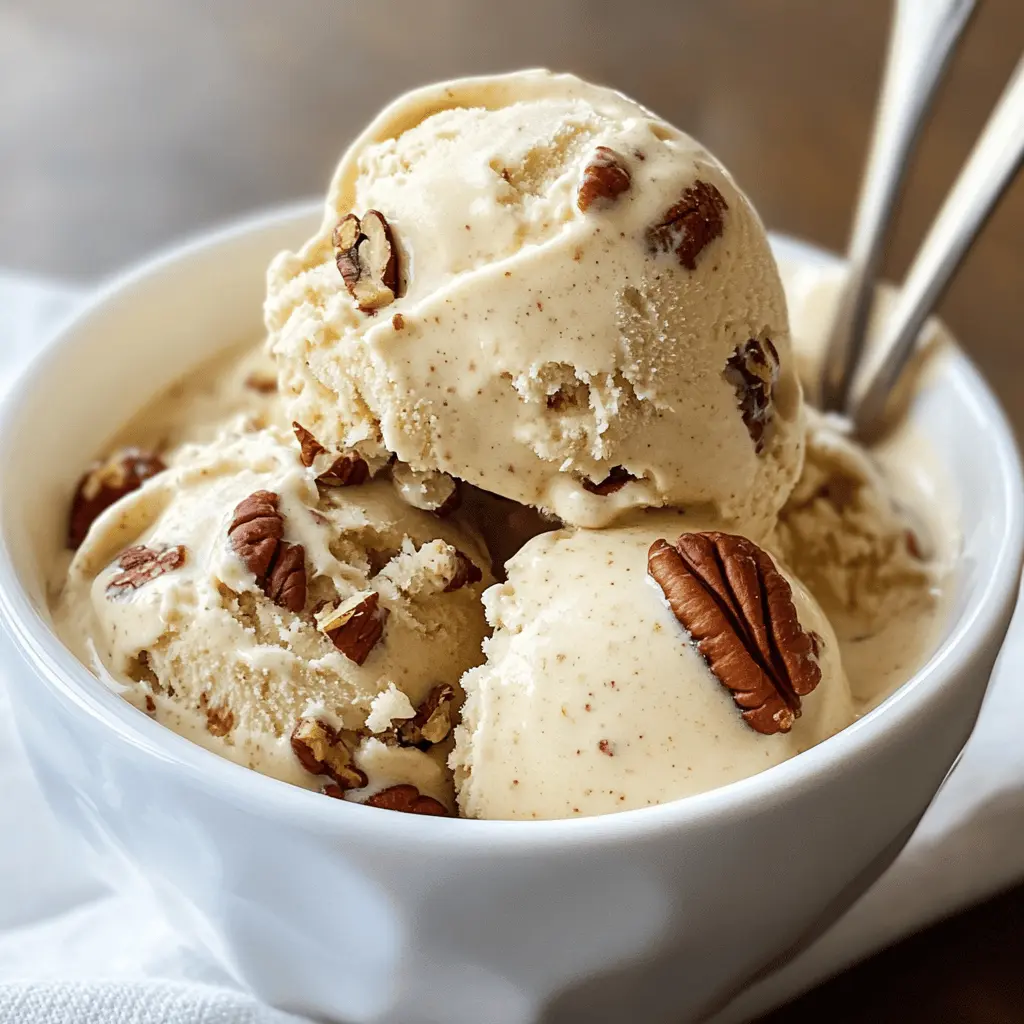
Key Ingredients & Tips for Butter Pecan Ice Cream
- Toasted Pecans: Toast pecans gently in butter before adding them to enhance their nutty taste.
- Brown Butter: Browning a bit of butter for the base can add a lot of depth.
What You Need for Butter Pecan Ice Cream
- Heavy cream
- Granulated sugar
- Pecans
⏱️ Time: 4-6 hours🍽️ Yields: 6 servings
How to Make Butter Pecan Ice Cream
Step 1: Prep Your Butter Pecan Base
In a large bowl, whisk together heavy cream, milk, and sugar. Stir in toasted pecans and any butter flavoring or browned butter if using.
Step 2: Churn the Ice Cream
Pour the chilled ice cream base into your ice cream maker. Churn according to your machine’s instructions until it reaches a soft-serve consistency, usually 20-30 minutes.
Step 3: Freeze for Firmness
Transfer the churned ice cream to a freezer-safe container. Cover tightly and freeze for at least 4 hours, or until it’s firm enough to scoop easily.
📝 Final Note
For the best scoop, take your ice cream out of the freezer about 10 minutes before serving to soften slightly.
Easy Homemade Cherry Garcia Ice Cream Recipe
Fans of cherry and chocolate will adore this Cherry Garcia ice cream. It combines sweet cherries with dark chocolate chunks.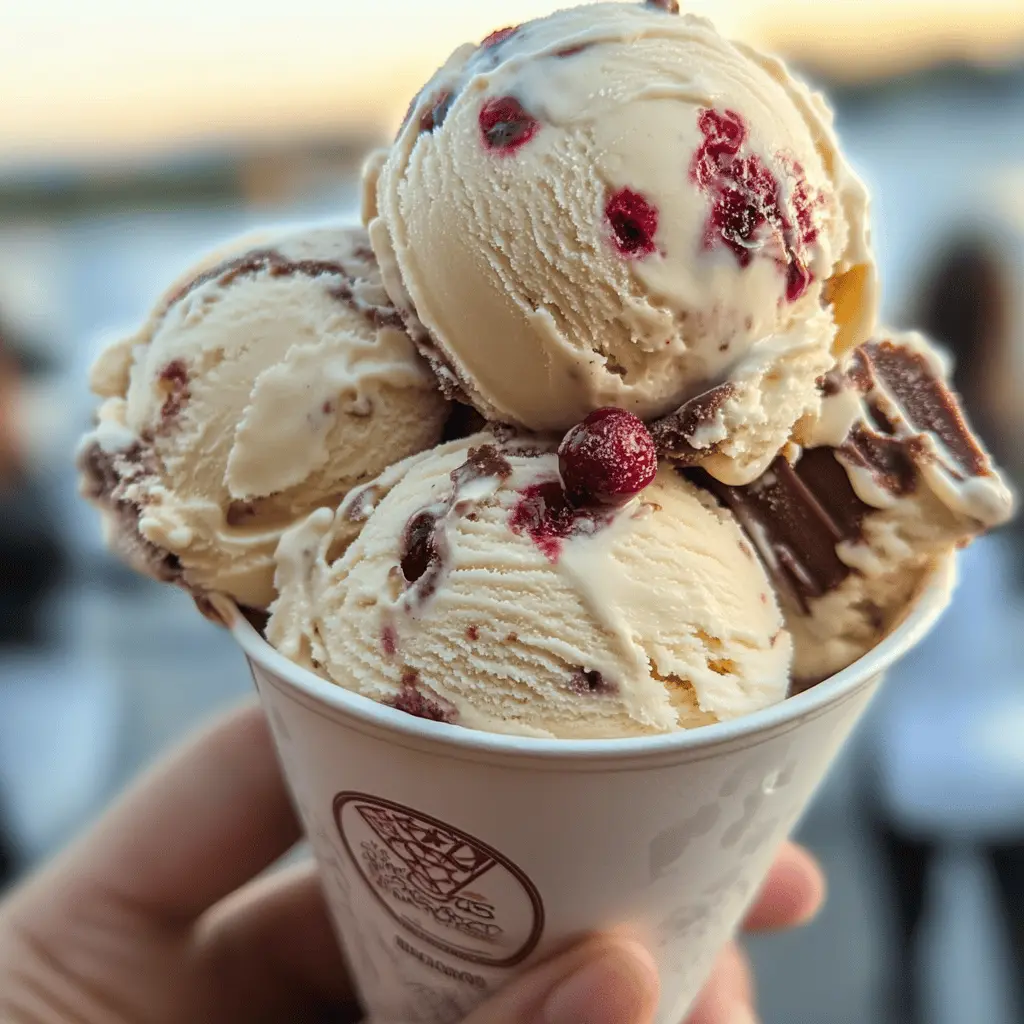
Key Ingredients & Tips for Cherry Garcia Ice Cream
- Good Cherries: Use fresh or frozen sweet cherries, pitted and chopped.
- Chocolate Chunks: Break up a good quality chocolate bar for varied chip sizes instead of using pre-made chips.
What You Need for Cherry Garcia Ice Cream
- Heavy cream
- Granulated sugar
- Pitted cherries
⏱️ Time: 4-6 hours🍽️ Yields: 6 servings
How to Make Cherry Garcia Ice Cream
Step 1: Prep Your Cherry Garcia Base
In a large bowl, whisk together heavy cream, milk, and sugar. Mix in chopped cherries and chocolate chunks.
Step 2: Churn the Ice Cream
Pour the chilled ice cream base into your ice cream maker. Churn according to your machine’s instructions until it reaches a soft-serve consistency, usually 20-30 minutes.
Step 3: Freeze for Firmness
Transfer the churned ice cream to a freezer-safe container. Cover tightly and freeze for at least 4 hours, or until it’s firm enough to scoop easily.
📝 Final Note
For the best scoop, take your ice cream out of the freezer about 10 minutes before serving to soften slightly.
Easy Homemade Chocolate Chip Cookie Dough Ice Cream
Who doesn’t love cookie dough? This chocolate chip cookie dough ice cream is packed with chunks of delicious dough.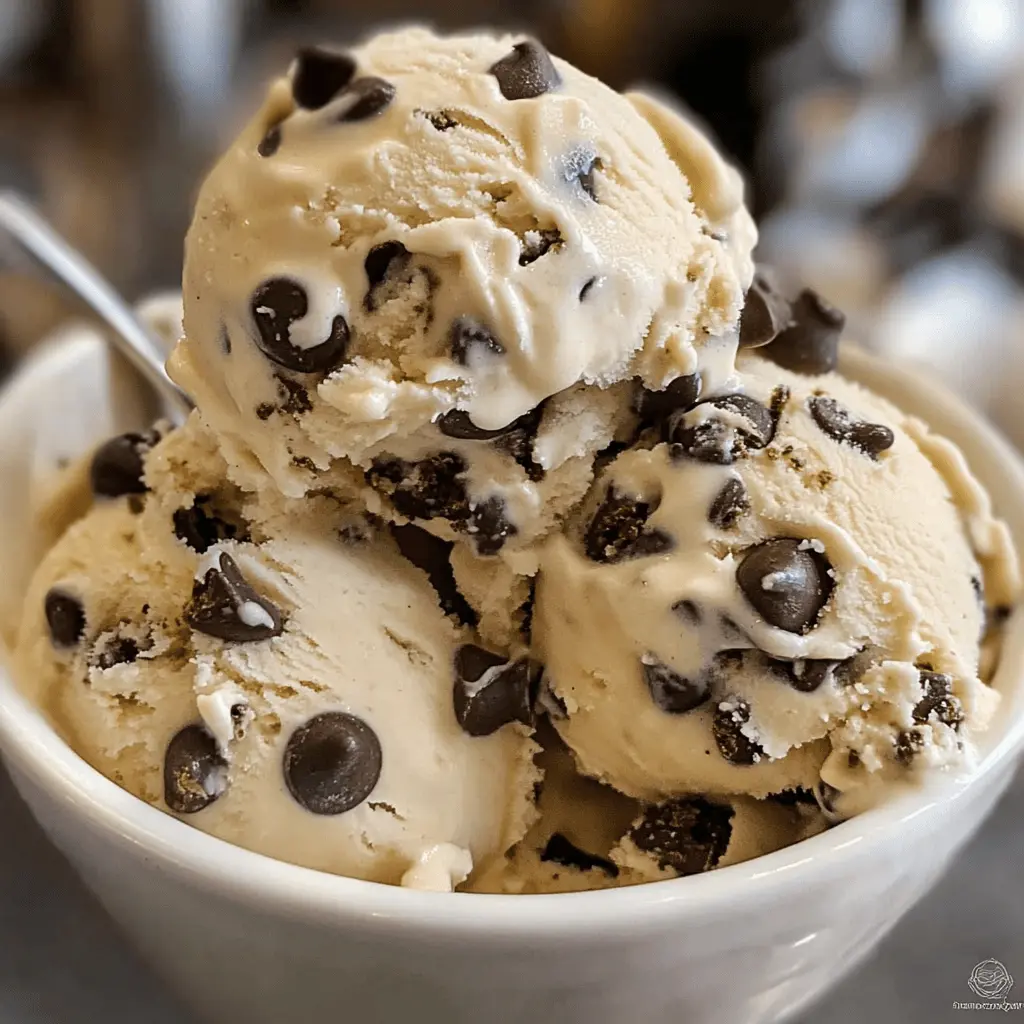
Key Ingredients & Tips for Cookie Dough Ice Cream
- Edible Cookie Dough: Make sure your cookie dough is safe to eat raw (no raw eggs, heat-treated flour).
- Small Pieces: Chill and cut your cookie dough into small, freezer-friendly pieces before adding.
What You Need for Cookie Dough Ice Cream
- Heavy cream
- Granulated sugar
- Edible cookie dough chunks
⏱️ Time: 4-6 hours🍽️ Yields: 6 servings
How to Make Cookie Dough Ice Cream
Step 1: Prep Your Cookie Dough Ice Cream Base
In a large bowl, whisk together heavy cream, milk, and sugar.
Step 2: Churn and Add Cookie Dough
Pour the chilled ice cream base into your ice cream maker. Churn according to your machine’s instructions until it reaches a soft-serve consistency, usually 20-30 minutes. Add cookie dough chunks in the last few minutes of churning.
Step 3: Freeze for Firmness
Transfer the churned ice cream to a freezer-safe container. Cover tightly and freeze for at least 4 hours, or until it’s firm enough to scoop easily.
📝 Final Note
For the best scoop, take your ice cream out of the freezer about 10 minutes before serving to soften slightly.
Easy Homemade Cottage Cheese Peanut Butter Ice Cream
A unique and protein-packed option, this cottage cheese peanut butter ice cream is surprisingly creamy. It’s a simple way to enjoy a frozen treat.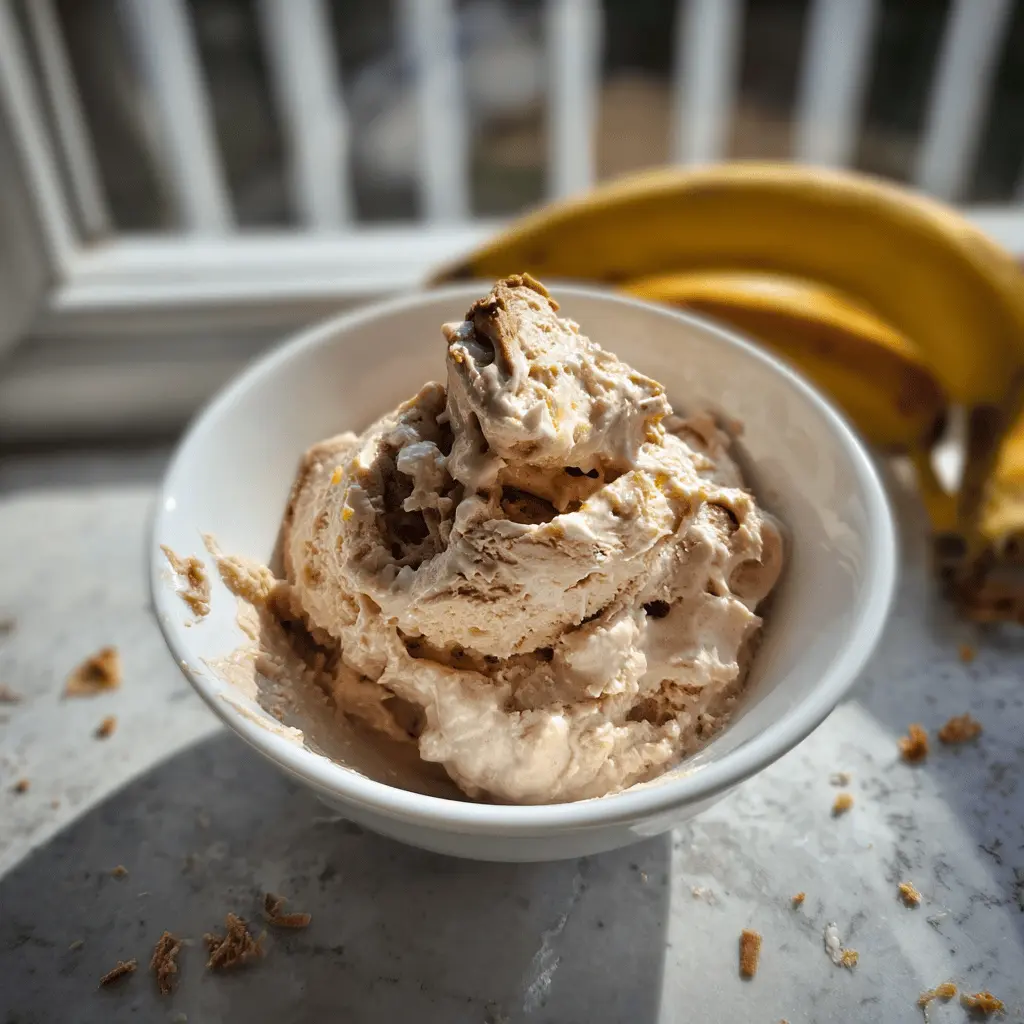
Key Ingredients & Tips for Cottage Cheese Peanut Butter Ice Cream
- Smooth Cottage Cheese: Blend cottage cheese thoroughly until very smooth before mixing with other ingredients.
- Natural Peanut Butter: Use natural peanut butter for a cleaner taste and easier blending.
What You Need for Cottage Cheese Peanut Butter Ice Cream
- Cottage cheese
- Peanut butter
- Sweetener
⏱️ Time: 4-6 hours🍽️ Yields: 6 servings
How to Make Cottage Cheese Peanut Butter Ice Cream
Step 1: Prep Your Cottage Cheese Peanut Butter Base
In a blender, combine cottage cheese, peanut butter, and your preferred sweetener until very smooth.
Step 2: Churn the Ice Cream
Pour the chilled base into your ice cream maker. Churn according to your machine’s instructions until it reaches a soft-serve consistency, usually 20-30 minutes.
Step 3: Freeze for Firmness
Transfer the churned ice cream to a freezer-safe container. Cover tightly and freeze for at least 4 hours, or until it’s firm enough to scoop easily.
📝 Final Note
For the best scoop, take your ice cream out of the freezer about 10 minutes before serving to soften slightly.
Easy Homemade Eggnog Ice Cream Recipe
Bring holiday cheer to your freezer with this spiced eggnog ice cream. It’s a festive and creamy dessert for any time of year.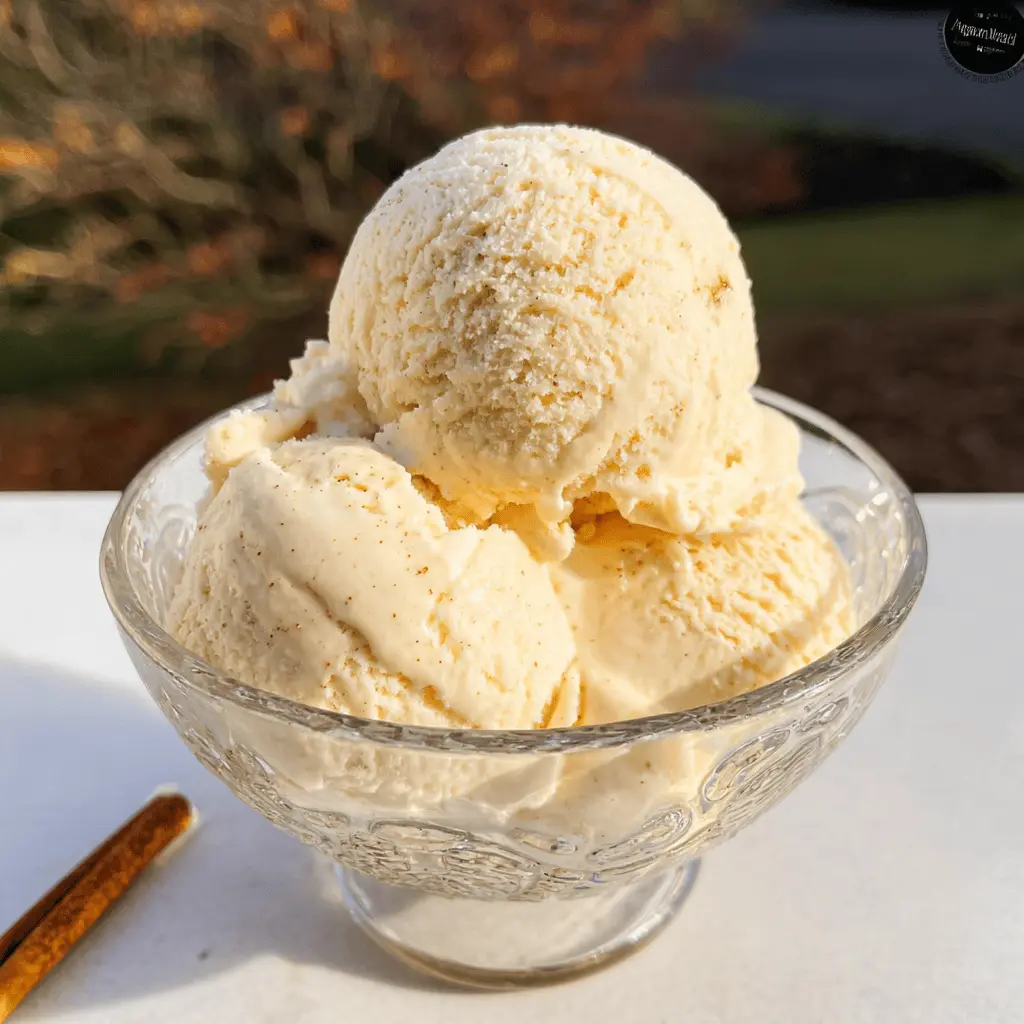
Key Ingredients & Tips for Eggnog Ice Cream
- Fresh Eggnog: Use a good quality store-bought eggnog or homemade for the base flavor.
- Spices: A pinch of nutmeg and cinnamon can enhance the eggnog taste.
What You Need for Eggnog Ice Cream
- Heavy cream
- Granulated sugar
- Eggnog
⏱️ Time: 4-6 hours🍽️ Yields: 6 servings
How to Make Eggnog Ice Cream
Step 1: Prep Your Eggnog Ice Cream Base
In a large bowl, whisk together heavy cream, sugar, and eggnog until well combined. Add a pinch of nutmeg if you like.
Step 2: Churn the Ice Cream
Pour the chilled ice cream base into your ice cream maker. Churn according to your machine’s instructions until it reaches a soft-serve consistency, usually 20-30 minutes.
Step 3: Freeze for Firmness
Transfer the churned ice cream to a freezer-safe container. Cover tightly and freeze for at least 4 hours, or until it’s firm enough to scoop easily.
📝 Final Note
For the best scoop, take your ice cream out of the freezer about 10 minutes before serving to soften slightly.
Easy Homemade Mint Chocolate Chip Ice Cream Recipe
The cool mint and chocolate chips in this mint chocolate chip ice cream are a perfect match. It’s a refreshing and classic combination.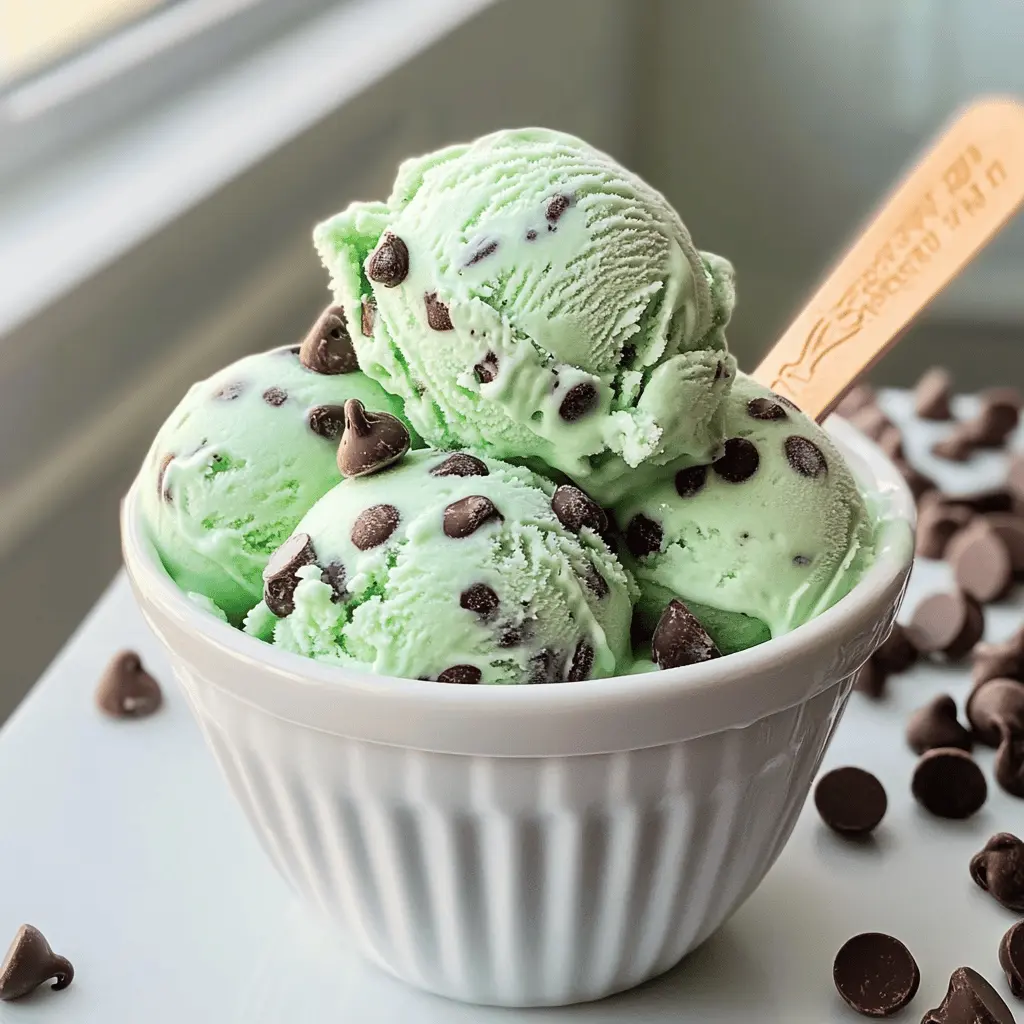
Key Ingredients & Tips for Mint Chocolate Chip Ice Cream
- Peppermint Extract: Start with a small amount of peppermint extract and add more to taste.
- Dark Chocolate: Use good quality dark chocolate chips or chopped chocolate for better flavor.
What You Need for Mint Chocolate Chip Ice Cream
- Heavy cream
- Granulated sugar
- Peppermint extract
⏱️ Time: 4-6 hours🍽️ Yields: 6 servings
How to Make Mint Chocolate Chip Ice Cream
Step 1: Prep Your Mint Chocolate Chip Base
In a large bowl, whisk together heavy cream, milk, and sugar. Mix in peppermint extract and green food coloring if desired.
Step 2: Churn and Add Chocolate Chips
Pour the chilled ice cream base into your ice cream maker. Churn according to your machine’s instructions until it reaches a soft-serve consistency, usually 20-30 minutes. Add chocolate chips in the last few minutes of churning.
Step 3: Freeze for Firmness
Transfer the churned ice cream to a freezer-safe container. Cover tightly and freeze for at least 4 hours, or until it’s firm enough to scoop easily.
📝 Final Note
For the best scoop, take your ice cream out of the freezer about 10 minutes before serving to soften slightly.