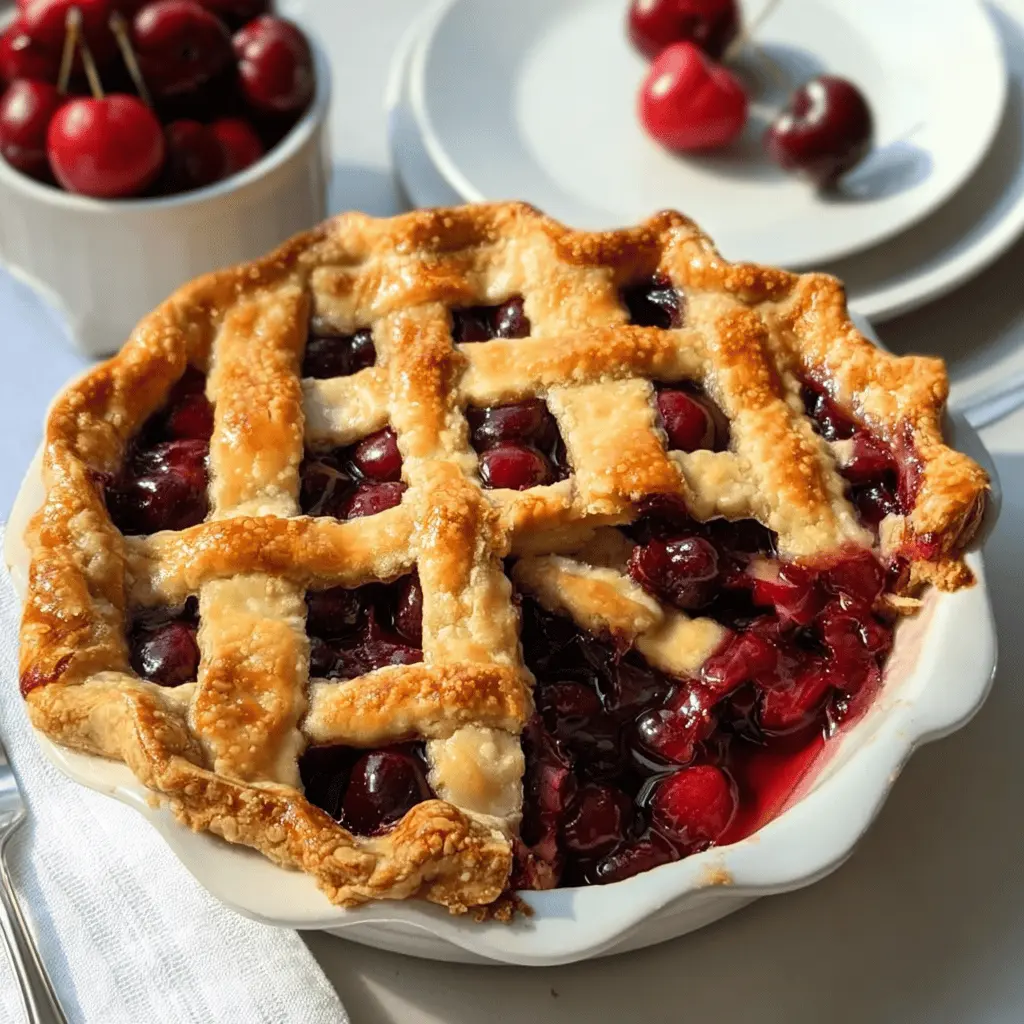
This sweet cherry pie is like a warm hug from Grandma! With juicy cherries and a flaky crust, it’s the perfect dessert for any occasion.
Honestly, there’s nothing quite like that fresh cherry flavor! I love serving it warm with a scoop of ice cream on top—seriously, it’s a slice of happiness! 😊
Key Ingredients & Substitutions
Cherries: Fresh tart cherries are the star here, but if they’re out of season, frozen cherries work great too! Just make sure they’re pitted and thawed. You could also use canned cherries in a pinch, but be sure to drain them first.
Sugar: Adjust the sugar based on the tartness of your cherries. If you’re using sweet cherries, 1 cup might be enough. For a healthier option, try using honey or maple syrup!
Cornstarch: This thickens your filling. If you don’t have cornstarch, you can substitute it with equal amounts of flour, but keep in mind the filling may be a bit runnier.
Butter: I love adding butter on top of the cherry filling. If you need a dairy-free option, you can use coconut oil or a non-dairy butter substitute.
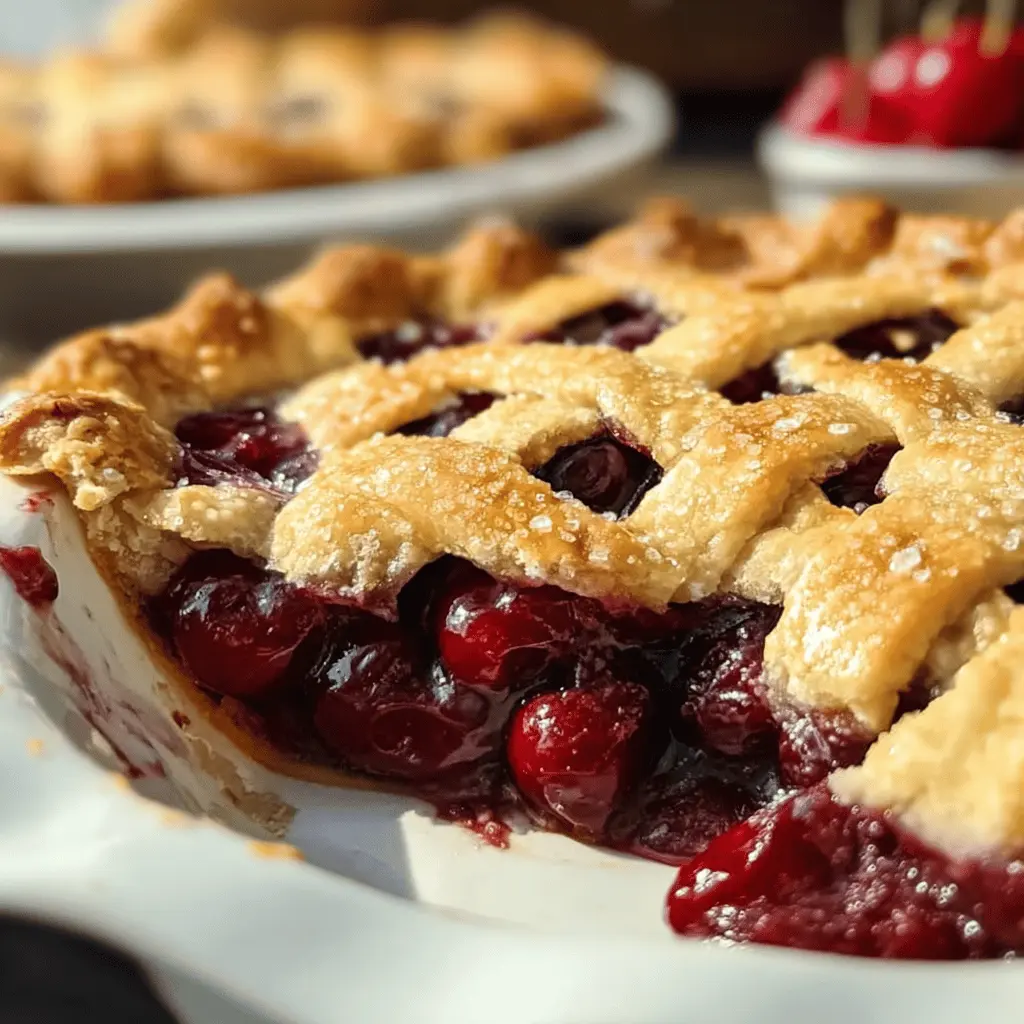
How Do You Make the Lattice Top?
Creating a pretty lattice top can be a bit tricky, but it’s worth it for that homemade look! Here’s how you do it:
- Roll out your second pie crust thinly on a floured surface.
- Cut the rolled crust into strips, about 3/4 inch wide.
- Lay half of the strips vertically over the filled pie, then fold back every other strip.
- Place a new strip horizontally across and return the folded strips over it. Repeat this until the pie is covered.
- Don’t stress about it being perfect—it’ll taste amazing no matter what!
Just remember to cut slits in a full crust if you’re going that route, to allow the steam to escape. A well-made crust is just as important as the filling, so take your time and enjoy the process!
Easy Homemade Grandma’s Sweet Cherry Pie
Ingredients You’ll Need:
For the Filling:
- 4 cups fresh or frozen tart cherries, pitted
- 1 to 1¼ cups granulated sugar (adjust to taste)
- 2 tablespoons cornstarch
- 1 tablespoon lemon juice
- 1 teaspoon vanilla extract
- ½ teaspoon almond extract (optional, enhances cherry flavor)
- 1 tablespoon butter, cut into small pieces
For the Crust:
- 1 package (about 14 oz) refrigerated pie crusts or homemade double pie crust
- 1 egg, beaten (for egg wash)
- 1 tablespoon coarse sugar (optional, for sprinkling on crust)
How Much Time Will You Need?
This delightful cherry pie takes about 30 minutes to prepare and an additional 50-60 minutes to bake. Plan for at least 2 hours cooling time before serving, making the total time around 3 hours. It’s worth the wait for that perfect slice!
Step-by-Step Instructions:
1. Preheat the Oven:
Start by preheating your oven to 425°F (220°C). This ensures the pie bakes evenly and gets that golden brown crust.
2. Make the Cherry Filling:
In a large bowl, combine your cherries with sugar, cornstarch, lemon juice, vanilla, and almond extract (if you’re using it). Gently toss everything together until the cherries are well coated and the mixture thickens a bit.
3. Prepare the Pie Crust:
Roll out one of your pie crusts and carefully fit it into a 9-inch pie dish. If there’s any excess dough hanging over the edges, trim it to ensure a neat finish.
4. Add the Filling:
Pour your cherry filling into the crust, spreading it evenly. Then, sprinkle the small pieces of butter on top of the cherries. This helps add extra flavor!
5. Lattice or Full Crust:
Roll out your second pie crust. If you’re making a lattice top, cut it into strips about ¾-inch wide. Lay half the strips vertically over the filling, folding back every other strip to weave in the other half. Alternatively, cover the pie completely with the second crust and cut slits for steam to escape.
6. Seal and Prepare for Baking:
Trim the edges of the crust and crimp them to seal everything in. Brush the top crust with beaten egg for that beautiful shine, and sprinkle with coarse sugar if desired.
7. Bake the Pie:
Place the pie in the oven and bake at 425°F (220°C) for 15 minutes. After that, reduce the heat to 350°F (175°C) and continue baking for another 35 to 40 minutes, or until the crust is a lovely golden brown and the filling is bubbling.
8. Cooling Time:
Once baked, let your pie cool at room temperature for at least 2 hours. This helps to set the filling so it doesn’t run when you slice it.
9. Serve:
Slice up your homemade cherry pie and serve it warm or at room temperature! It’s fantastic on its own or topped with vanilla ice cream or whipped cream for an extra treat!
Enjoy your delicious slice of Grandma’s sweet cherry pie, packed with juicy cherries and wrapped in a flaky crust! It’s sure to bring back sweet memories with every bite! 🍒🥧
FAQ for Easy Homemade Grandma’s Sweet Cherry Pie
Can I Use Frozen Cherries for This Recipe?
Absolutely! Frozen tart cherries work perfectly. Just make sure they’re thawed and drained of excess liquid. This will prevent the pie from becoming too watery!
How Do I Store Leftover Pie?
To store any leftover cherry pie, cover it with plastic wrap or aluminum foil and keep it in the refrigerator. It should stay fresh for about 3-4 days. You can also freeze slices for up to 3 months—just wrap them tightly!
Can I Substitute the Cornstarch?
Yes! If you don’t have cornstarch, you can use an equal amount of all-purpose flour as a thickener. Just keep in mind that it may require slightly longer baking to achieve the right consistency.
How Do I Get a Perfectly Flaky Crust?
For a flaky crust, make sure your butter is cold before mixing it into the dough. Also, avoid overworking the dough when rolling it out—this keeps the layers light and flaky!