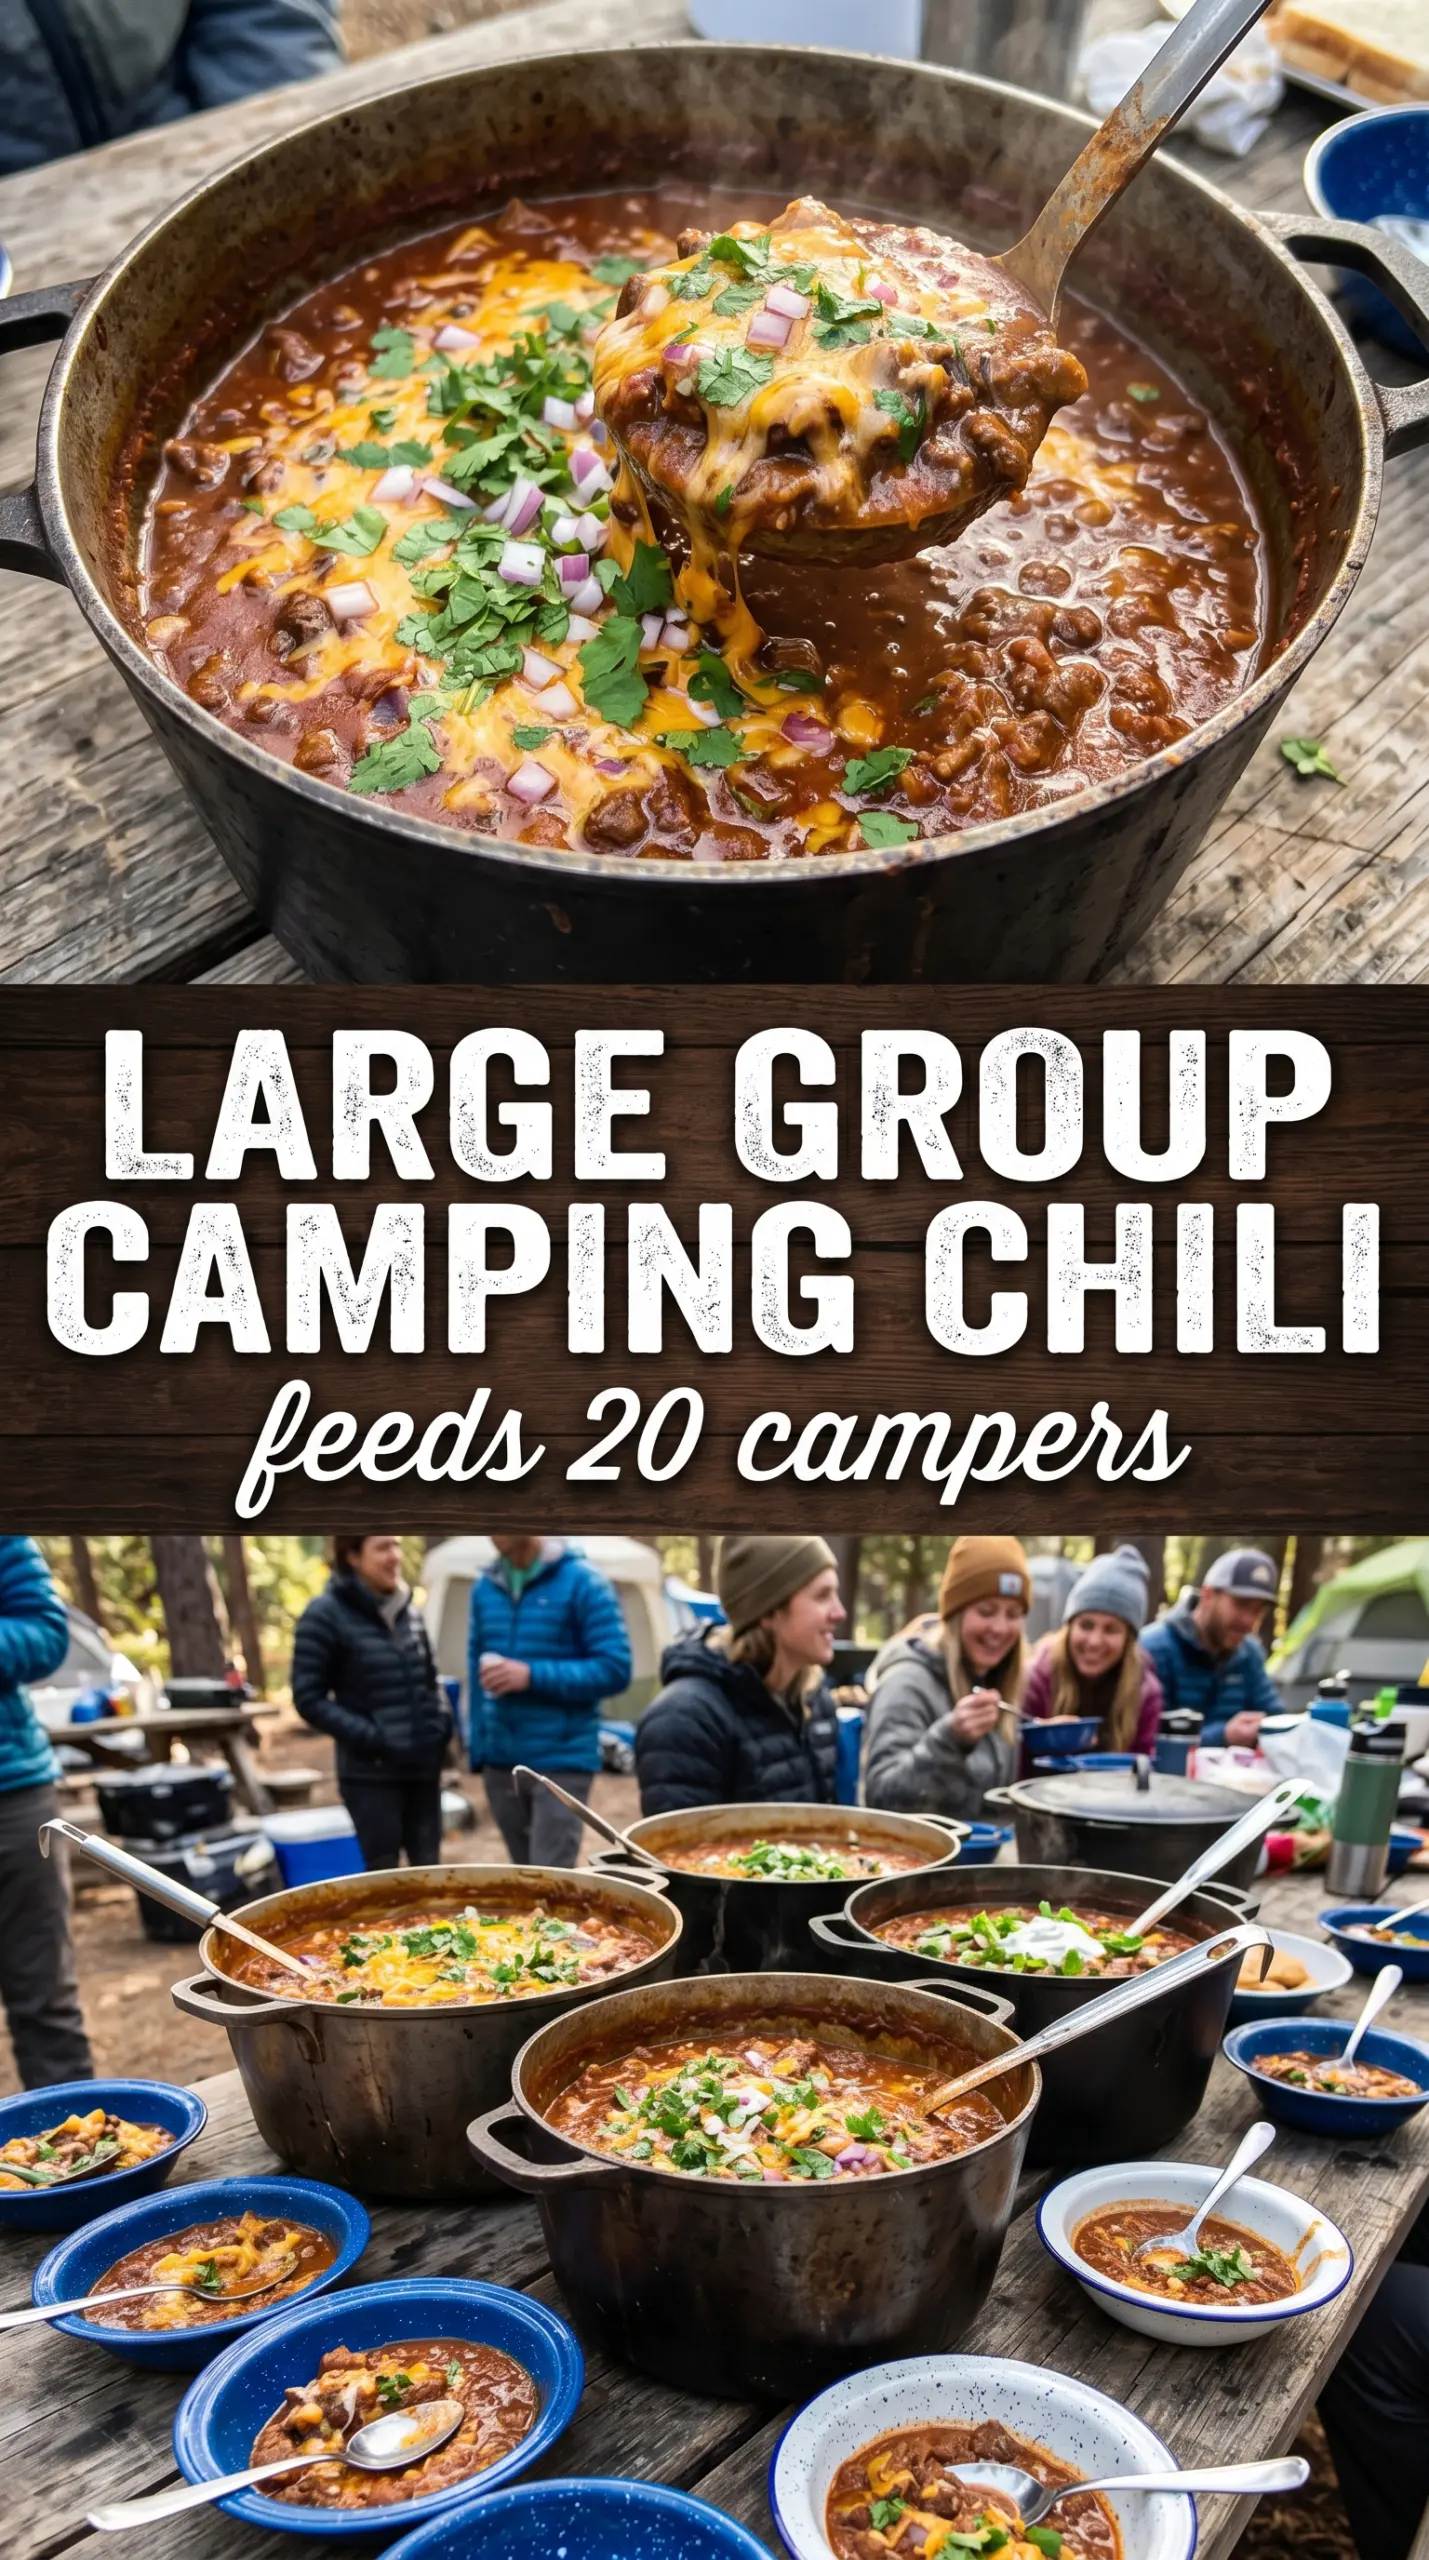
Bubbling chili tastes best when it can take its time over a real fire. The beef turns rich and savory, the tomatoes cook down into a thick base, and the beans hold their shape instead of fading into mush. In a Dutch oven, everything happens in one pot, which means the bottom picks up those browned bits from the beef and turns them into deeper flavor instead of waste.
This version keeps the ingredient list simple, but the order matters. Browning the beef first gives the chili its backbone, and letting the tomato paste cook in with the spices removes that raw, tinny edge. The long simmer is what ties it all together, thickening the broth just enough so each spoonful clings to the meat and beans.
Below, I’ve included the small details that make campfire chili come out hearty instead of watery, plus a few ways to adjust it if you want it a little spicier, lighter, or easier to make ahead.
The chili thickened up beautifully in the Dutch oven, and the tomato paste gave it a deeper flavor than my usual recipe. We ate it with crackers around the fire and there wasn’t a spoonful left.
Save this campfire chili for a Dutch oven dinner that stays thick, smoky, and perfect for scooping with crackers.
The Trick to Keeping Campfire Chili Thick Instead of Watery
A good campfire chili needs enough simmer time to reduce, but it also needs the right balance of tomatoes, beans, and meat. If the pot is too full or the heat is too low, the liquid never tightens up and you end up with soupier chili than you wanted. The other common mistake is rushing the browning step. That first layer of color on the beef is where the deep, meaty flavor starts.
Tomato paste is doing more than adding color here. It helps thicken the pot and gives the chili a cooked, rounded tomato base instead of a sharp canned-tomato taste. Stirring occasionally matters too, especially over a campfire, because the heat can be uneven and the bottom can catch before the top has finished reducing.
What Each Ingredient Is Actually Doing in the Pot
- Ground beef — This builds the body of the chili and gives the broth its savory backbone. An 80/20 blend works best because a little fat carries flavor, but if you use leaner beef, keep an eye on the pot so the bottom doesn’t dry out before the vegetables soften.
- Onion and bell pepper — These add sweetness and a little freshness so the chili tastes layered instead of flat. Dice them fairly small so they soften in the short cook time and disappear into the sauce instead of staying crunchy.
- Kidney beans — They hold up well in a long simmer and give the chili that classic hearty texture. Canned beans are the right choice here because dried beans would need a separate cook and would throw off the timing.
- Diced tomatoes and tomato paste — The diced tomatoes add moisture and brightness, while the paste concentrates the sauce and thickens everything as it cooks. If you want a richer result, let the paste cook for a minute with the beef and vegetables before the tomatoes go in.
- Chili powder and cumin — These are the main seasoning drivers, and they need heat to open up. Stir them into the hot fat and beef before the liquids fully hit the pot so they bloom instead of tasting dusty.
Building the Chili Base Over the Fire
Brown the Beef First
Start with the ground beef in a hot Dutch oven and break it up as it cooks. You want browned edges and little caramelized bits on the bottom, not gray steam-cooked meat. If the pot is crowded, the beef will release liquid and simmer instead of browning, so keep the heat steady and give it a few undisturbed minutes between stirs.
Soften the Vegetables in the Fat
Once the beef is browned, add the onion and bell pepper and cook until the onion turns translucent and the pepper softens a little. This step pulls the sweet flavor out of the vegetables and lets them blend into the chili base. If the fire is running hot, lower the pot or move it to a cooler spot so the vegetables don’t scorch before they soften.
Let the Simmer Do the Work
After the beans, tomatoes, paste, and spices go in, bring the pot to a gentle simmer and cover it. The chili should burble lazily, not boil hard. That slower heat keeps the beans intact, gives the tomato paste time to thicken, and prevents the bottom from burning while the top still tastes thin.
Finish With Time, Not Extra Ingredients
Cook until the chili looks thick enough to mound on a spoon and the fat has risen slightly around the edges. Taste at the end and adjust salt and pepper only after the chili has reduced, because the seasoning concentrates as it cooks. If it still looks loose, leave the lid off for the last few minutes and let the steam escape.
How to Adjust Campfire Chili for Different Camps and Crowds
Make It Spicier for a Bigger Kick
Add crushed red pepper, cayenne, or a diced jalapeño with the onions and peppers. Building the heat early lets it cook into the chili instead of sitting on top, and it gives you a cleaner, warmer spice instead of a sharp burn.
Make It Gluten-Free Without Changing the Pot
The chili itself is naturally gluten-free as long as your chili powder blend is clean and your toppings are, too. Skip regular crackers and serve it with gluten-free crackers, corn chips, or just a spoon and extra cheese.
Swap in Ground Turkey for a Lighter Version
Ground turkey works well, but it needs a little help because it’s leaner and milder than beef. Add a tablespoon of oil at the start and expect a slightly lighter, less rich chili that still holds up nicely once the spices and tomato paste cook down.
Stretch It for a Crowd
Add another can of beans or a second pound of beef if you need to feed more people, but keep the spices scaled up too or the flavor will flatten out. If the pot gets too full, simmer a little longer with the lid cracked so it can reduce instead of turning thin.
Storage and Reheating
- Refrigerator: Store in an airtight container for up to 4 days. It thickens as it sits, which is exactly what you want.
- Freezer: Freezes well for up to 3 months. Cool it completely first and leave a little headspace in the container because chili expands as it freezes.
- Reheating: Warm it gently on the stove over medium-low heat, stirring often and adding a splash of water if needed. Don’t blast it on high heat or the bottom can scorch before the center is hot.
Answers to the Questions Worth Asking

Campfire Chili
Ingredients
Equipment
Method
- Brown the ground beef in a Dutch oven over campfire heat until no longer pink, then add the diced onion and diced bell pepper and stir. Cook for 5 minutes, stirring occasionally, until the vegetables soften and the beef is well browned (visual cue: beef browns and onion turns translucent).
- Add the kidney beans, diced tomatoes, tomato paste, chili powder, cumin, salt, and pepper to the Dutch oven. Stir to combine and bring the mixture to a steady simmer over the campfire (visual cue: bubbles break the surface across the pot).
- Cover the Dutch oven and cook for 35-40 minutes, stirring occasionally to prevent sticking. Keep it at a gentle simmer throughout (visual cue: chili is bubbling under the lid and thickens slightly by the final minutes).
- Ladle the chili into bowls and serve hot. Top each portion with shredded cheese, sour cream, and crackers (visual cue: cheese melts slightly on top and toppings sit in distinct layers).