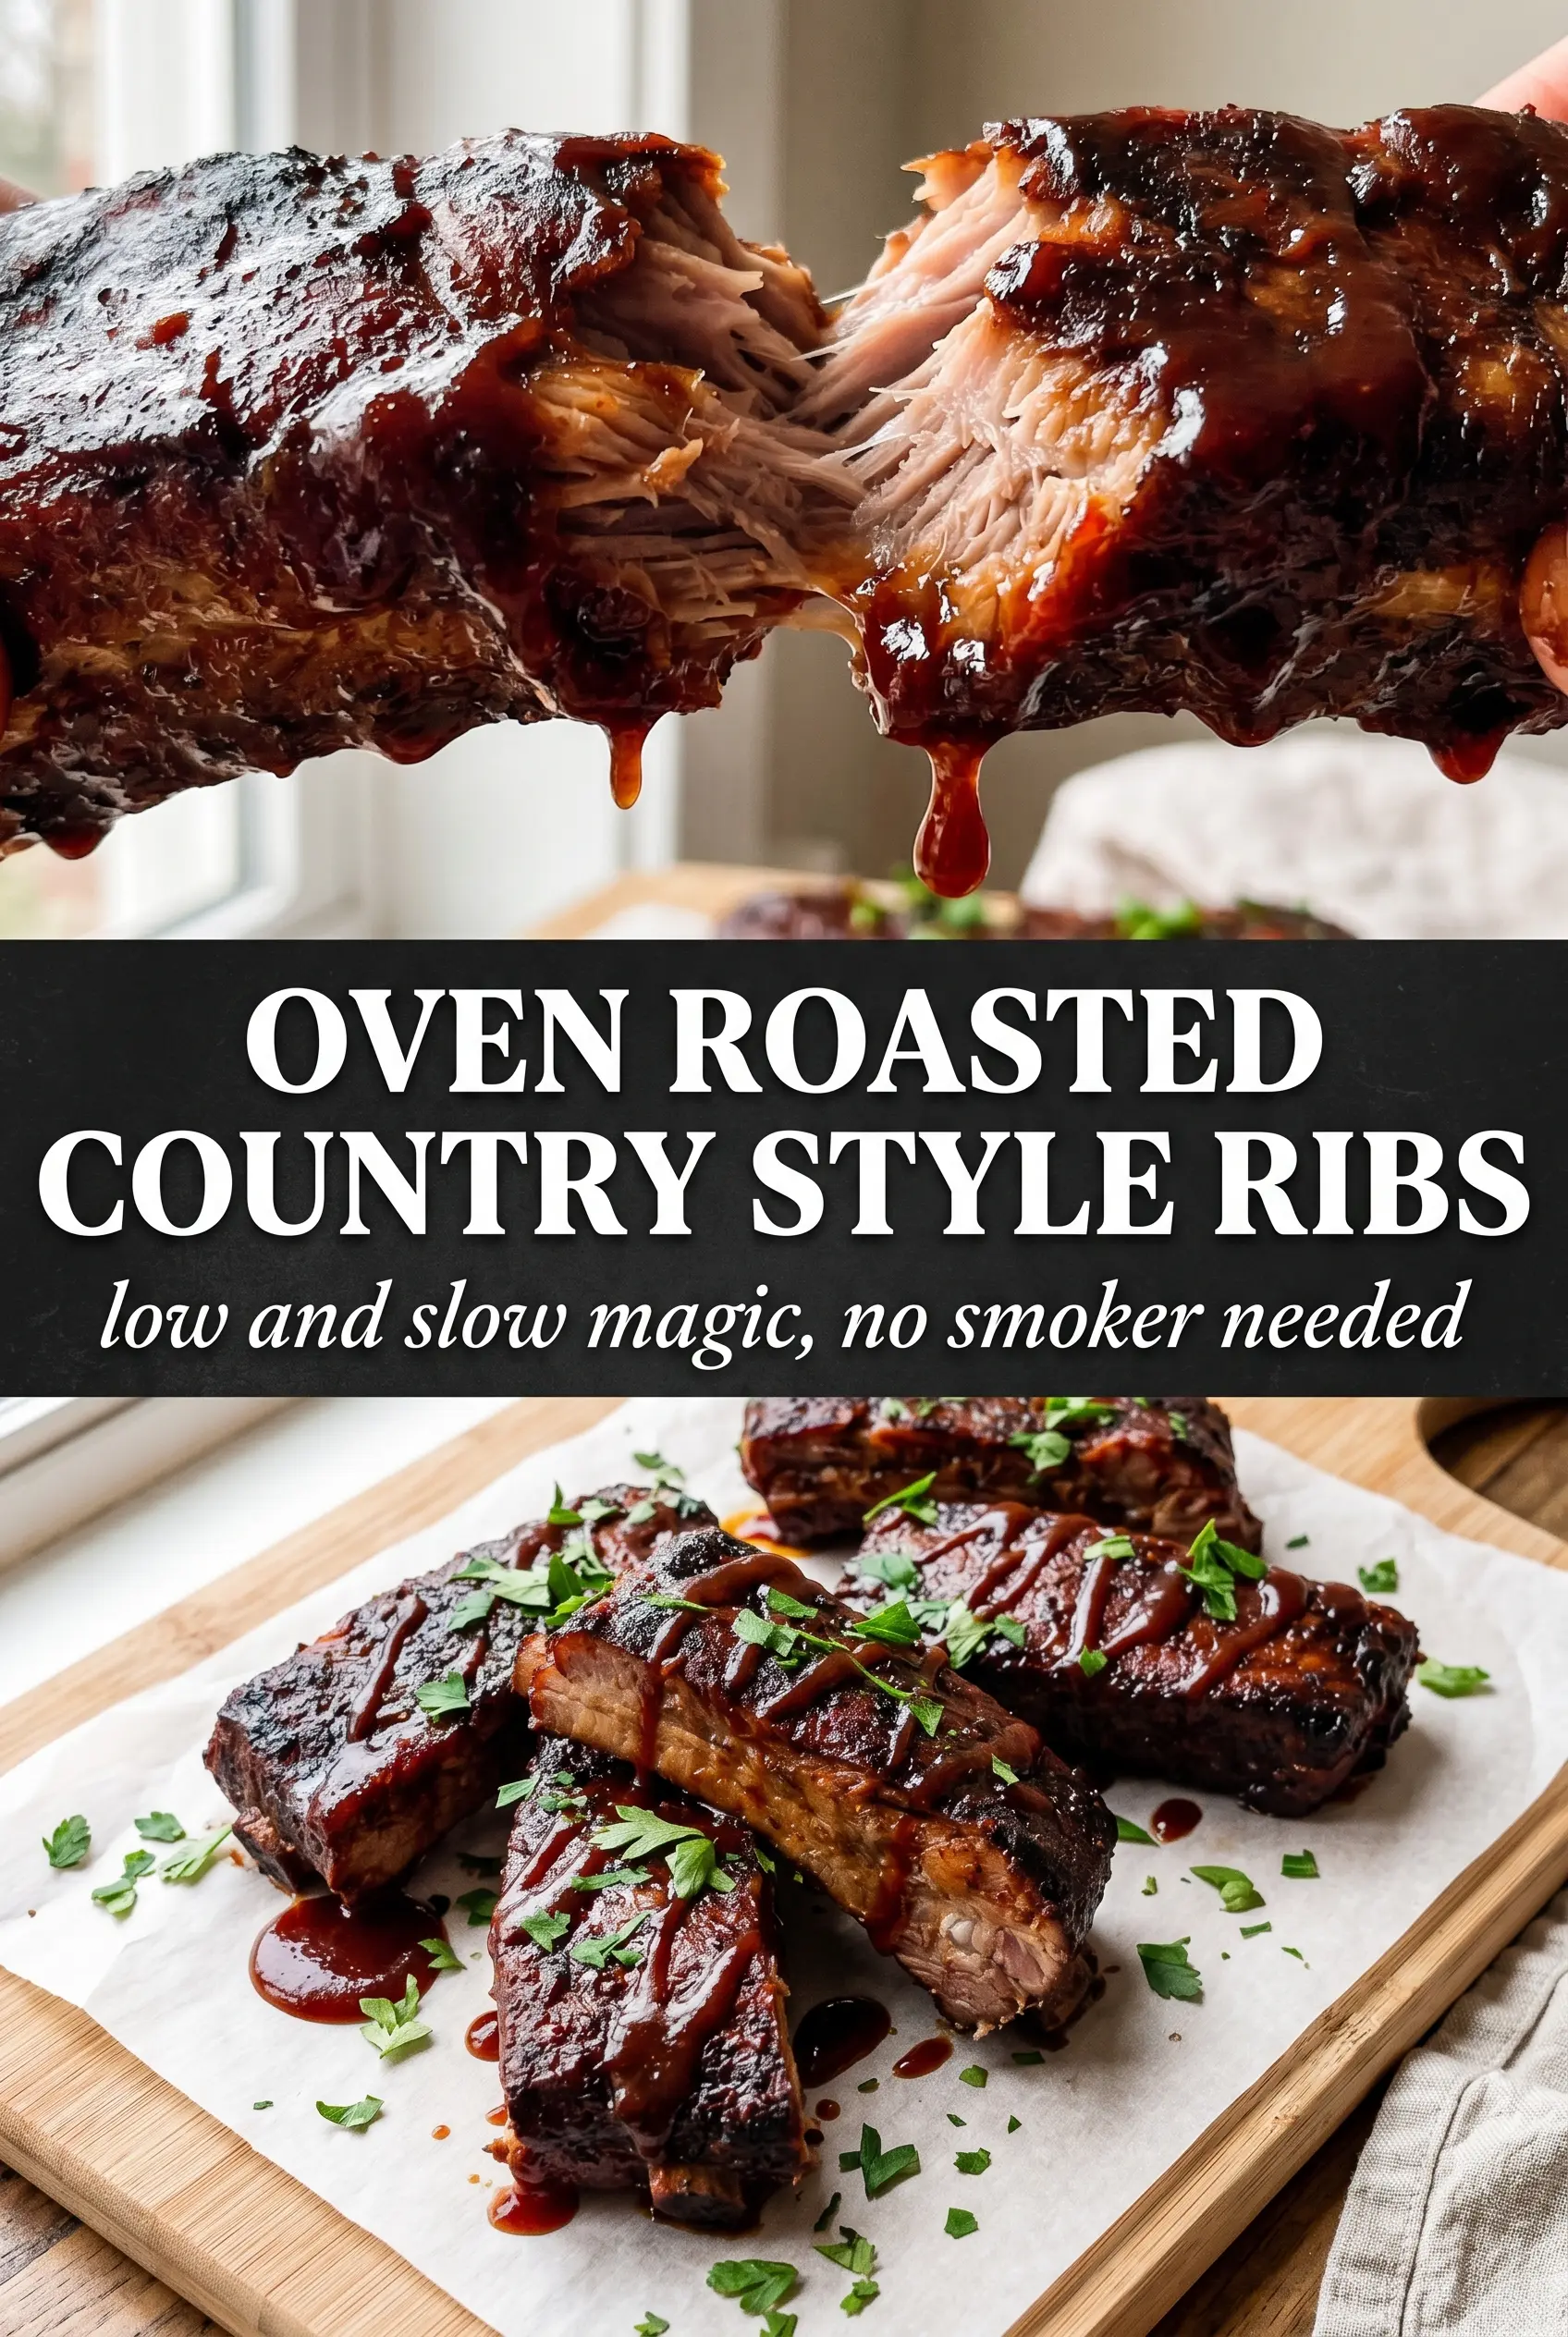
Tender country style ribs need time, not tricks. Low oven heat turns these thick pork pieces from firm and uneven into juicy shreds, and the final blast of BBQ sauce gives you that sticky edge everyone reaches for first. The best part is that the oven does most of the work while the rub slowly melts into the meat and the foil keeps everything steaming gently until the ribs are ready to fall apart.
What makes this version work is the two-stage finish. First, the ribs bake covered at a low temperature so the connective tissue softens without drying out the surface. Then the foil comes off, the oven goes hotter, and the sauce tightens into a caramelized glaze instead of burning on the pan. The dry rub pulls double duty here too: brown sugar helps browning, smoked paprika brings depth, and cumin gives the pork a little backbone that stands up to the BBQ sauce.
Below you’ll find the timing that keeps these ribs tender instead of chewy, plus a few easy swaps if your BBQ sauce runs sweet, smoky, or spicy. Once you’ve made them this way, it’s hard to go back to rushing the oven.
The ribs came out fall-apart tender and the BBQ sauce got sticky in the oven without burning. I used boneless country ribs and they shredded perfectly over mashed potatoes.
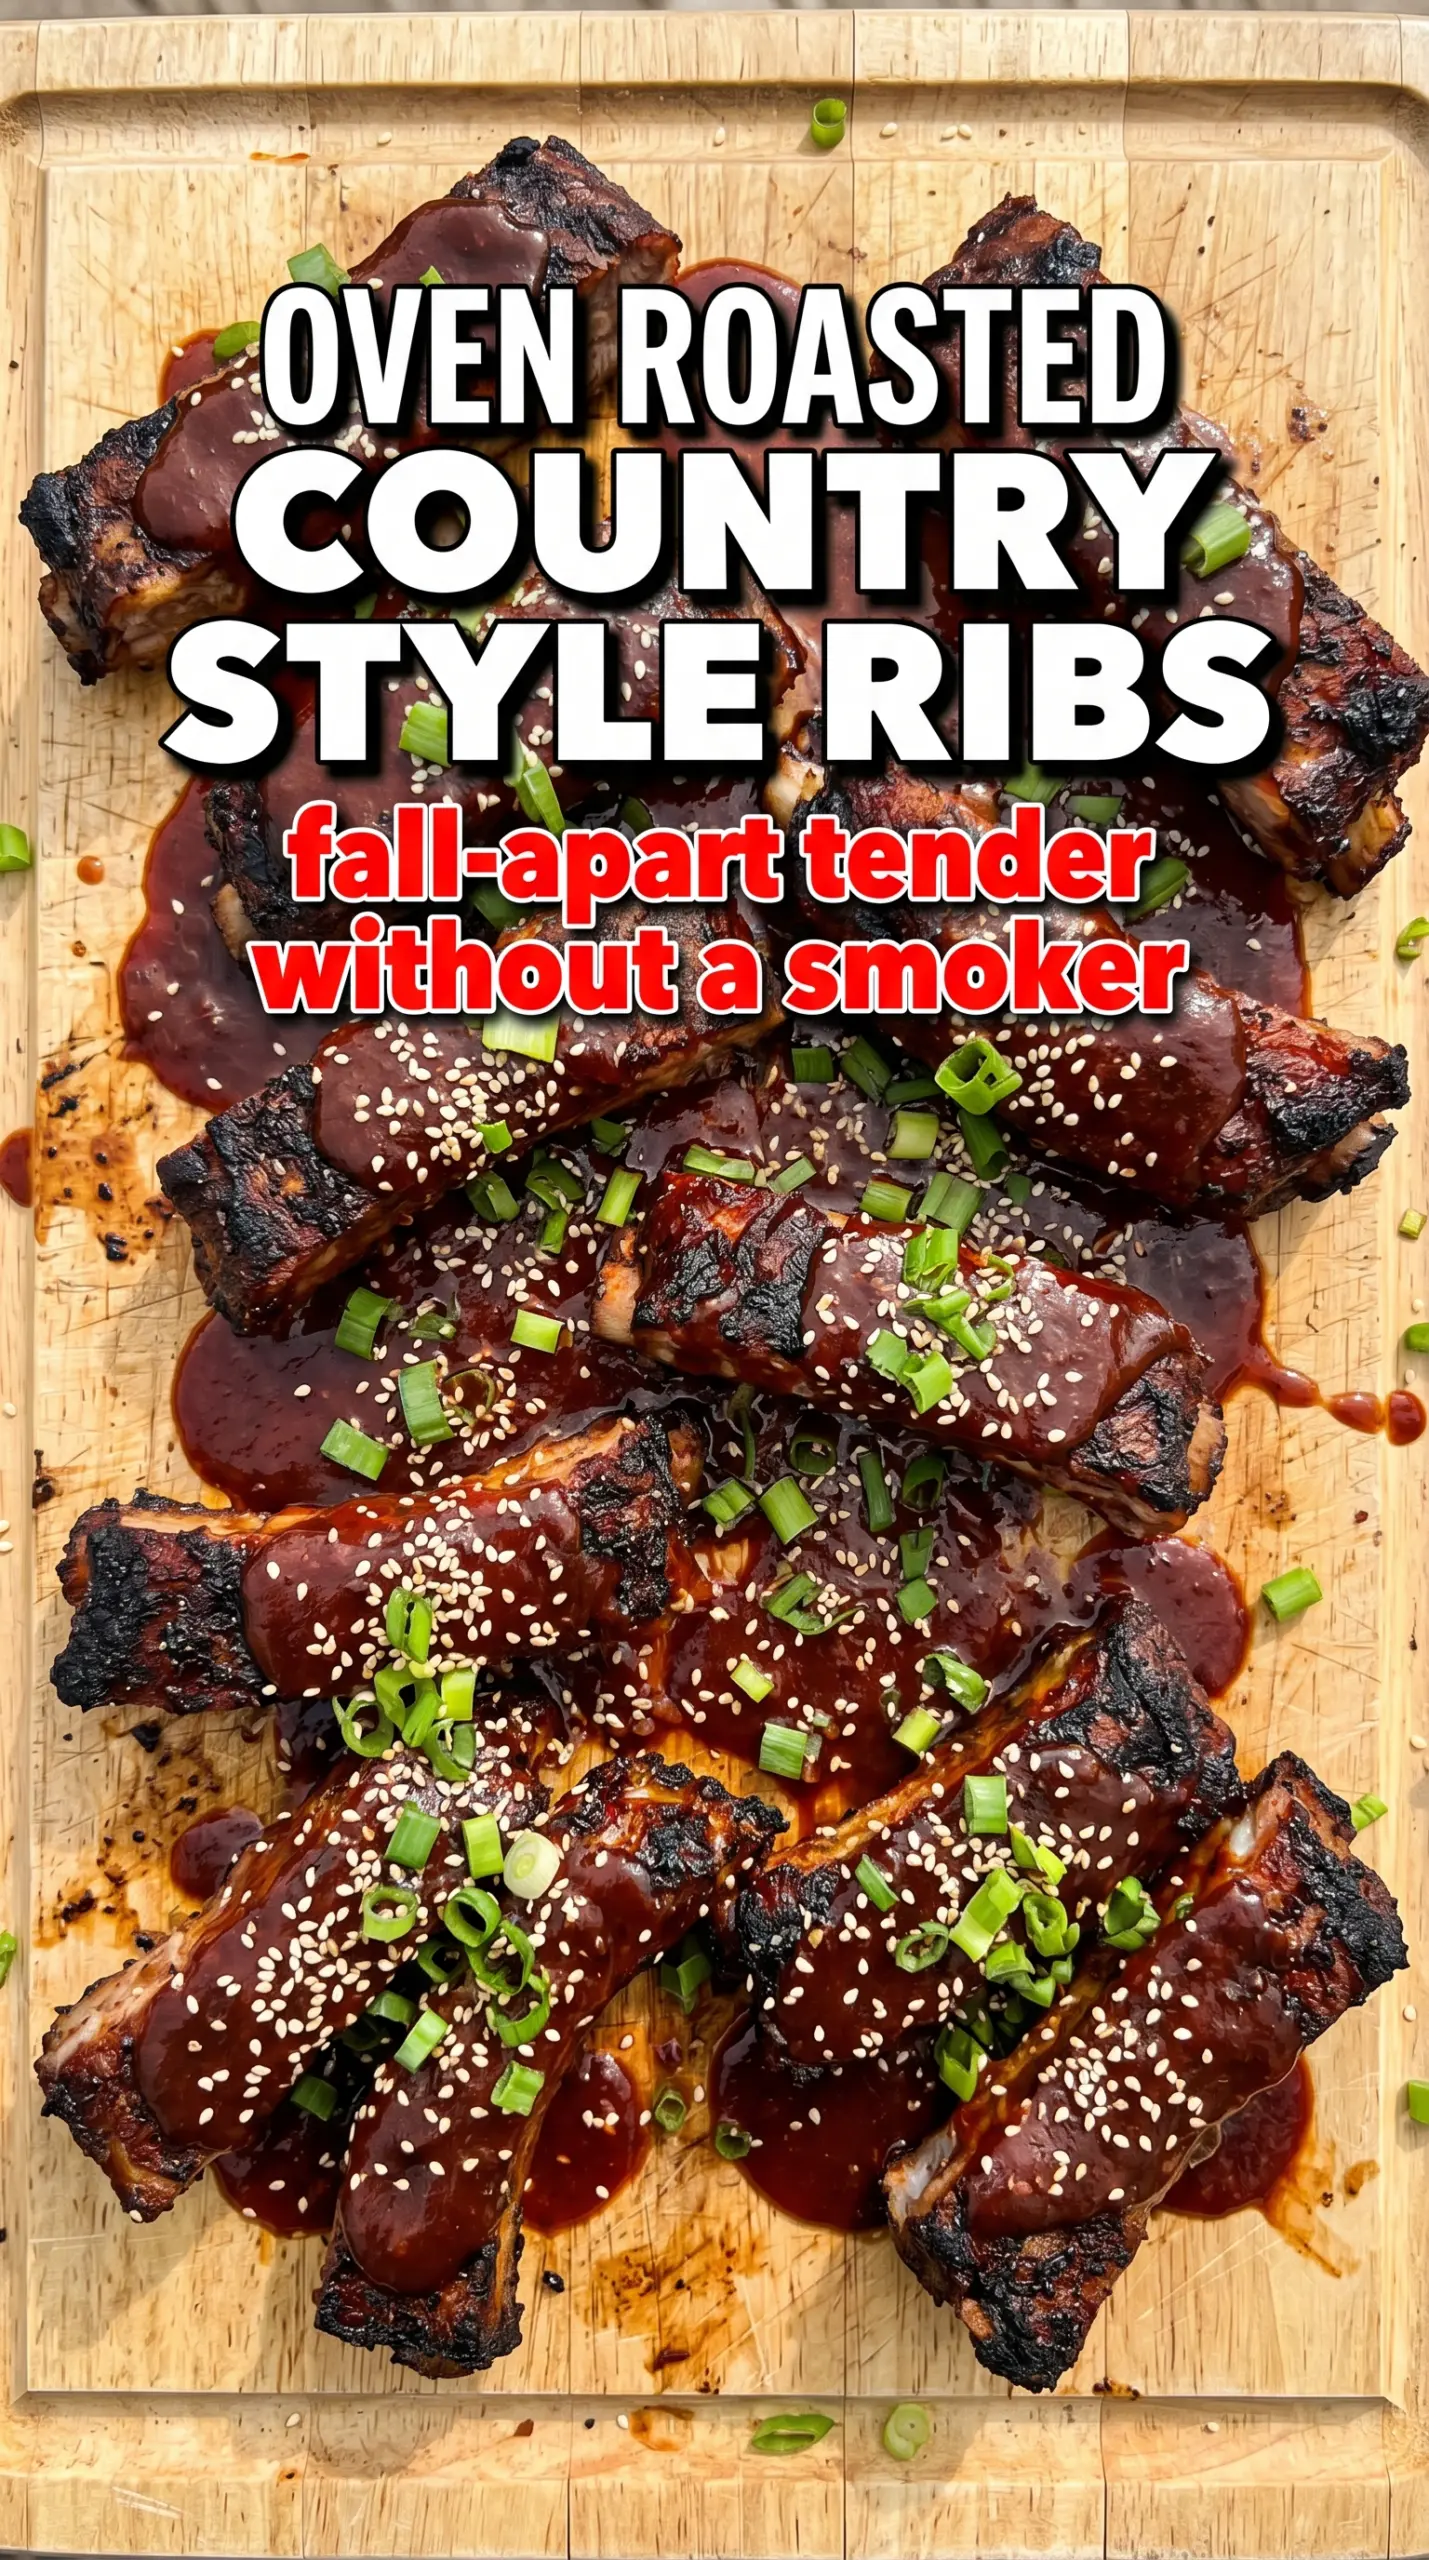
Tender oven roasted country style ribs with a sticky BBQ glaze and a caramelized dry rub crust are the kind of dinner worth pinning for later.
The Part That Keeps Country Style Ribs Juicy Instead of Chewy
Country style ribs are cut from the shoulder, not the rib rack, so they behave more like a braise than a quick grill job. That means the biggest mistake is treating them like fast-cooking pork and pulling them too early. If the meat still feels tight when you press it with tongs, it needs more time under the foil. The long covered bake gives the connective tissue a chance to soften, and that’s what turns a dense piece of pork into those juicy strands that pull apart with a fork.
The second place people go wrong is blasting the sauce on too early. BBQ sauce has sugar, and sugar burns before the meat is tender. Waiting until the ribs are already soft lets the sauce reduce into a glossy coating instead of turning bitter on the pan.
What Each Ingredient Is Actually Doing in This Dish
- Country style pork ribs — These need the low-and-slow treatment because they’re thick, meaty shoulder cuts. Bone-in ribs bring a little more flavor and stay a touch juicier, while boneless ribs are easier to serve and shred just as well if you cook them long enough.
- Brown sugar — This helps the dry rub form that lacquered crust under the foil and adds caramel notes when the ribs finish uncovered. Light or dark brown sugar both work; dark gives a deeper molasses edge.
- Smoked paprika — This carries the smoky note that makes the ribs taste like they spent time over fire even though they’re baked. Regular paprika won’t give you the same depth, so this is worth using if you have it.
- BBQ sauce — Use a sauce you’d actually eat on its own, because it becomes the finish. If your sauce is very sweet, the sugar in the rub is enough; if it’s tangy, the final glaze cuts nicely through the pork.
- Cayenne — This doesn’t make the ribs hot unless you go heavy. It keeps the rub from tasting flat and balances the sweet glaze at the end.
How to Get the Tender Rib Texture Before the Glaze Goes On
Coating the Ribs Well
Pat the ribs dry, then coat every side with the rub until the surface looks heavily seasoned. That thick layer matters because it builds flavor during the long bake and helps form the crust later. If the ribs look bare in spots, those pieces will taste flatter and brown unevenly. Press the seasoning on with your hands so it sticks before the foil goes on.
The Covered Bake
Set the ribs in a single layer and cover the dish tightly with foil so the moisture stays trapped. At 300°F, they should cook gently enough that the pork softens before the outside dries out. After about 2 hours, the meat should give easily when pierced with a fork and pull back from the edges a little. If it still feels firm, leave it covered longer; don’t rush this stage or the ribs will eat like roast pork instead of tender country ribs.
Glazing and Caramelizing
Once the ribs are tender, uncover them and brush on the BBQ sauce generously. Raise the oven to 400°F so the sauce thickens and bubbles at the edges without just sliding off the meat. Watch for a sticky sheen and a few darker spots on the surface, not blackened edges. That final bake is short, and the moment the glaze looks set and glossy, the ribs are ready.
How to Adapt These Country Style Ribs for Different Kitchens
Make Them Dairy-Free Without Changing the Texture
This recipe is already dairy-free as written, which makes it easy to serve with almost any side. Keep the same rub and sauce, and the result stays just as tender and sticky. If you serve them with mashed potatoes or slaw, use dairy-free versions on the side and the main dish still feels complete.
Use Boneless Ribs for Easier Shredding
Boneless country style ribs cook a little more evenly and shred fast for sandwiches or bowls. They can dry out if you stop at the first sign of tenderness, so use the fork test and keep going until they pull apart cleanly. The flavor stays the same, but the texture gets even softer.
Swap the BBQ Sauce to Match the Meal
A sweeter sauce gives you a sticky, glossy finish, while a tangier one cuts through the richness of the pork. If your sauce is very thick, thin it with a spoonful of water before brushing so it spreads in a thin layer and doesn’t clump. The glaze should coat the ribs, not sit on top in blobs.
Make Them Gluten-Free with the Right Sauce
The pork and rub are naturally gluten-free, but BBQ sauce can be the weak spot. Use a gluten-free sauce and check the label on the spices if you’re sensitive to cross-contact. You won’t lose any texture, and the final glaze still caramelizes the same way.
Storage and Reheating
- Refrigerator: Store leftovers in an airtight container for 3 to 4 days. The sauce thickens as it chills, and the meat stays juicy if it’s kept covered.
- Freezer: These freeze well for up to 2 months. Cool completely, wrap tightly, and freeze with a little extra sauce so the meat doesn’t dry out when reheated.
- Reheating: Reheat covered in a 300°F oven with a spoonful of sauce or a splash of water until hot through. The common mistake is using high heat, which dries the pork before the glaze loosens back up.
Answers to the Questions Worth Asking
Oven Roasted Country Style Ribs
Ingredients
Equipment
Method
- Preheat the oven to 300°F. Mix the dry rub ingredients, then coat the ribs generously on all sides so every surface is covered.
- Place the ribs in a single layer in a baking dish and cover tightly with foil. Bake for 2 hours at 300°F until the ribs are very tender.
- Uncover the ribs and brush generously with BBQ sauce. Increase the oven to 400°F and bake uncovered for 20–25 minutes, until the sauce is caramelized and sticky.
- Let the ribs rest briefly, then serve with extra BBQ sauce. The meat should pull into juicy shreds with a fall-apart texture.