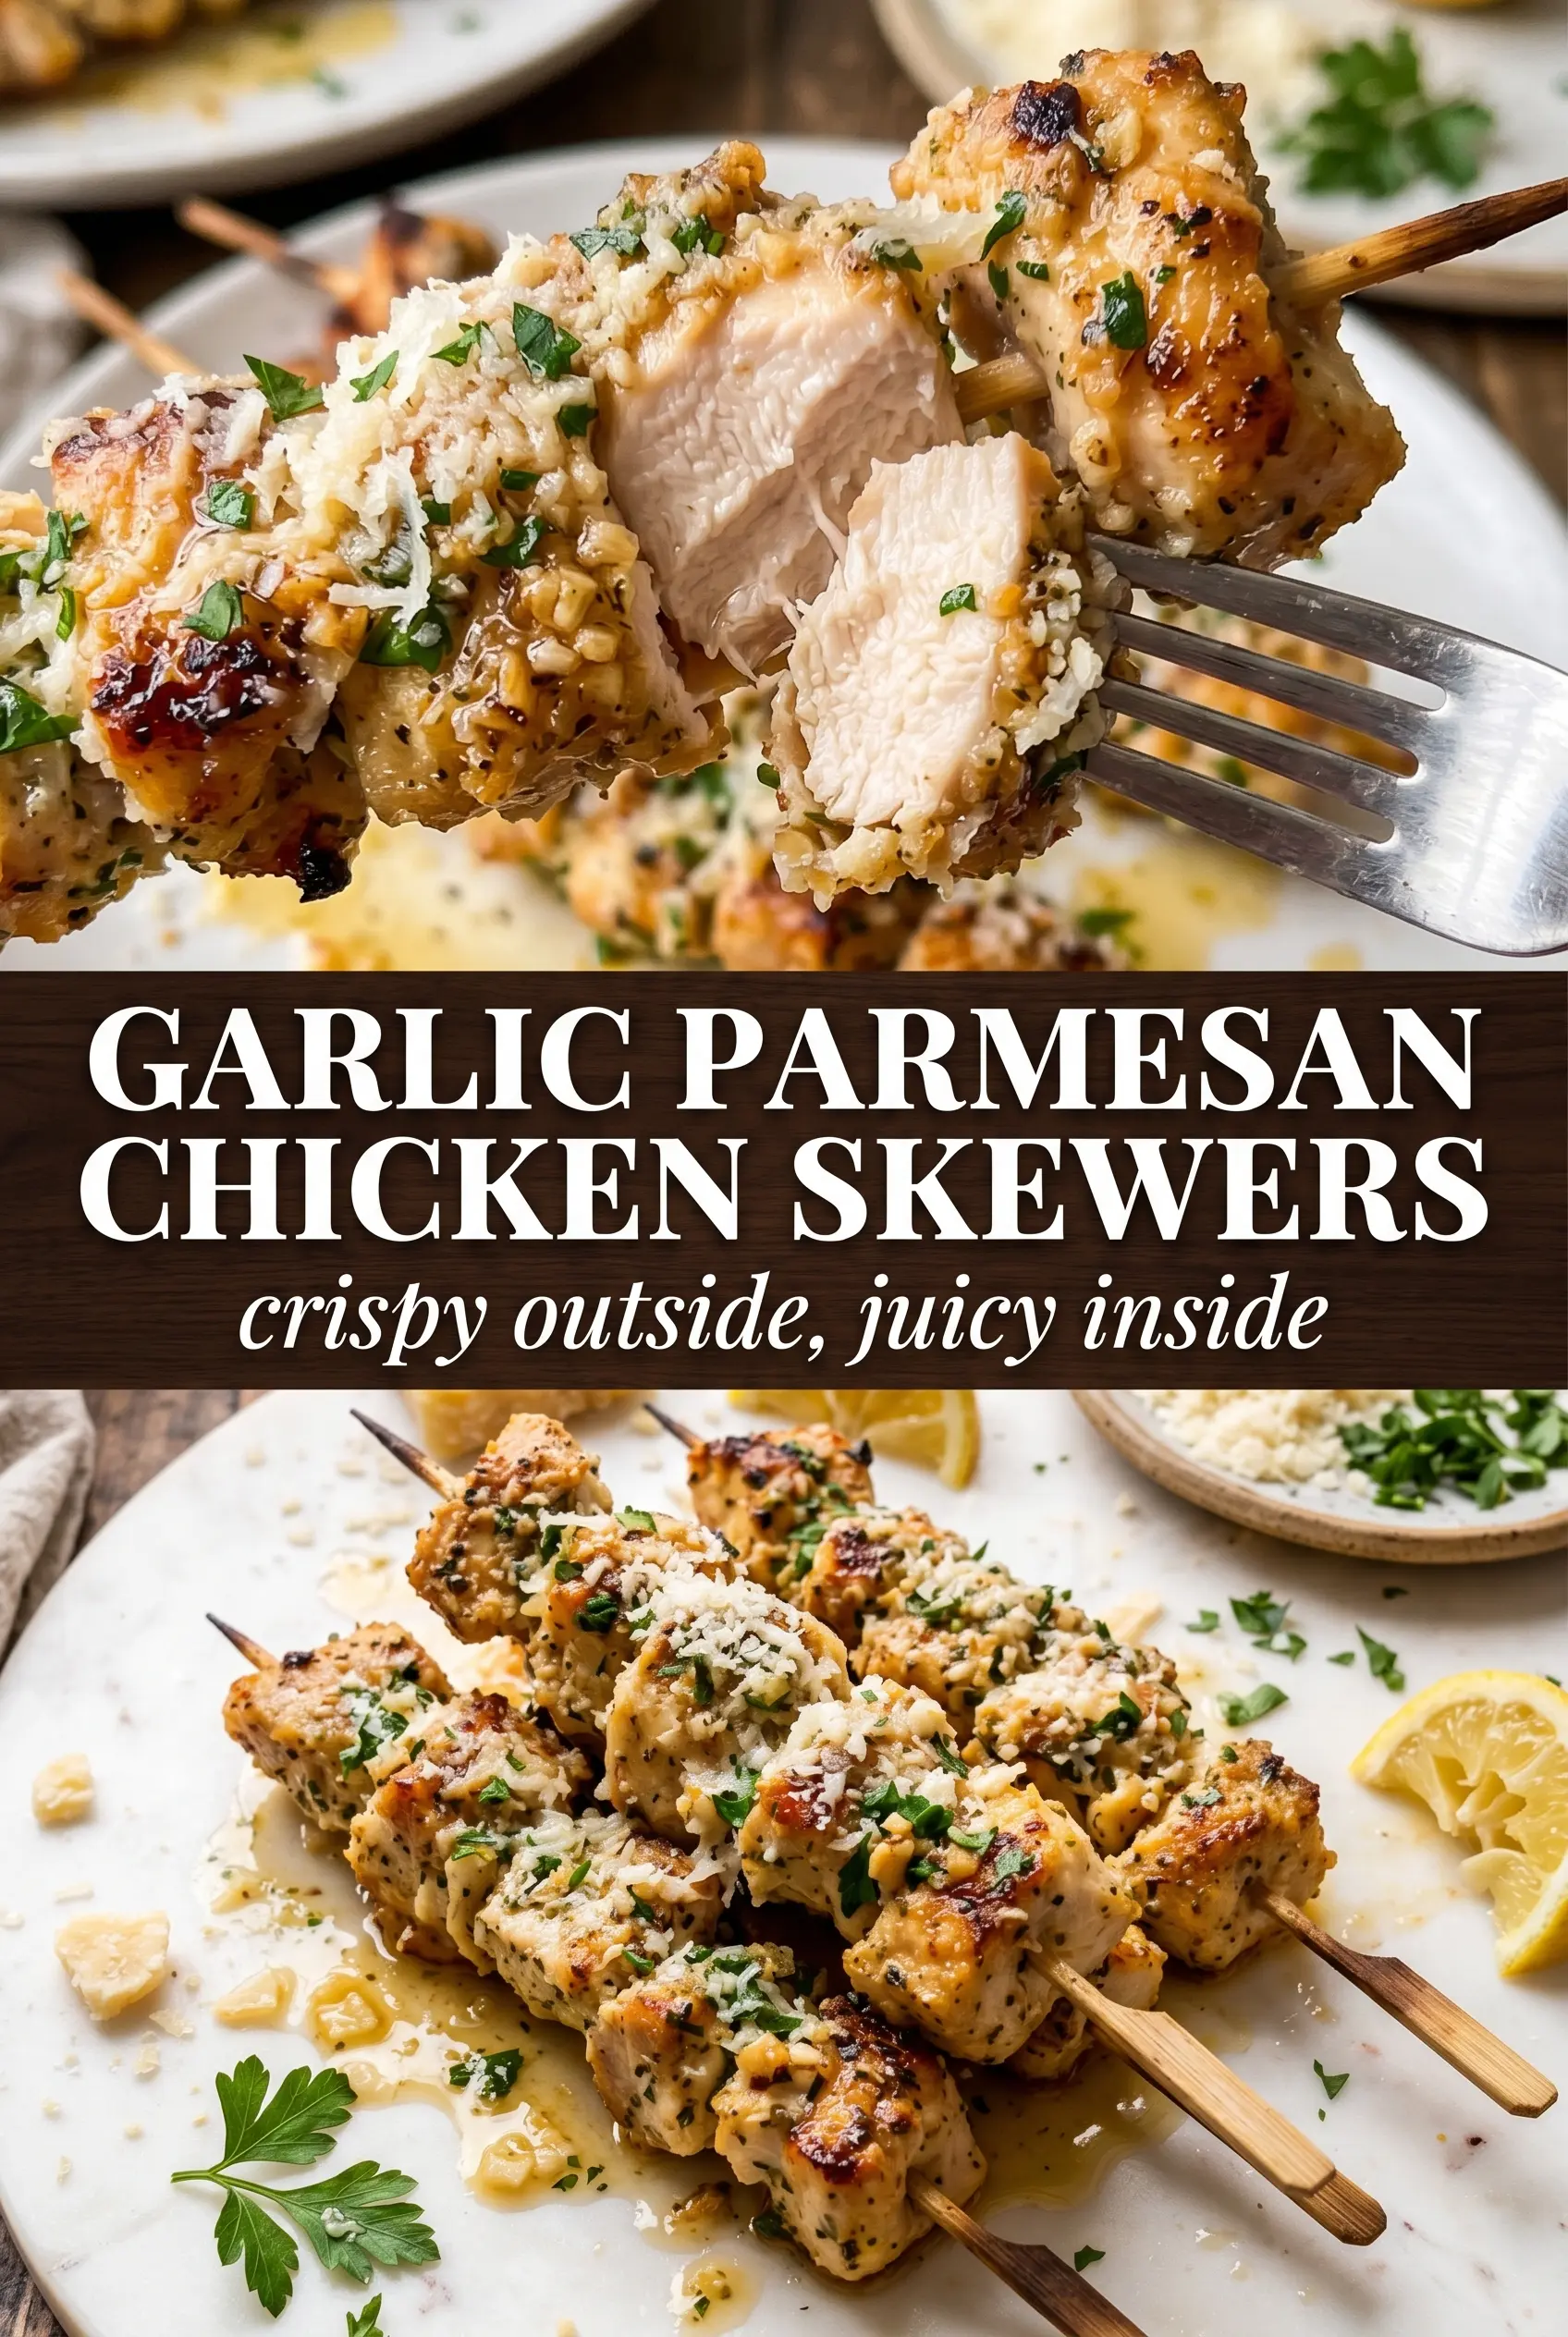
Garlic Parmesan Chicken Skewers come off the grill with charred edges, juicy centers, and a glossy coating of garlic butter that clings to every cube. The parmesan doesn’t just sit on top here; it melts into the hot chicken and settles into the little ridges from the grill, so each bite tastes savory, buttery, and a little crisp at the edges. They disappear fast because they’re simple food done with enough care to taste like more than the sum of their parts.
The trick is in two places: the marinade and the finish. Olive oil carries the garlic and spices onto the chicken so the surface seasons evenly, and a short marinating time keeps the breast meat from drying out before it hits the heat. Then the garlic parmesan butter goes on right after grilling, while the chicken is still hot enough to soften the cheese and turn it into a thin, salty glaze instead of a dusty topping.
Below, you’ll find the details that matter most: how to keep the chicken juicy, how to get real grill marks without scorching the garlic, and what to swap if you’re cooking indoors or want a slightly different finish.
The marinade gave the chicken such a good garlicky flavor, and brushing on the parmesan butter right after grilling made it taste like restaurant chicken. I used a grill pan and the edges still got nicely charred without drying out.
These garlic parmesan chicken skewers are the kind that vanish before dinner is over — keep this one handy for grill nights when you want something fast, juicy, and full of garlicky butter.
The Difference Between Juicy Chicken and Dry Skewers Starts Before the Grill
Chicken breast dries out fast once it crosses from just-cooked into overcooked, so the goal here is even sizing and a hot, fast cook. Cutting the pieces into 1.5-inch cubes keeps them close in thickness, which means the outside can pick up char at the same time the center reaches doneness. If the cubes are uneven, the smaller ones turn stringy before the bigger ones are ready.
The other mistake is packing the skewers too tightly. Leave a little gap between each piece so heat can move around the chicken instead of steaming the sides where they touch. That space is what gives you those browned edges instead of pale, soft spots.
- Chicken breast — Breasts stay lean and take on the garlic parmesan finish cleanly. Thighs work too, but they cook a little longer and bring a richer, fattier result.
- Olive oil — This helps the seasoning stick and protects the surface on the grill. A neutral oil also works if that’s what you have.
- Fresh garlic — Minced garlic in the marinade and butter gives the dish its sharp, savory backbone. Garlic powder won’t give the same fresh bite, though you can use a little in a pinch if that’s all you’ve got.
- Parmesan cheese — Freshly grated parmesan melts better into the hot butter and clings to the chicken instead of turning dusty. The pre-grated shelf-stable kind won’t melt as smoothly.
- Italian seasoning and smoked paprika — The seasoning blend gives the chicken some herb depth, and paprika adds a little warmth and color. You don’t need much, but you do want both so the chicken tastes seasoned all the way through, not just garlicky on the outside.
What Each Ingredient Is Actually Doing in This Chicken Dish

- Chicken (pat dry for browning) — Room temperature cooks more evenly. Even thickness ensures uniform cooking.
- Oil or butter (the browning medium) — High-heat oil essential. Creates pan flavor through browning.
- Seasonings (salt, pepper, spices) — Apply generously. Chicken carries the entire flavor profile.
- Aromatics (garlic, ginger, or herbs) — Cook with fat to bloom flavors. Become the foundation.
- Sauce or braising liquid (if using) — This keeps chicken moist. Balance richness with acid.
- Vegetables (if using) — Layer by cooking time. Hard vegetables first, soft vegetables last.
- Acid (vinegar, wine, lime, or pineapple) — This brightens and prevents one-dimensional flavor.
- Proper doneness (165°F internal temperature) — Use thermometer for accuracy. Overcooked is dry and flavorless.
Getting the Grill Marks Without Burning the Garlic
Building the Marinade
Mix the olive oil, garlic, Italian seasoning, paprika, salt, and pepper before adding the chicken so the seasoning disperses evenly instead of clumping in one spot. Toss until every cube looks lightly coated and glossy. Thirty minutes is enough to season the surface without turning the texture soft. If you leave it much longer than that, the garlic can start to dominate and the breast meat can lose its clean bite.
Threading the Skewers
Slide the chicken onto the skewers with a small gap between each piece. That little bit of space matters because tightly packed chicken steams where the pieces touch, and steamed chicken never picks up the same char. If you’re using wooden skewers, soak them long enough that the exposed ends don’t scorch over the heat.
Grilling to a Clean Char
Preheat the grill or grill pan until it’s properly hot before the chicken goes on. You should hear a steady sizzle the moment the skewers hit the surface, not a timid hiss. Cook for 5 to 6 minutes per side, turning only when the first side releases and shows deep grill marks. If the chicken sticks, it’s not ready to flip yet.
Finishing With the Garlic Parmesan Butter
Stir the melted butter with garlic, parmesan, and parsley, then brush it onto the skewers as soon as they come off the heat. The chicken needs to be hot enough to soften the cheese into the butter so it spreads in a thin coating. If you wait until the skewers cool, the parmesan sets up in little clumps instead of glazing the meat.
Make it with chicken thighs instead of breasts
Chicken thighs stay juicier and forgive a little more time on the grill, which makes them a smart swap if you’re nervous about drying out breast meat. Cut them into the same size cubes and expect a slightly richer, more savory result.
Dairy-free version that still tastes finished
Use a plant-based butter and skip the parmesan, then finish with extra parsley and a pinch of garlic salt if needed. You won’t get the same salty cheese crust, but you’ll still have glossy, garlicky skewers with good browning and a clean finish.
Oven or grill pan cooking
A grill pan gives you the best indoor char, but a hot broiler works too. Put the skewers on a rack over a sheet pan and broil close to the heat for a fast finish, watching carefully because the parmesan butter goes from golden to browned fast under the broiler.
Storage and Reheating
- Refrigerator: Store leftovers in an airtight container for up to 3 days. The parmesan butter will settle as it chills, but the chicken stays usable.
- Freezer: Freeze cooked chicken off the skewers for up to 2 months. The texture softens a bit after thawing, so this is better for bowls or wraps than for serving straight on skewers.
- Reheating: Reheat gently in a 325°F oven or in a covered skillet over low heat with a splash of water or a little butter. High heat dries the breast meat out fast and can make the cheese topping turn greasy.
Answers to the Questions Worth Asking
Garlic Parmesan Chicken Skewers
Ingredients
Equipment
Method
- Combine olive oil, minced garlic, Italian seasoning, smoked paprika, and salt and black pepper to taste in a bowl, then add the chicken cubes and toss until evenly coated. Cover and marinate for at least 30 minutes in the refrigerator.
- Thread the marinated chicken onto skewers, leaving a small gap between each piece so they char without steaming. Preheat the grill or grill pan to medium-high while you skewer.
- Grill the skewers for 5–6 minutes per side until the chicken is cooked through and charred at the edges, flipping once when the first side develops grill marks. Keep the grill surface at medium-high during cooking.
- Mix melted butter with minced garlic, parmesan cheese, and fresh parsley to make the finishing sauce. Right after removing the skewers from the grill, brush them generously with the garlic parmesan butter so it clings and melts into a light parmesan glaze.
- Serve immediately with extra parmesan cheese and fresh parsley on top for a fresh, aromatic finish.