
This artisan sourdough bread is crispy on the outside and soft on the inside. It’s made from simple ingredients like flour, water, and salt, and has a lovely tangy flavor!
The best part? You get to knead and shape it, which is oddly satisfying. I always keep some on hand for sandwiches or just to enjoy with butter. Yum! 🥖
Key Ingredients & Substitutions
Bread Flour: This is essential for a good structure and chewy texture. While unbleached is preferred, you can substitute with all-purpose flour if you don’t have bread flour, but it may result in a slightly softer loaf.
Sourdough Starter: Make sure to use an active and bubbly starter for the best rise. If you don’t have sourdough starter, you could use store-bought yeast (about 1.5 tsp) but the flavor will differ from sourdough.
Sea Salt: This enhances flavor without being overpowering. If you only have table salt, reduce the amount slightly, as it’s finer and saltier than sea salt.
Water: Use lukewarm water to help activate the starter. If your kitchen is chilly, warm it just a bit but avoid hot water which can kill the yeast.
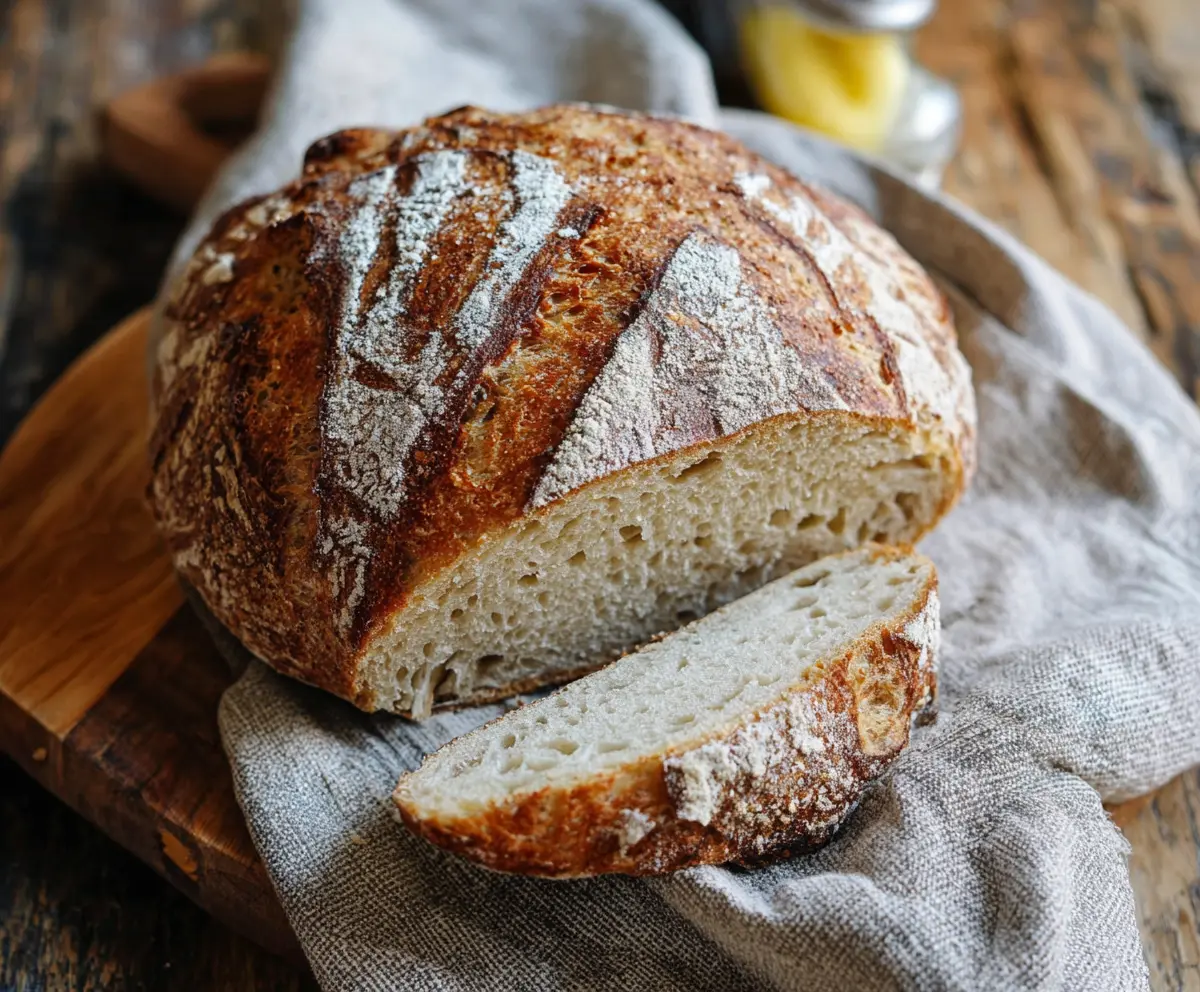
How Do You Achieve Those Perfect Bubbles in Your Bread?
The key to getting those nice air bubbles in artisan sourdough lies in the fermentation process. Here’s a simple breakdown:
- Allow the dough to rest after mixing (autolyse) to hydrate the flour. This helps gluten development.
- The stretch and fold technique helps to build structure over time without intensive kneading. Do this every 30 minutes for 2 hours.
- Don’t rush the fermentation stage! Let the dough rise until it has almost doubled and is nice and bubbly for the best texture.
Remember to be gentle when shaping to preserve the air bubbles you’ve created. Happy baking!
Artisan Sourdough Bread
Ingredients You’ll Need:
- 500g bread flour (preferably unbleached)
- 350g water (lukewarm)
- 100g active sourdough starter (fed and bubbly)
- 10g sea salt
- Additional flour for dusting
How Much Time Will You Need?
This artisan sourdough bread will take about 30 minutes of active prep time, plus 4 to 6 hours for fermentation, and overnight in the fridge. Baking takes around 40 to 45 minutes, so plan for a total of about 12-24 hours, including resting and chilling times, but most of it is hands-off!
Step-by-Step Instructions:
1. Mix the Ingredients:
In a large mixing bowl, combine the bread flour and lukewarm water. Mix everything together until there are no dry spots of flour left. It should look a bit shaggy. Cover the bowl with a towel and let it rest for 1 hour. This resting period is called autolyse and helps the flour absorb the water and start the gluten development.
2. Combine with Starter and Salt:
After the hour is up, add the active sourdough starter and sea salt to your dough. Mix it well by folding the dough back onto itself using your hands or a dough scraper until fully incorporated. It will become easier to handle after this step.
3. Stretch and Fold:
Now comes the fun part! For the next 2 hours, every 30 minutes, stretch one side of the dough, lift it up, and fold it over itself. Rotate the bowl and repeat this process until you’ve folded all four sides. This builds strength and creates air pockets inside the dough.
4. Fermentation Time:
After you’ve finished the stretch and fold, cover the dough again and let it ferment at room temperature for about 4 to 6 hours. You’ll know it’s ready when it roughly doubles in size and has lots of tiny bubbles on the surface.
5. Shape the Dough:
Transfer the dough to a floured surface. Gently press it down to release some air, then fold the edges towards the center to shape it into a round loaf. Flip it seam side down and pull it towards you a bit to create surface tension which will help it rise nicely.
6. Final Proof:
Place the shaped dough into a well-floured banneton basket or a bowl lined with a floured tea towel. Cover it and put it in the fridge overnight (8-12 hours). This “cold retard” helps develop amazing flavors in your sourdough.
7. Preheat the Oven:
The next day, about 30 minutes before baking, preheat your oven to 230°C (450°F) with a Dutch oven or heavy pot inside. This will ensure your pot is hot, which gives the bread a beautiful crust.
8. Score and Bake:
Once the oven is hot, carefully remove the Dutch oven. Place a piece of parchment paper on top of the dough and flip it out onto the paper. Use a sharp knife or a razor blade to score the top of the loaf. This allows it to expand while baking!
9. First Bake:
Carefully transfer the loaf with the parchment paper into the hot Dutch oven. Cover with the lid and bake for 20 minutes. This creates steam, which is essential for a good crust.
10. Brown the Crust:
After 20 minutes, remove the lid from the pot and continue baking for another 20 to 25 minutes until the crust is deep golden brown and crispy.
11. Cool and Enjoy:
Once baked, carefully take the bread out of the oven and let it cool completely on a wire rack. This helps maintain its airiness. After it cools, slice it up and enjoy your delicious artisan sourdough bread!
Happy baking! Enjoy the joy of homemade sourdough with your favorite toppings or on its own!
Can I Use All-Purpose Flour Instead of Bread Flour?
Yes, you can use all-purpose flour, but the texture may be slightly different. Bread flour has a higher protein content, which helps develop more gluten, resulting in a chewier texture. If using all-purpose, consider adding a bit more water as it absorbs less moisture.
How Do I Know When My Dough Has Fermented Enough?
Your dough is ready when it has roughly doubled in size, feels puffy, and has bubbles forming throughout. You can gently poke the dough with a finger; if it springs back slowly, it’s perfect for shaping.
Can I Leave My Dough to Proof Longer?
Yes, if you need a longer proof due to scheduling, you can refrigerate the dough after the initial rise (prior to shaping) for up to 24 hours. This slows down fermentation and allows for deeper flavor development.
What’s the Best Way to Store Leftover Sourdough Bread?
Store leftover sourdough bread in a paper bag at room temperature for up to 3 days to keep the crust crispy. For longer storage, wrap it tightly in plastic wrap and freeze for up to 3 months. Just remember to let it thaw at room temperature before enjoying!