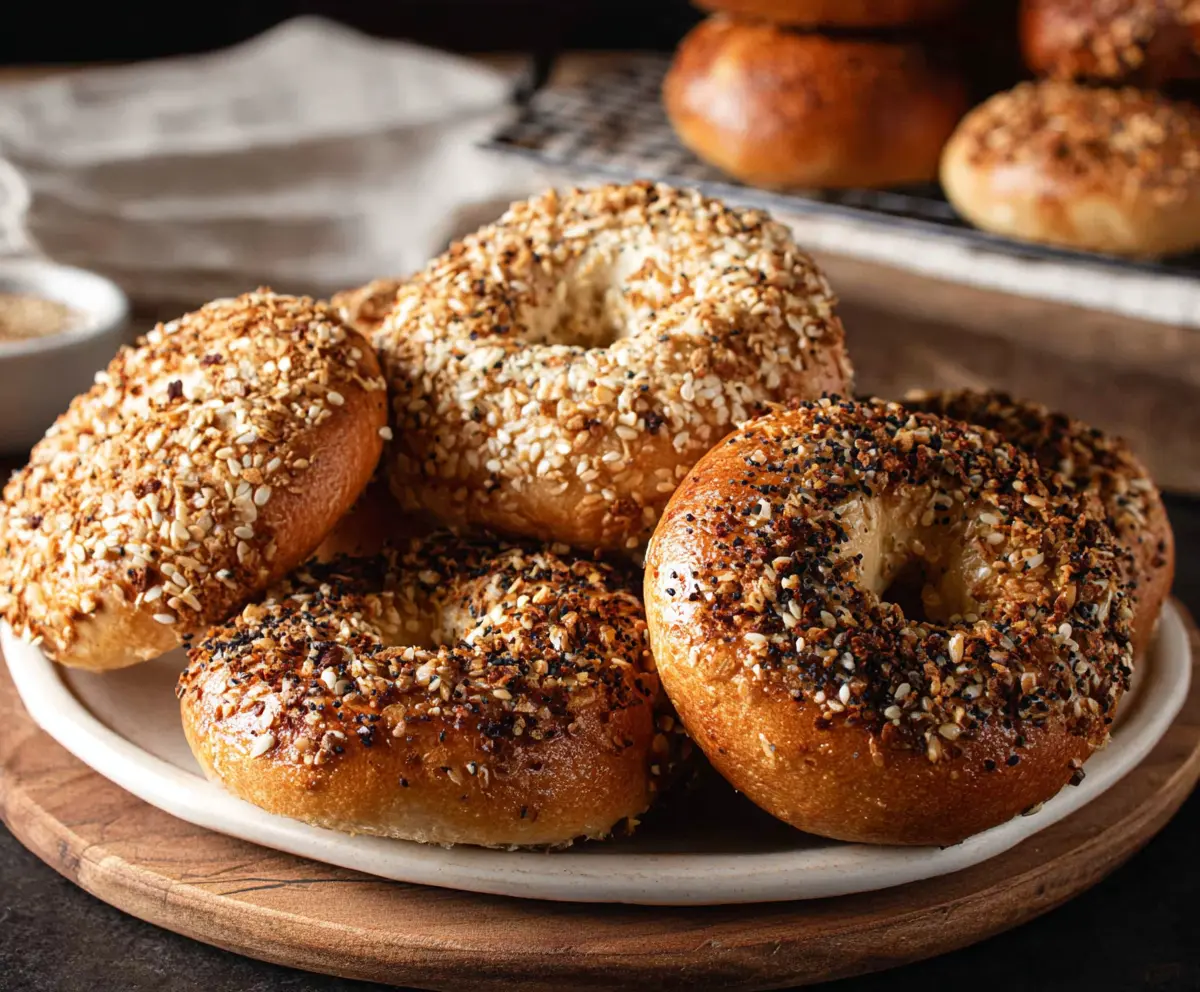
These authentic New York style bagels are chewy, golden, and so delicious! Boiled before baking, they get that perfect crust while staying soft inside. Great for breakfast or a snack!
I love how easy they are to customize! Top them with cream cheese, lox, or just some butter. Trust me, once you try these, store-bought bagels just won’t cut it anymore! 🥯
Ingredients & Substitutions
Bread Flour: High-gluten bread flour is ideal for that chewy texture. If you can’t find it, you can use all-purpose flour, but your bagels might be slightly less chewy. I always prefer the stretchiness of bread flour for the best results.
Barley Malt Syrup: This gives bagels their unique flavor and color. If you don’t have it, honey is a good substitute. I sometimes use molasses for a richer taste. Just remember, it will alter the sweetness slightly.
Vegetable Oil: Adding oil can make the dough softer and easier to work with. However, it’s optional. I often skip it if I’m aiming for more traditional, flavorful bagels.
Toppings: Feel free to mix and match! I love using everything bagel seasoning for a burst of flavor. If you’re watching sodium, you can use less coarse salt or skip it altogether.
How Do I Make the Perfect Chewy Crust?
Creating that chewy crust is all about the boiling step! Boiling bagels before baking is what sets them apart from regular bread. Make sure to maintain a gentle boil; this ensures the bagels puff up nicely. Here’s how to do it:
- Start with a large pot of water boiling and add baking soda – this will help with the crust’s color and texture.
- Reduce heat for a gentle boil. Too much bubbling can be messy.
- Boil each bagel for 1 minute on each side. This step is crucial, so don’t rush it!
- Let them drain well on a towel before adding your toppings.

How to Make Authentic New York Style Bagels
Ingredients You’ll Need:
For the Dough:
- 4 cups bread flour (high-gluten flour preferred)
- 1 tablespoon granulated sugar
- 1 ½ teaspoons salt
- 1 packet (2 ¼ teaspoons) active dry yeast
- 1 ¼ cups warm water (110°F / 45°C)
- 1 tablespoon barley malt syrup (or honey as substitute)
- 2 tablespoons vegetable oil (optional, for dough softness)
For Boiling:
- Water for boiling
- 1 tablespoon baking soda (for boiling water)
For Toppings:
- sesame seeds
- poppy seeds
- coarse salt
- dried onion flakes
- garlic flakes
- everything bagel seasoning
How Much Time Will You Need?
This bagel recipe takes about 20 minutes of prep time, 1 hour to 1 ½ hours for the first rise, about 20 minutes for shaping and second rise, and then 20–25 minutes for baking. So, you’re looking at around 2 to 2 ½ hours in total—most of which is just waiting for the dough to rise. Don’t worry, it’ll be worth it!
Step-by-Step Instructions:
1. Activate the Yeast:
Start by getting your yeast going! In a small bowl, mix the warm water, sugar, and yeast. Let it sit for about 5 to 10 minutes until it’s foamy. This means your yeast is alive and ready to work its magic in your dough!
2. Make the Dough:
In a large mixing bowl, combine your bread flour and salt. Then add the foamy yeast mixture, barley malt syrup, and vegetable oil (if you’re using it). Mix everything together until a rough dough forms. Don’t worry about it being perfect; it will come together as you knead.
3. Knead the Dough:
Turn the dough out onto a floured surface and knead it for about 10 minutes until it’s smooth and elastic. If you have a stand mixer, you can use the dough hook on medium speed for about 8 minutes instead. Your dough should feel soft yet firm—just right!
4. First Rise:
Put the dough into a lightly oiled bowl and cover it with a damp cloth or plastic wrap. Place it in a warm area and let it rise for 1 to 1 ½ hours until it doubles in size. This is the time to relax or prep your toppings!
5. Shape the Bagels:
Once risen, punch down the dough to release the air. Divide it into 8 equal pieces. Take each piece and roll it into a ball. Use your finger to poke a hole through the center of each ball and gently stretch to create a ring that’s about 2 to 3 inches in diameter. You want them to look like bagels!
6. Second Rise:
Lay the shaped bagels on a parchment-lined baking sheet. Cover them with a towel and let them rest for about 20 minutes. This helps them puff up a little more before boiling.
7. Preheat the Oven:
Set your oven to preheat at 425°F (220°C) and line another baking sheet with parchment paper so you’re ready to bake.
8. Boil the Bagels:
Get a large pot of water boiling and stir in the baking soda. This step gives bagels their chewy crust! Lower the heat to a gentle boil. Carefully add the bagels in batches and boil each for about 1 minute on each side, totaling about 2 minutes. Use a slotted spoon to remove them and let them drain on a towel.
9. Add Toppings:
While your bagels are still wet from boiling, now is the time to add toppings! Dip or sprinkle your favorites on top. Be generous—they will stick beautifully!
10. Bake the Bagels:
Transfer the bagels to your prepared baking sheet and pop them in the oven. Bake for about 20 to 25 minutes, or until they are golden brown and shiny. Your kitchen will smell amazing by this point!
11. Cool and Serve:
Once baked, remove them from the oven and let them cool on a wire rack for at least 15 minutes before slicing or serving. Enjoy these classic, chewy, and flavorful New York-style bagels fresh from your oven!
Can I Use All-Purpose Flour Instead of Bread Flour?
Yes, you can use all-purpose flour, but for the best chewy texture that New York-style bagels are known for, high-gluten bread flour is preferred. If you try all-purpose flour, just keep in mind the texture may be slightly different.
What If My Yeast Doesn’t Foam?
If your yeast doesn’t foam after 5-10 minutes, it may be dead. Make sure your water is no hotter than 110°F (45°C) as too hot water can kill the yeast. You might need to start over with fresh yeast to ensure your bagels rise properly.
How Should I Store Leftover Bagels?
Store any leftover bagels in an airtight container at room temperature for up to 2 days. If you want to keep them longer, freeze them! Just slice them first, then wrap in plastic and foil, and they’ll last up to 3 months. Thaw or toast them for a fresh taste.
Can I Add Other Flavorings to the Dough?
Absolutely! You can add ingredients like minced garlic, cheese, or herbs to the dough for added flavor. Just be cautious not to overload it, as too many extras might affect the dough’s structure!