
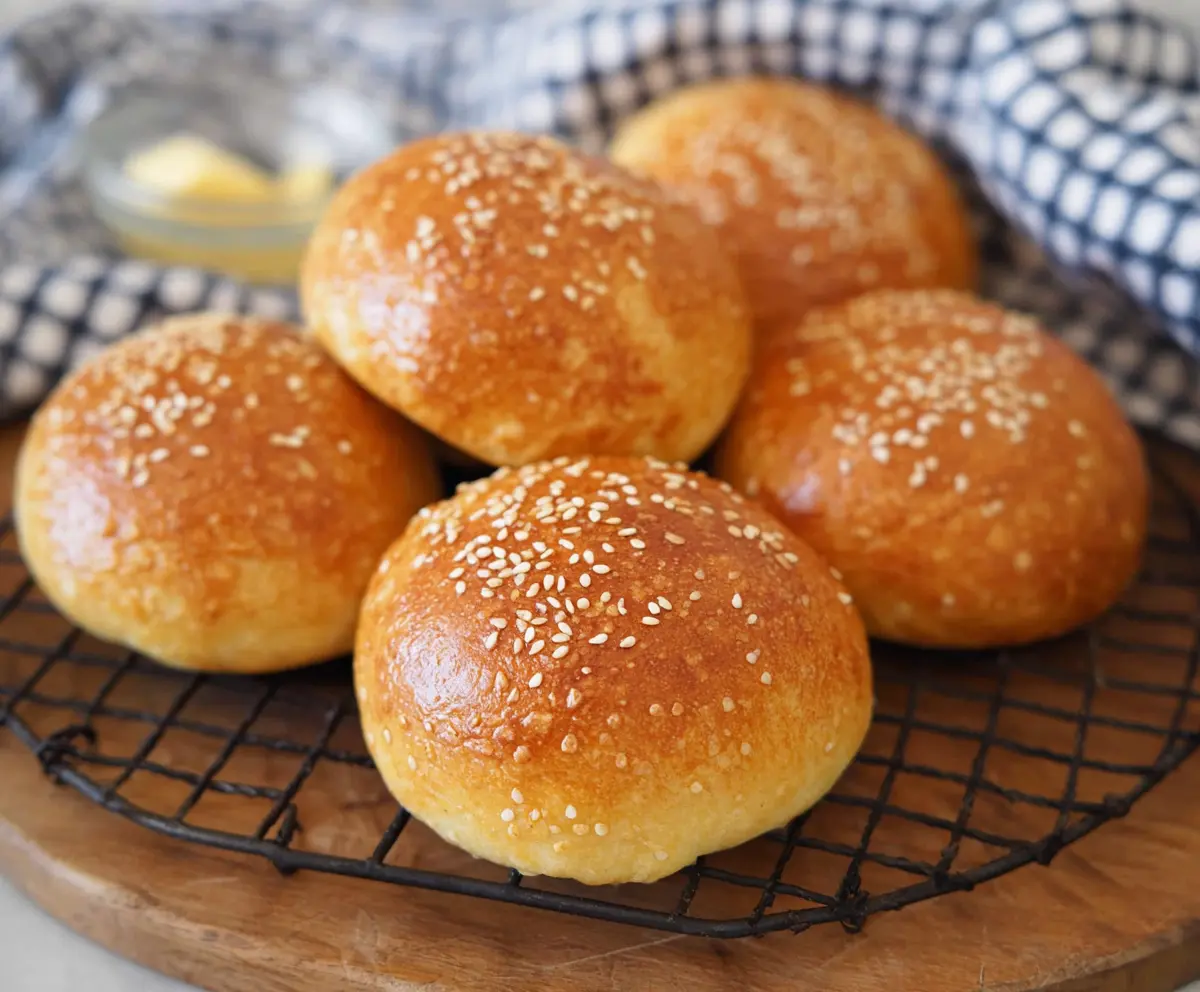
These soft and fluffy cottage cheese buns are a treat for any meal! They are easy to make and perfect for breakfast, sandwiches, or just a snack.
Honestly, I love how cheesy and comforting they taste. Plus, they’re great fresh out of the oven or toasted the next day! 🧀🍞
Key Ingredients & Substitutions
All-Purpose Flour: This is the main structure for the buns. If you need a gluten-free option, consider using a 1:1 gluten-free flour blend. Just keep an eye on the texture as it can differ from regular flour.
Cottage Cheese: Opt for small curd cottage cheese for a smoother mixture. If you’re looking for a different flavor, ricotta works well as a substitute, adding creaminess to the buns.
Butter: Unsalted butter is best for controlled seasoning. If you want a dairy-free option, feel free to use coconut oil or a vegan butter alternative. They can give a unique flavor!
Yeast: Active dry yeast is key for making the buns rise. If you only have instant yeast, you can use it without proofing, just mix it with the flour. The rising time may be slightly shorter.
Sugar: It not only adds sweetness but also helps with browning. If you’re cutting back on sugar, honey or agave can work too; just reduce the liquid slightly in your recipe.
How Do I Knead Dough for the Perfect Texture?
Kneading is crucial for gluten development, which gives your buns their soft texture. Here’s how to do it effectively:
- Lightly flour your work surface to prevent sticking, but don’t overdo it.
- Press the dough down with the heel of your hand, then fold it over itself.
- Give it a quarter turn and repeat, pushing and folding for about 8-10 minutes.
- The dough should become smooth and elastic. If it’s too sticky, add a bit more flour as needed.
Feeling the right texture is key—when it’s ready, it should be slightly tacky but not stick to your fingers. Happy baking!
How to Make Cottage Cheese Buns?
Ingredients You’ll Need:
For the Dough:
- 2 cups all-purpose flour (plus extra for kneading)
- 1 cup cottage cheese (well drained and crumbled)
- 2 tbsp unsalted butter, softened
- 1/4 cup sugar
- 1 egg (room temperature)
- 1/2 cup warm milk (around 110°F/43°C)
- 1 tsp active dry yeast
- 1/2 tsp salt
- 1 tsp vanilla extract (optional, for a slight sweetness)
For Topping:
- Sesame seeds (for sprinkling on top)
- 1 egg yolk mixed with 1 tbsp water (for egg wash)
How Much Time Will You Need?
This recipe takes about 20 minutes to prepare, plus about 2 hours for the dough to rise (1-1.5 hours for the first rise and 30-40 minutes for the second rise). Baking will take an additional 15-20 minutes. In total, plan for about 2 hours and 40 minutes from start to enjoying these delicious buns!
Step-by-Step Instructions:
1. Activate the Yeast:
Start by dissolving the yeast and a pinch of sugar in warm milk in a small bowl. Let it sit for 5-10 minutes until it gets frothy. This means your yeast is active and ready to work its magic!
2. Mix the Dry Ingredients:
In a large bowl, whisk together the flour, sugar, and salt. This will be the base for your dough. Set it aside for a moment while you prepare the wet ingredients.
3. Combine Wet Ingredients:
Add the crumbled cottage cheese, softened butter, egg, and optional vanilla extract to the dry mixture. This blend will bring moisture and flavor to your buns.
4. Add the Yeast Mixture:
Now, pour in the yeast mixture that you activated earlier. Stir everything together until you have a shaggy dough that pulls away from the sides of the bowl.
5. Knead the Dough:
Transfer the dough to a floured surface and knead it for about 8-10 minutes. You should end up with a smooth and elastic dough. If it’s too sticky, just sprinkle a little more flour on it while kneading.
6. Let It Rise:
Place your kneaded dough into a lightly greased bowl. Cover it with a clean kitchen towel or plastic wrap and let it rise in a warm place for about 1-1.5 hours, or until it has doubled in size. This is when the yeast does its job!
7. Punch Down the Dough:
After it has risen, gently punch the dough down to release any excess air. This is essential to keep your buns fluffy!
8. Shape the Buns:
Divide the dough into 6-8 equal portions. Shape each portion into a smooth ball and place them on a baking tray lined with parchment paper. Remember to leave a little space between each bun.
9. Second Rise:
Cover the buns loosely and let them rise again for another 30-40 minutes until they are puffy. This step helps them rise further and become light and airy.
10. Preheat and Prepare for Baking:
While your buns are rising, preheat the oven to 375°F (190°C). Once the buns are ready, brush them with the egg wash (egg yolk mixed with water) and sprinkle on sesame seeds for that tasty topping!
11. Bake the Buns:
Place the tray in the preheated oven and bake for 15-20 minutes until they are golden brown on top. Your kitchen should smell amazing right about now!
12. Cool and Serve:
Once baked, carefully remove the buns from the oven and let them cool slightly on a wire rack before serving. They’re perfect warm or at room temperature.
Now enjoy these delightful cottage cheese buns with a filling of your choice or simply as they are! Happy baking!
Can I Use Low-Fat Cottage Cheese?
Yes, low-fat cottage cheese can be used! It will still yield soft buns, but they might be slightly less rich in flavor compared to full-fat versions.
Can I Make These Buns Vegan?
Absolutely! To make vegan cottage cheese buns, substitute the egg with a flaxseed or chia seed egg (1 tbsp flaxseed meal or chia seeds mixed with 2.5 tbsp water, let sit to thicken). Use plant-based butter and non-dairy milk as well.
What’s the Best Way to Store Leftovers?
Store any leftovers in an airtight container at room temperature for up to 3 days, or refrigerate them for up to a week. You can also freeze the buns for longer storage; just wrap them tightly in plastic wrap and then in aluminum foil before freezing.
Can I Add Fillings to the Buns?
Definitely! You can add fillings like shredded cheese, herbs, or cooked meat before shaping the dough into balls for added flavor. Just be sure not to overfill them to maintain their shape while baking!