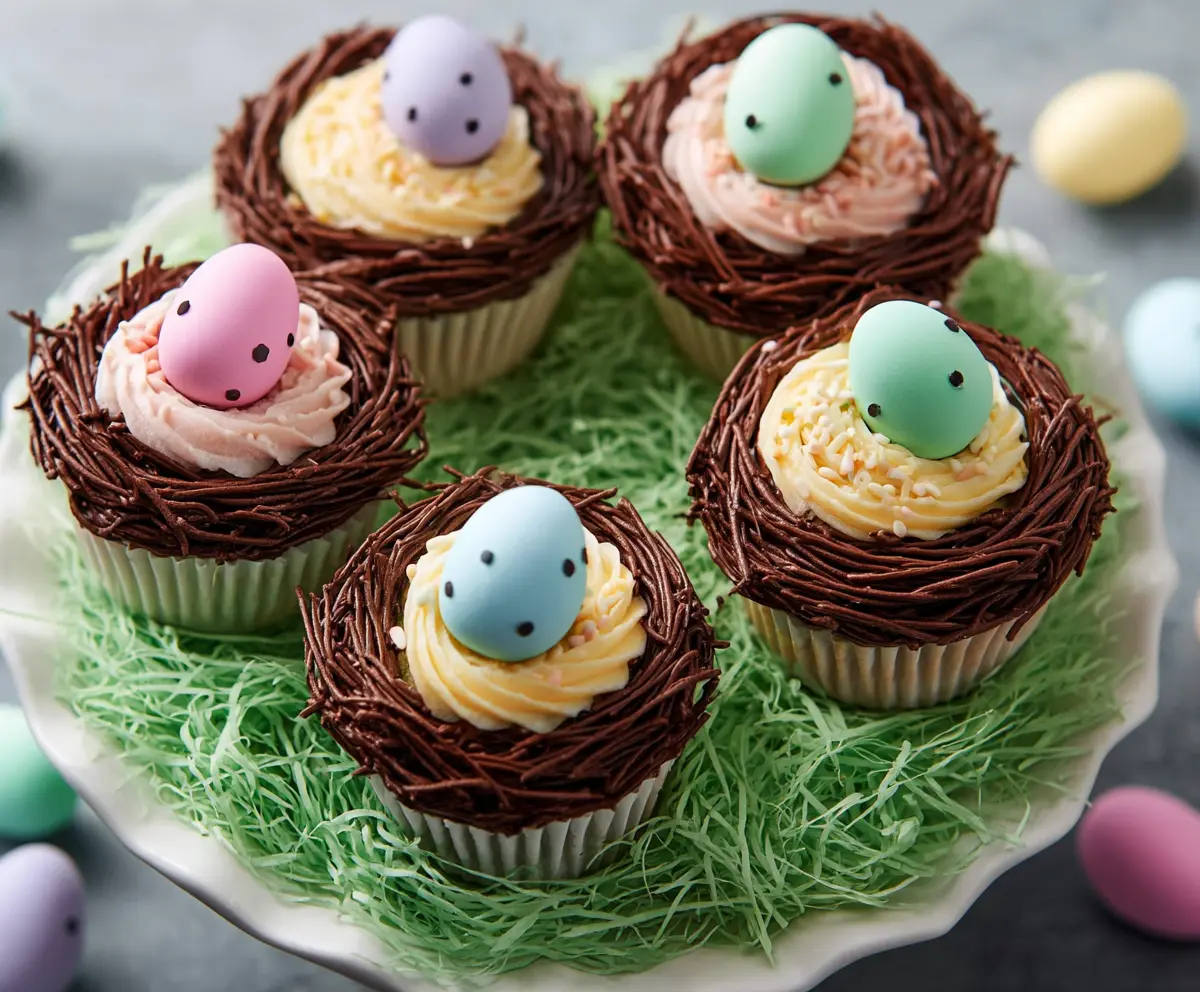
These Easter Egg Nest Cupcakes are a sweet treat that kids and adults will love! Topped with colorful candy eggs, they look like little nests, making them super fun for spring celebrations.
Baking and decorating these cupcakes is a great way to get everyone involved. Plus, who doesn’t love a cupcake packed with chocolatey goodness? They’re easy to make and even easier to enjoy!
Key Ingredients & Substitutions
All-Purpose Flour: A staple for the cupcakes, but you can use cake flour for a softer texture. If gluten-free is a must, try a 1:1 gluten-free blend.
Butter: Unsalted butter is recommended for a balanced flavor. If dairy-free, opt for a plant-based butter instead. I’ve found it works well and keeps the cupcakes moist.
Sugar: Granulated sugar is standard here, but you can try substituting half with brown sugar for a hint of molasses flavor—it’s always a hit in my baking!
Semisweet Chocolate: Feel free to use dark or milk chocolate based on your taste preference. White chocolate can also be a fun alternative for a different look!
Candy Eggs: Look for mini chocolate eggs or jelly beans if pastel candy eggs aren’t available. They add a nice pop of color and sweetness to the cupcakes.
How Can I Make Sure My Buttercream Frosting is Perfectly Fluffy?
A rich, fluffy buttercream takes your cupcakes to the next level. Start by beating your softened butter until it’s creamy. Gradually add the powdered sugar to avoid a sugary cloud, and beat until smooth.
- After mixing in vanilla and liquids, increase your mixing speed for 3-4 minutes. This air incorporates perfectly for fluffiness.
- Adjust the consistency with more cream or sugar depending on preference. If it’s too thick, a bit more cream will help!
What’s the Best Way to Pipe the Chocolate Nest?
Piping chocolate can be tricky, but here’s how to make it easier. Melt your chocolate until smooth but not too runny—about the thickness of syrup is ideal.
- Transfer melted chocolate into a piping bag. If using a bag without a tip, snip a small corner for controlled piping.
- Pipe the chocolate in circular motions around the buttercream to create the nest effect. The key is to overlap and create layers—don’t worry about making it perfect, nature isn’t either!
How Do I Make Beautifully Colored Frosting?
Dividing your frosting into bowls before adding gel food coloring lets you customize shades to your liking. Start with a drop of color and mix. If you want vibrant pastels, a little goes a long way!
- Mix thoroughly to ensure even color. If the color is richer than you like, mix in a little more white frosting until it’s just right.
- Keep your colors separated, and get creative—it’s a fun way to make each cupcake unique!
How to Make Easter Egg Nest Cupcakes
Ingredients You’ll Need:
For The Cupcakes:
- 1 ½ cups all-purpose flour
- 1 ½ tsp baking powder
- ¼ tsp salt
- ½ cup unsalted butter, softened
- 1 cup granulated sugar
- 2 large eggs
- 2 tsp vanilla extract
- ½ cup whole milk
For The Buttercream Frosting:
- 1 cup unsalted butter, softened
- 4 cups powdered sugar
- 2-3 tbsp heavy cream or milk
- 1 tsp vanilla extract
- Gel food coloring (pastel colors: pink, blue, yellow, green, purple)
For The Chocolate “Nest”:
- 1 ½ cups semisweet chocolate chips or chopped chocolate
- 2 tbsp vegetable oil (optional for thinning)
For Decoration:
- Edible candy eggs (small, speckled pastel eggs)
- Sprinkles (optional)
How Much Time Will You Need?
This delightful recipe takes about 30 minutes to prepare and 18-22 minutes to bake, plus some cooling time for the cupcakes. You’ll want to set aside an extra 15-20 minutes for decorating, making this a fun project that’s perfect for Easter celebrations!
Step-by-Step Instructions:
1. Preheat Oven and Prepare Pans:
Start by preheating your oven to 350°F (175°C). While that’s heating up, line a muffin tin with cupcake liners so your cupcakes will release easily once baked!
2. Make the Cupcakes:
In a medium bowl, whisk together the flour, baking powder, and salt. In a larger bowl, cream together the softened butter and granulated sugar until it’s light and fluffy—this usually takes about 3-5 minutes. Add the eggs one at a time, mixing well after each addition, then stir in the vanilla extract. Gradually mix in the dry ingredients, alternating with the milk, starting and ending with the dry mix. Just mix until everything is combined. Now, scoop the batter into the cupcake liners, filling them about 2/3 full. Bake for 18-22 minutes, or until a toothpick comes out clean when inserted in the center. Once done, let the cupcakes cool completely on a wire rack.
3. Prepare the Buttercream Frosting:
In a clean mixing bowl, beat the softened butter on medium speed until creamy—about 2-3 minutes. Gradually add the powdered sugar one cup at a time, ensuring it’s well mixed after each addition to avoid a sugary mess! Then, mix in the vanilla extract and 2 tablespoons of cream or milk. Beat the frosting on high speed for about 3-4 minutes until it’s fluffy and silky. Divide the frosting into bowls and tint each portion with your chosen pastel gel food colors for that beautiful Easter look!
4. Make Chocolate “Nest” Frosting:
In a microwave-safe bowl, melt the chocolate chips in 30-second intervals, stirring until smooth. If you’d like the chocolate to be a bit thinner for piping, stir in the optional vegetable oil. Let the chocolate cool slightly so it thickens, but remains pipeable.
5. Frost the Cupcakes:
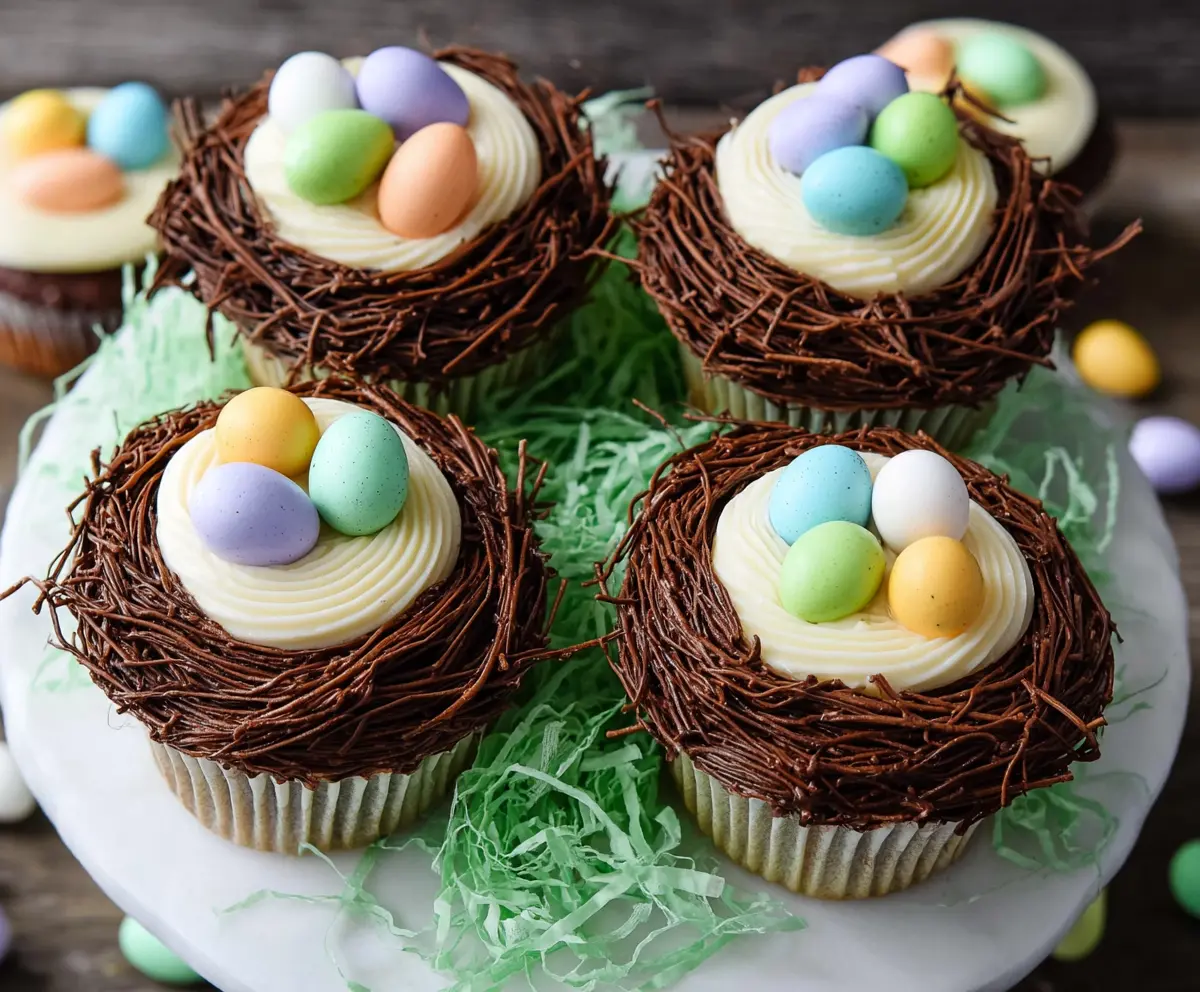
Using a piping tip, pipe a swirl of your pastel-colored buttercream in the center of each cupcake to create the “nest bed.” Next, transfer the melted chocolate to a piping bag fitted with a small round or multi-opening tip. Pipe the chocolate around the buttercream center in overlapping circular motions to form the “nest.” Get creative and don’t worry about making it perfect—it can be as whimsical as you like!
6. Decorate:
Gently place a speckled pastel candy egg on top of the buttercream center in each chocolate nest. If you’d like to add a bit of sparkle, sprinkle a few confetti sprinkles or edible glitter around the egg!
7. Serve:
Arrange your lovely cupcakes on a plate or platter. For an extra Easter touch, decorate with some green shredded paper or edible grass to mimic a bird’s nest. Now, you’re ready to serve and enjoy your festive Easter Egg Nest Cupcakes!
These cupcakes are not only a treat for the taste buds but also a feast for the eyes. Have fun making these adorable delights for your Easter celebrations!
Can I Use Cake Flour Instead of All-Purpose Flour?
Yes, you can! Using cake flour will give your cupcakes a lighter and more tender texture. Just replace the all-purpose flour with the same amount of cake flour for delightful results!
What If I Don’t Have Gel Food Coloring?
No worries! You can use liquid food coloring instead, but keep in mind that it might make the frosting a bit runny. Start with a small amount and gradually add more until you achieve your desired color.
How Should I Store Leftover Cupcakes?
Store leftover cupcakes in an airtight container at room temperature for up to 3 days. If you live in a warm climate or want them to last longer, refrigerating them is a great option—just allow them to come to room temperature before enjoying!
Can I Use Different Types of Chocolate for the Nest?
Absolutely! While semisweet chocolate works great, you can experiment with milk chocolate or even dark chocolate for a richer flavor. Just adjust the sweetness of your cupcakes as needed!