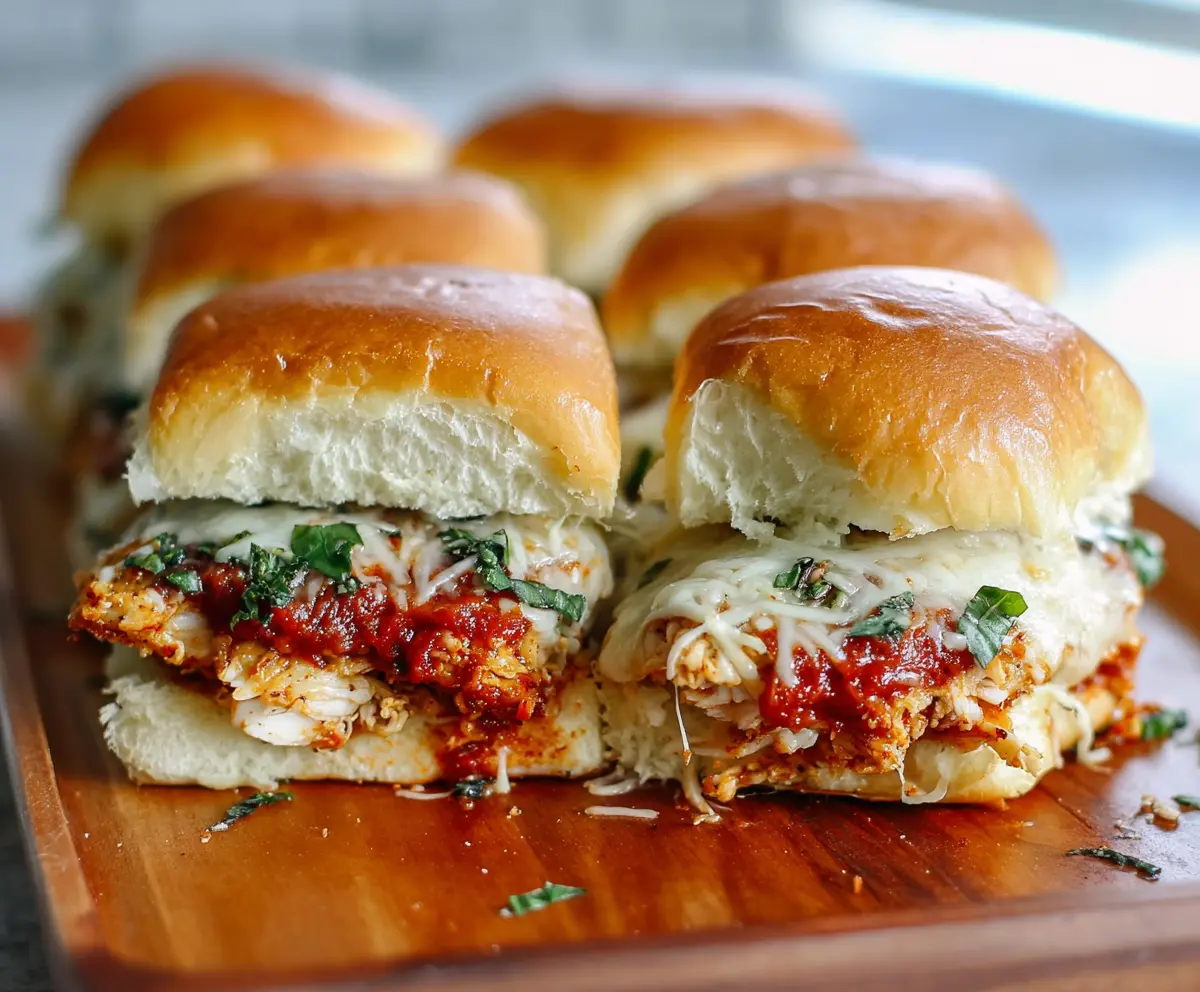
These Garlic Chicken Parmesan Sliders are mini sandwiches that pack a tasty punch! Tender chicken is smothered in cheesy goodness and topped with garlic, all between soft rolls. Yum!
Perfect for game nights or a quick snack, these sliders are sure to disappear fast! I love serving them with a side of marinara for dipping—it’s a delicious touch! 🍗🧀
Key Ingredients & Substitutions
Slider Buns: I prefer using soft dinner rolls for their light texture. If you’re looking for a healthier option, whole wheat or gluten-free rolls work well too!
Chicken Breasts: Tender chicken is key! If you’re short on time, feel free to use pre-cooked or leftover chicken. Rotisserie chicken is a great substitute!
Breadcrumbs: Italian-seasoned breadcrumbs add flavor, but plain breadcrumbs with some Italian herbs mixed in will do just fine. Try Panko for extra crunch!
Parmesan Cheese: Grated Parmesan adds a punchy flavor, but if you don’t have any, you can use Romano or Pecorino cheese. Just remember to adjust the salt if needed.
Garlic: Fresh garlic boosts the flavor, but garlic powder can be a quick alternative. I recommend using one or two cloves for that lovely aroma!
How Do I Make Sure My Chicken is Perfectly Crispy?
To get that crunchy coating on your chicken, follow these steps for the best results:
- Make sure to season your chicken well with salt and pepper to enhance its flavor.
- Keep your oil hot enough before adding the chicken. This helps create a crispy texture. A good rule is to check if the oil sizzles when you add a breadcrumb.
- Don’t overcrowd the pan! Fry one or two pieces at a time to maintain heat and achieve an even golden finish.
- Let the fried chicken bits rest on paper towels to soak up any excess oil, keeping them crispy.
Follow these simple tips, and you’ll have sliders that everyone will love!
Garlic Chicken Parmesan Sliders
Ingredients You’ll Need:
For the Sliders:
- 8 slider buns (soft dinner rolls)
- 2 large chicken breasts, split or pounded thin
- 1 1/2 cups Italian-seasoned breadcrumbs
- 1/2 cup grated Parmesan cheese
- 2 large eggs
- 1/2 cup all-purpose flour
- 1-2 cloves garlic, minced
- 1 1/2 cups marinara sauce
- 1 1/2 cups shredded mozzarella cheese
- 2 tablespoons olive oil or vegetable oil (for frying)
- 4 tablespoons unsalted butter, melted
- Fresh basil leaves, chopped (for garnish)
- Salt and pepper to taste
How Much Time Will You Need?
This delicious recipe will take about 30 minutes to prepare, plus an additional 10 minutes for baking. You’ll have perfectly crispy sliders ready to enjoy in under an hour!
Step-by-Step Instructions:
1. Preheat Your Oven:
First things first, set your oven to 375°F (190°C) so it’s hot and ready for your sliders!
2. Prepare the Breading Station:
Gather three shallow dishes. In the first, place your flour. In the second, beat the eggs until well mixed. In the third, combine the Italian breadcrumbs with the grated Parmesan cheese. This will make the coating extra tasty!
3. Coat the Chicken:
Season the chicken breasts with a pinch of salt and pepper. Now, take each piece of chicken and dredge it in the flour, making sure to coat it evenly. Next, dip it in the beaten eggs, and finally, cover it well with the breadcrumb mixture. Make sure every bit is coated for maximum crunch!
4. Fry the Chicken:
In a large skillet, heat the olive oil over medium-high heat. Once hot, carefully place the breaded chicken into the skillet. Cook them for about 3-4 minutes on each side, or until they turn golden and crispy. Once done, remove them and place on paper towels to let them drain and get rid of excess oil.
5. Toast the Slider Buns:
While the chicken is cooling, lightly toast your slider buns. You can do this in the oven or on a skillet for a nice, warm, and slightly crisp texture.
6. Assemble the Sliders:
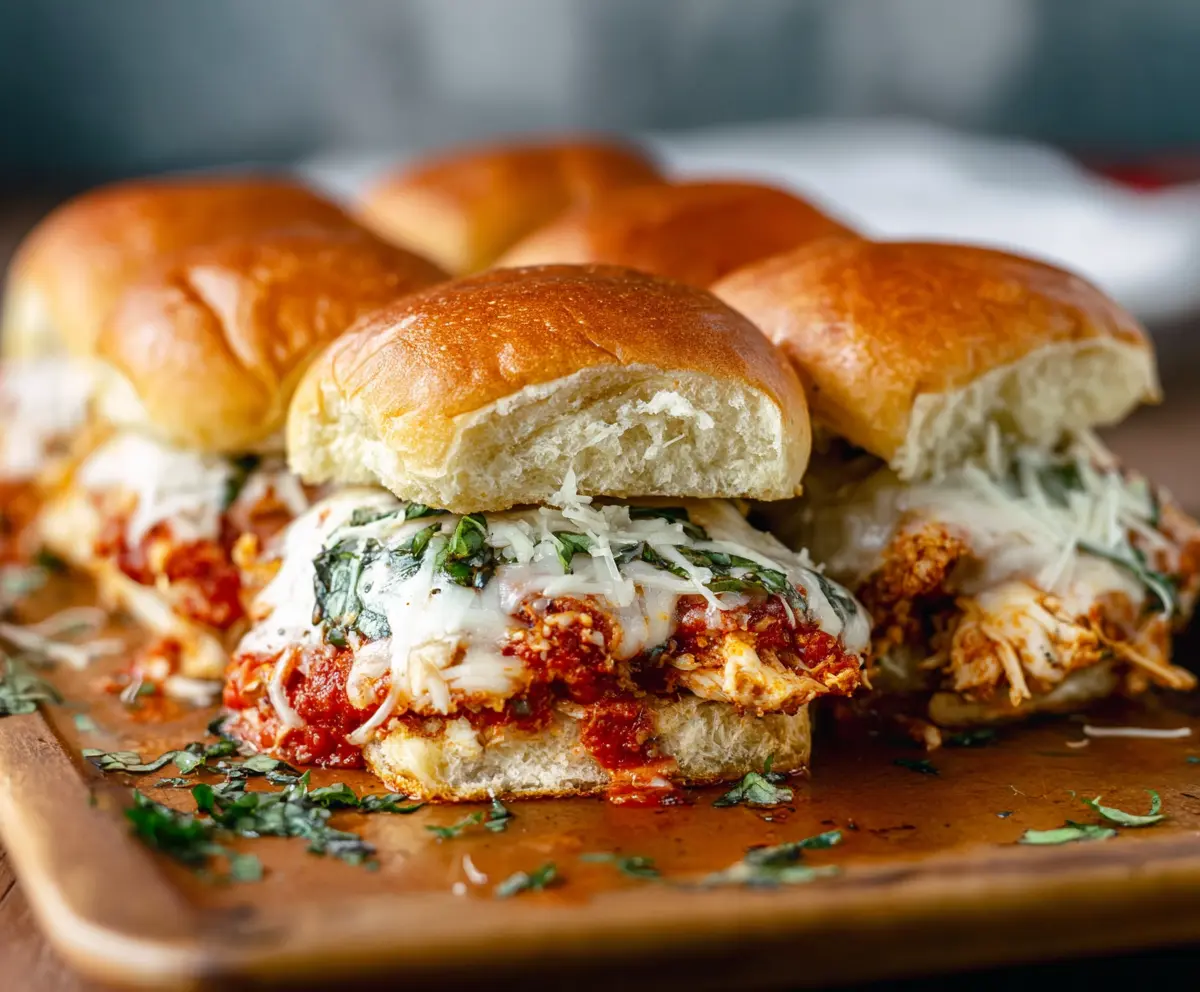
On the bottom half of each bun, spread a spoonful of marinara sauce. Place a piece of the crispy chicken on top. Sprinkle the minced garlic over the chicken to add delicious garlicky flavor!
7. Add Cheese and More Sauce:
Top the chicken with shredded mozzarella cheese. Drizzle a little more marinara sauce on top for that extra kick of flavor.
8. Bake the Sliders:
Place all the assembled sliders on a baking sheet and pop them in your preheated oven. Bake for about 8-10 minutes, or until the cheese is melted and bubbly!
9. Add the Finishing Touch:
While they bake, mix the melted butter with a bit more minced garlic. Once the sliders are done, take them out and brush the tops of the buns with this buttery garlic mixture for an added layer of flavor and shine.
10. Garnish and Serve:
Finish your sliders by garnishing them with chopped fresh basil leaves. Serve them immediately with extra marinara sauce on the side for dipping. Enjoy every bite of your savory, cheesy Garlic Chicken Parmesan Sliders!
These sliders are perfect for gatherings, parties, or a cozy dinner at home. They’re sure to be a hit!
Can I Use Frozen Chicken for This Recipe?
Sure! If you’re using frozen chicken, make sure to thaw it completely in the fridge overnight or in a sealed plastic bag submerged in cold water before breading and cooking.
What Can I Use Instead of Marinara Sauce?
If you don’t have marinara sauce, you can substitute with any tomato-based sauce, like pizza sauce or even a garlic alfredo for a creamy twist. Just keep in mind that it will change the flavor profile of the sliders!
How Do I Store Leftover Sliders?
Store leftover sliders in an airtight container in the fridge for up to 3 days. To reheat, place them in the oven at 350°F (175°C) for about 10 minutes to warm them up and melt the cheese again.
Can I Make These Sliders Ahead of Time?
Absolutely! You can prepare the chicken and sauce in advance, then assemble the sliders right before baking. This makes meal prep a breeze! Just hold off on the garlic butter brush until they’re ready to bake for maximum flavor.