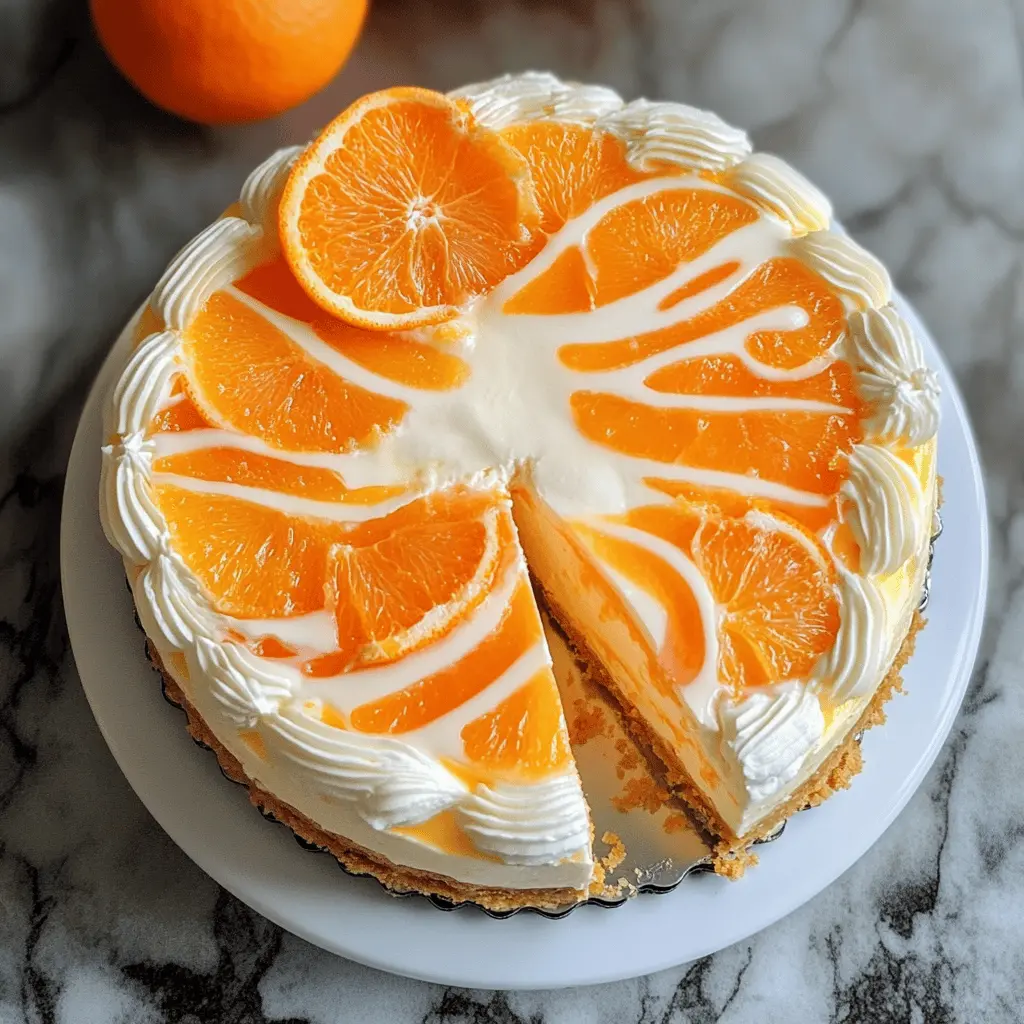
This No-bake Orange Creamsicle Cheesecake is a fruity, creamy dream! It’s super easy to make with a tasty graham cracker crust and a light, refreshing orange flavor.
I love how it comes together with no baking involved—just mix it up, chill, and enjoy! Perfect for lazy days when you still want something delicious! 🍊🍰
Key Ingredients & Substitutions
Graham cracker crumbs: These form the base of your cheesecake crust. If you don’t have them, crushed cookies like Oreos or digestive biscuits can be great alternatives.
Cream cheese: This gives the cheesecake its rich, creamy texture. You can swap it with mascarpone cheese for a slightly different taste, or use a dairy-free cream cheese for a vegan option.
Heavy whipping cream: This is key to making your cheesecake fluffy. If you need a lighter option, you can use whipped coconut cream, which also adds a subtle coconut flavor.
Orange juice and zest: Freshly squeezed is best for vibrant flavor! If you can’t find fresh oranges, bottled juice works too, but make sure it’s 100% juice without added sugar.
Gelatin: This is optional for firmness. If you’re vegan, try using agar-agar as a substitute. It works similarly but check the instructions for the right ratios.
How Do I Make Sure My Cheesecake Fills Well and Whips Up Perfectly?
Making the filling perfectly smooth is essential for this cheesecake. Start by ensuring your cream cheese is at room temperature. Cold cream cheese won’t blend well and will leave lumps in your cheesecake.
- Beat the cream cheese with your mixer until it’s fluffy and smooth.
- Add the powdered sugar and vanilla slowly, mixing well to incorporate each addition.
- When whipping the heavy cream, make sure your bowl and beaters are cold. This helps the cream whip up faster and reach stiff peaks.
- Gently fold the whipped cream into the cream cheese mix, being careful not to deflate the air you’ve whipped in. This makes your cheesecake light and airy.
No-Bake Orange Creamsicle Cheesecake
Ingredients You’ll Need:
For the Crust:
- 1 1/2 cups graham cracker crumbs
- 1/3 cup granulated sugar
- 1/2 cup unsalted butter, melted
For the Filling:
- 16 oz cream cheese, softened
- 1 cup powdered sugar
- 1 teaspoon vanilla extract
- 1 cup heavy whipping cream
- 1 cup orange juice (freshly squeezed is best)
- Zest of 1 orange
- 1 tablespoon unflavored gelatin (optional, for firmness)
- 2 tablespoons cold water (if using gelatin)
- Orange food coloring (optional)
For Decoration:
- Whipped cream (for topping)
- Orange slices (for garnish)
How Much Time Will You Need?
This delightful cheesecake will take about 20 minutes of prep time and a chilling time of at least 4 hours (preferably overnight). That means you can enjoy this delicious treat even if you’re a bit short on time! Just prep the crust and filling, let it chill, and you’re ready to serve.
Step-by-Step Instructions:
1. Preparing the Crust:
Start by combining graham cracker crumbs, granulated sugar, and melted butter in a mixing bowl. Stir well until everything is mixed really well. Now, press this mixture firmly into the bottom of a 9-inch springform pan to create an even crust. Place the pan in the refrigerator to chill while you make the filling.
2. Dissolving Gelatin (Optional):
If you want a firmer cheesecake, prepare the gelatin first. In a small bowl, combine the gelatin with cold water and let it sit for about 5 minutes to bloom. After that, gently heat the mixture in the microwave until it’s fully dissolved. Let it cool just a bit before using it.
3. Making the Filling:
In a large bowl, take the softened cream cheese and beat it with an electric mixer until smooth. Gradually add the powdered sugar and the vanilla extract, mixing until everything is well combined and creamy.
4. Whipping the Cream:
In another bowl, whip the heavy whipping cream until stiff peaks form. This part adds lightness to your cheesecake! Now, gently fold this whipped cream into the cream cheese mixture until you can’t see any streaks left.
5. Combining Flavors:
Divide the creamy mixture into two bowls. In one bowl, mix in the orange juice and orange zest. If you’re using it, stir the dissolved gelatin into this orange mixture. For a vibrant look, feel free to add a few drops of orange food coloring, too!
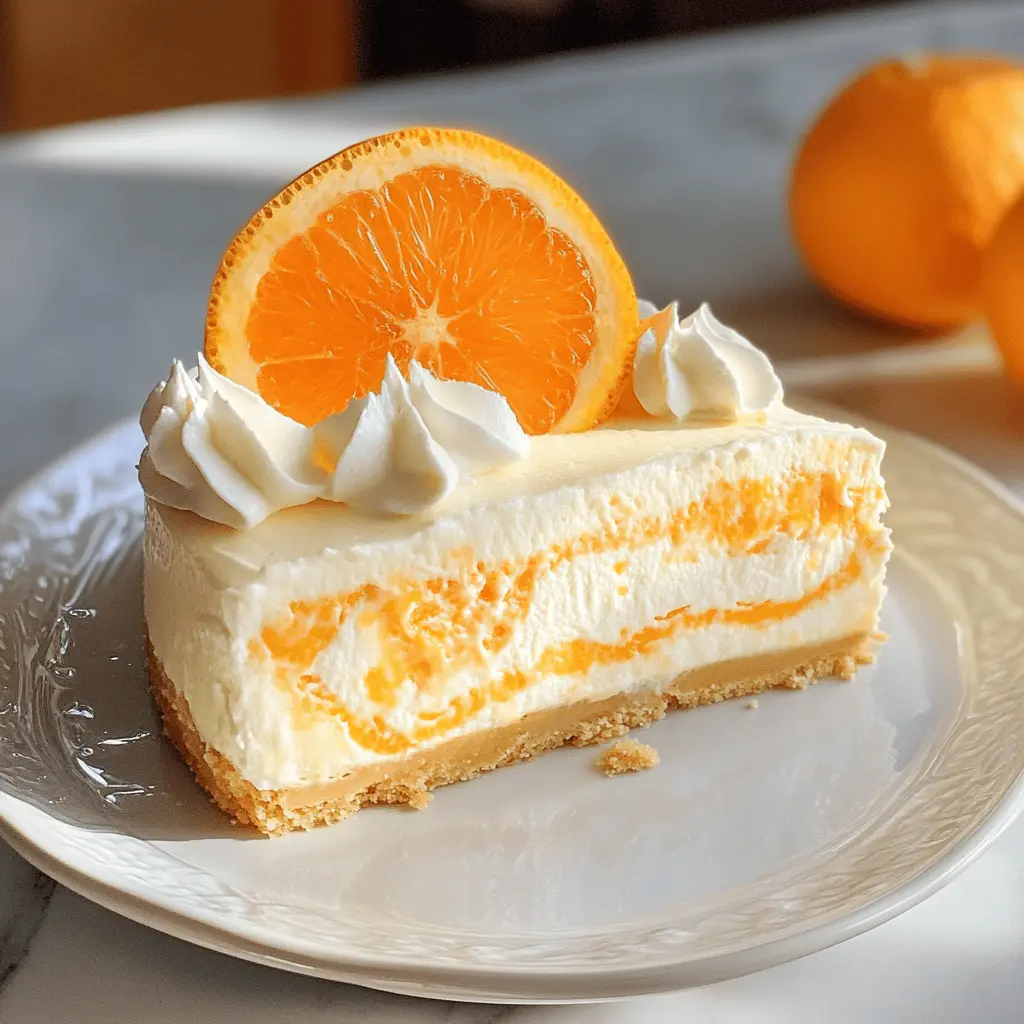
6. Creating the Swirl Effect:
To make your cheesecake special, alternate spoonfuls of the orange mixture and the plain cream cheese mixture on top of the chilled crust. Swirl them together gently with a knife or skewer to create a beautiful marbled effect.
7. Chilling the Cheesecake:
Cover the springform pan with plastic wrap and place it in the refrigerator. Let it chill for at least 4 hours, but if you can wait until the next day, it will taste even better!
8. Serving Your Cheesecake:
When your cheesecake is fully set, run a knife around the edges and carefully remove the springform pan. Top it off with a generous dollop of whipped cream and add some fresh orange slices for garnish. Now, slice and enjoy your refreshing no-bake orange creamsicle cheesecake!
Can I Use a Different Type of Crust?
Absolutely! If you’re not a fan of graham crackers, you can use crushed digestive biscuits, vanilla wafers, or even a chocolate cookie crust for a different flavor profile. Just make sure to keep the butter and sugar ratios similar to ensure it holds together well.
Can I Make This Cheesecake Without Gelatin?
Yes, you can skip the gelatin if you prefer a softer, creamier cheesecake. Just be aware that it may be less sturdy and may not hold its shape as well when sliced. Make sure to chill it for at least the recommended time to help firm it up!
How Should I Store Leftovers?
Store any leftovers covered in the refrigerator for up to 5 days. You can also freeze it! Wrap individual slices in plastic wrap and then place them in an airtight container. Frozen slices can be enjoyed within 1-2 months. Just thaw them in the fridge overnight before serving.
What Can I Use Instead of Heavy Whipping Cream?
If you don’t have heavy whipping cream, you can substitute it with whipped topping (like Cool Whip) for a quicker option. Alternatively, you could use coconut cream for a dairy-free version; just chill a can of coconut milk overnight and scoop out the cream that solidifies on top!