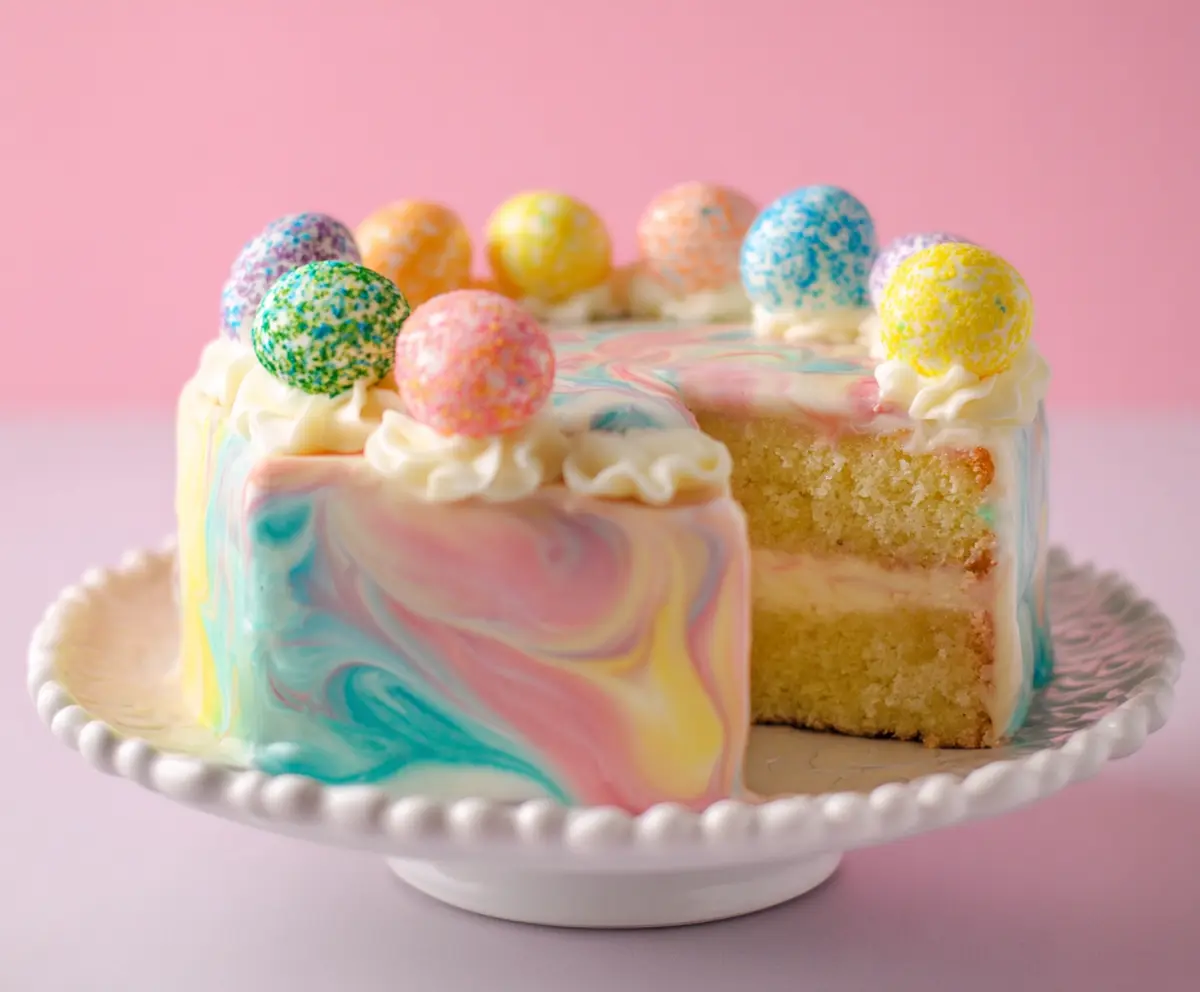
This Swirled Easter Cake is a colorful treat perfect for celebrating! With a moist vanilla base and vibrant swirls of frosting, it’s a feast for both the eyes and the tummy.
Baking this cake is so much fun! I love watching those swirling colors come together. It’s like art you can eat—just don’t forget to save some for your guests (if you can resist!). 🎉
Key Ingredients & Substitutions
All-Purpose Flour: This is the base of the cake. You can substitute it with cake flour for a lighter texture, but you might need to adjust liquid ingredients slightly.
Unsalted Butter: This adds richness. If you’re looking for a dairy-free option, use plant-based butter or coconut oil. It won’t affect the flavor too much.
Granulated Sugar: Sugar not only sweetens but helps with texture. You can replace it with brown sugar for a hint of caramel flavor, just be aware that it may change the cake’s color slightly.
Whole Milk: This keeps the cake moist. You can use almond milk or a non-dairy milk alternative as a substitution, but make sure it’s unsweetened for better results.
Food Coloring: I love using gel food coloring for its vibrant hue. Liquid coloring works too, but gel gives bolder colors without adding extra liquid.
How Do I Ensure My Cake is Fluffy and Moist?
The key to a fluffy cake is in the creaming method. Start with softened butter, and beat it with sugar until light and fluffy. Incorporating air into the butter is crucial!
- Use room temperature ingredients to help them combine easily.
- Don’t overmix once you add dry ingredients; mix just until combined to keep the cake tender.
- Make sure your oven is preheated before baking; this helps the cake rise properly.
Also, let your cakes cool completely before frosting; this helps prevent melting and works for better frosting application!
How to Make a Swirled Easter Cake?
Ingredients You’ll Need:
For The Cake:
- 2 ½ cups all-purpose flour
- 2 ½ tsp baking powder
- ½ tsp salt
- ¾ cup unsalted butter, softened
- 1 ¾ cups granulated sugar
- 4 large eggs
- 1 tbsp vanilla extract
- 1 cup whole milk
For The Buttercream Frosting:
- 1 cup unsalted butter, softened
- 4 cups powdered sugar, sifted
- ¼ cup heavy cream
- 2 tsp vanilla extract
- Food coloring in pastel shades (pink, blue, yellow, purple)
For Decorations:
- Colorful speckled candy eggs or jelly beans (for topping)
How Much Time Will You Need?
This delightful Easter cake takes about 20 minutes to prepare, 30 minutes to bake, and an additional 30 minutes to cool and decorate. The total time comes to around 1 hour and 20 minutes, including cooling time and decorating before serving.
Step-by-Step Instructions:
1. Prepare the Cake Batter:
First, preheat your oven to 350°F (175°C) and grease two 8-inch round cake pans with butter and flour. In a medium bowl, blend the flour, baking powder, and salt. In a separate large mixing bowl, cream together the softened butter and granulated sugar until it’s light and fluffy. Then, add the eggs one at a time, beating well after each addition, and stir in the vanilla extract. Now, gradually mix in the dry ingredients and milk, starting and ending with the dry ingredients, until just combined.
2. Bake the Cake:
Next, pour the batter evenly into your prepared cake pans. Bake them in the preheated oven for 25–30 minutes. To check if they’re done, insert a toothpick into the center; it should come out clean. Once baked, let the cakes cool in their pans for about 10 minutes before transferring them to wire racks to cool completely.
3. Prepare the Buttercream Frosting:
While the cakes are cooling, you can make the buttercream. In a large bowl, beat the softened butter with a mixer until it’s creamy. Gradually add in the sifted powdered sugar, starting on low speed and increasing to high until everything is smooth. Then, mix in the heavy cream and vanilla extract until the frosting is fluffy and well combined.
4. Create the Swirled Frosting Effect:
Now it’s time to make your frosting colorful. Divide the buttercream into four small bowls and tint each with different pastel food coloring. On a large plate or inside a clean bowl, add dollops of each colored frosting close together. Using a spatula or knife, gently swirl the colors together without mixing them completely to keep the beautiful pastel swirls visible.
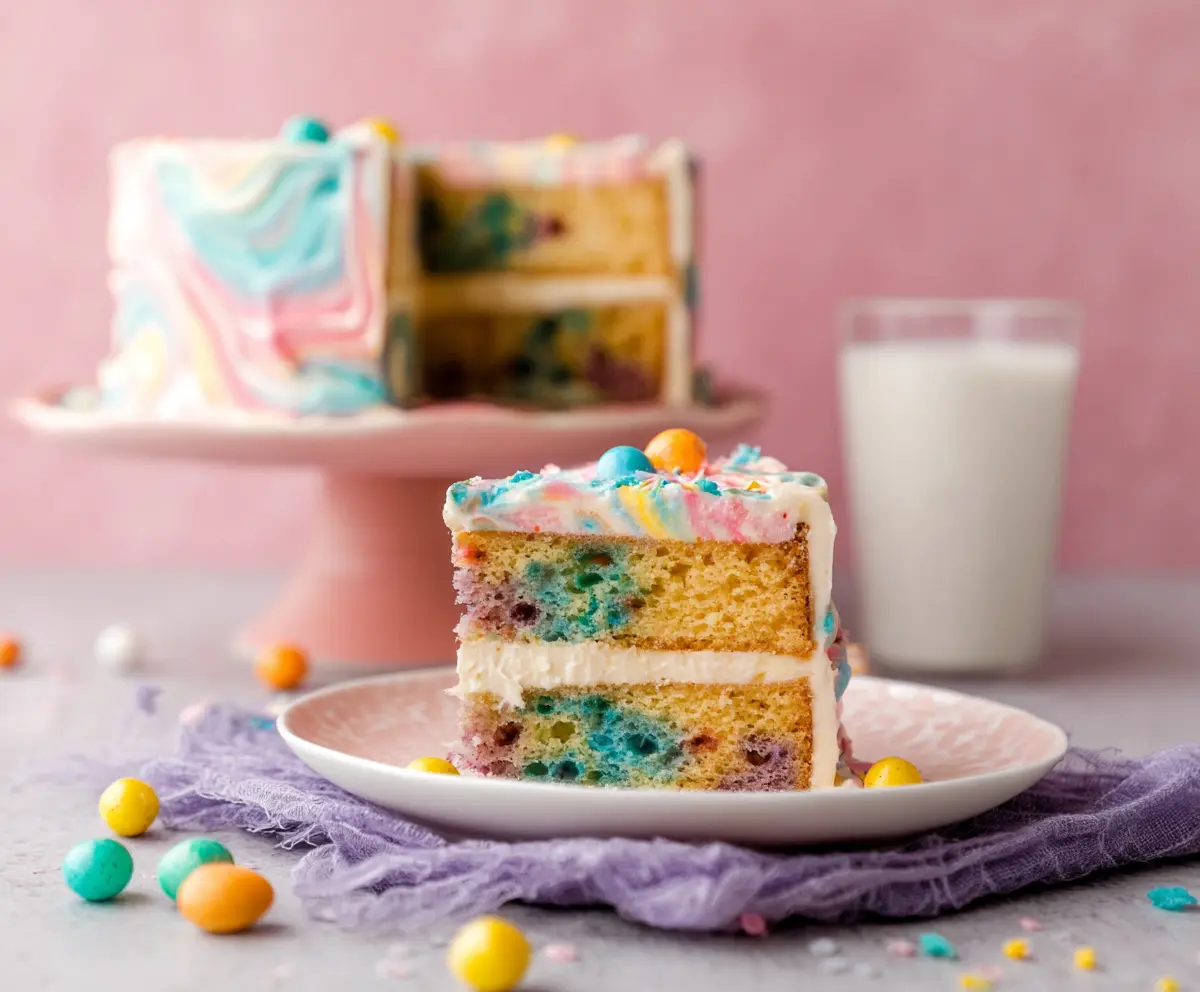
5. Assemble the Cake:
Place one cake layer on a serving plate. Spread a generous layer of your plain or swirled frosting on top. Add the second cake layer on top, then use the swirled buttercream to frost the entire cake smoothly, making sure it looks pretty and festive.
6. Decorate:
For a finishing touch, pipe small rosettes or dollops of plain or lightly colored buttercream around the top edge of the cake. Scatter the colorful speckled candy eggs or jelly beans on each dollop to create a fun Easter theme.
7. Serve and Enjoy:
Refrigerate the cake for about 30 minutes to help the frosting set before slicing. Once ready, slice and serve this delightful swirled Easter cake to enjoy with family and friends. It’s a beautiful way to celebrate with a tasty, colorful dessert!
Can I Use Different Sizes of Cake Pans?
Yes, you can use different sizes, but baking times may vary. If using a 9-inch pan, check for doneness at 20–25 minutes. For a smaller size like a 6-inch pan, it may take longer, so keep an eye on it!
What If I Don’t Have Heavy Cream for the Frosting?
If you don’t have heavy cream, you can substitute it with whole milk or half-and-half. The frosting may not be as rich, but it will still be delicious. Just add a bit more powdered sugar to achieve your desired consistency.
How Should I Store Leftover Cake?
Store any leftover cake in an airtight container at room temperature for up to 3 days. If you prefer fresher slices, you can refrigerate it for up to a week. Just remember to let it come back to room temperature before serving for the best flavor!
Can I Make the Cake Ahead of Time?
Absolutely! You can bake the cake layers a day in advance. Just wrap them tightly in plastic wrap and store them at room temperature. Frost them the day you plan to serve for the freshest taste!