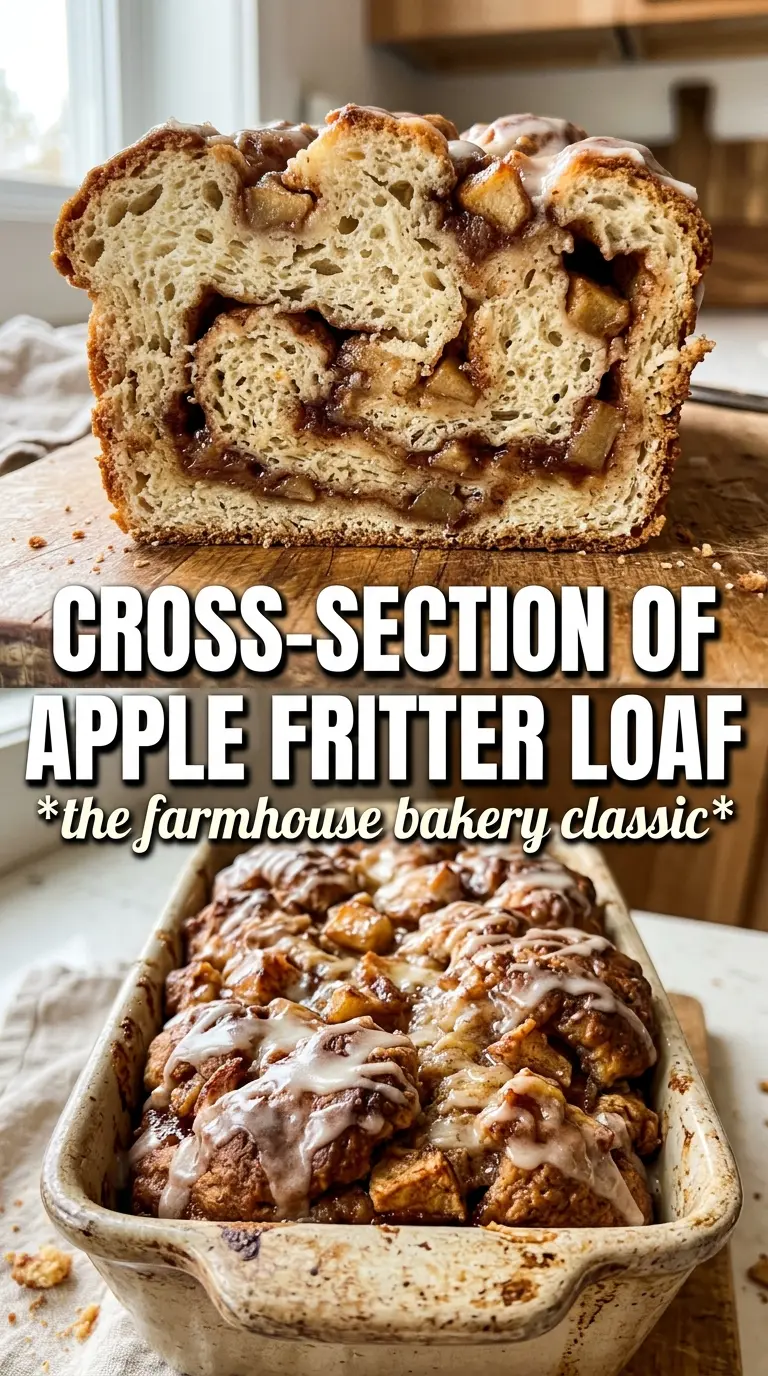
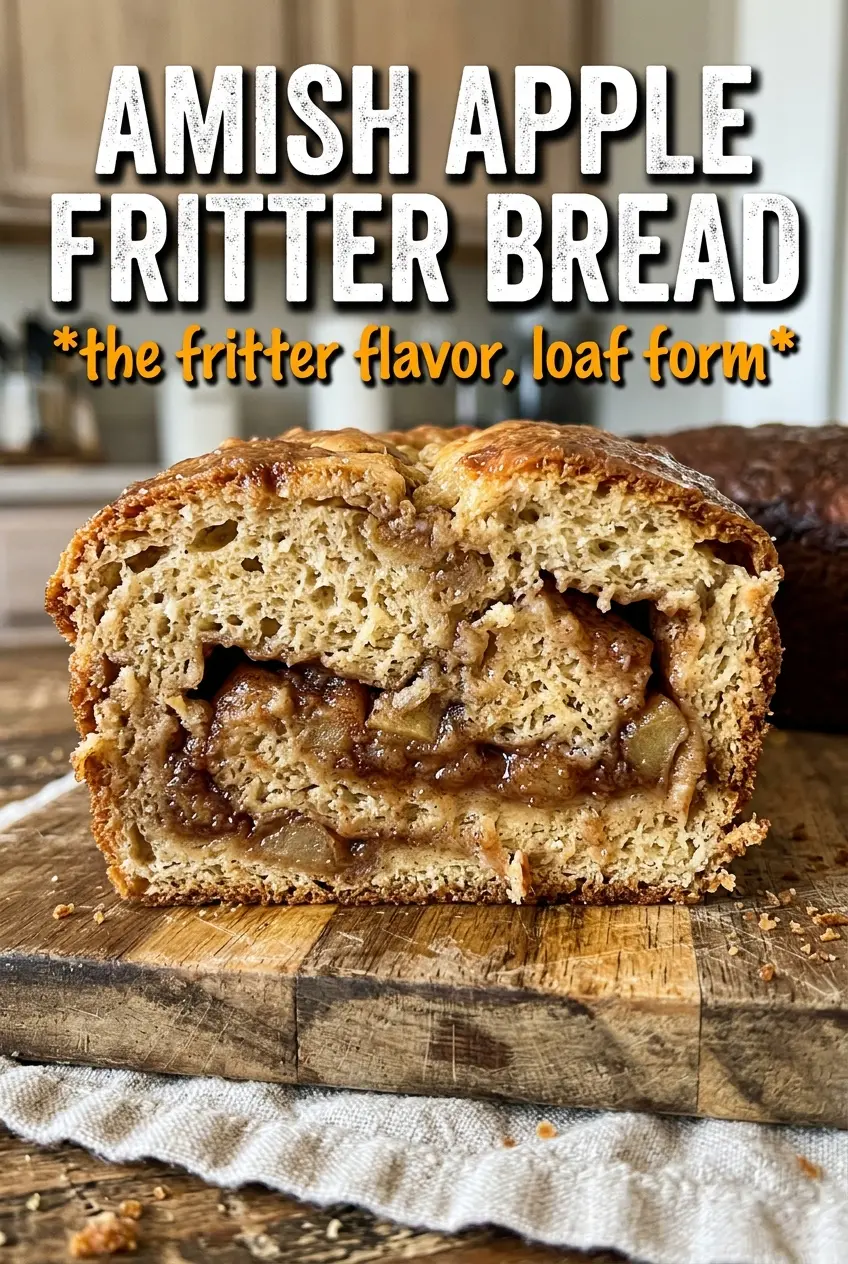
Amish apple fritter bread bakes up with a tender crumb, ribbons of cinnamon sugar, and soft apple pieces that turn jammy in the oven. The top sets into a lightly crackled crust, then the warm glaze sinks into the surface and gives each slice that bakery-style finish people remember after the plate is empty.
What makes this version work is the layering. Tossing part of the cinnamon sugar with the apples keeps the fruit from tasting flat, and stacking the batter and apples in stages gives you that fritter-style swirl instead of a loaf that just has apples scattered through it. The batter itself stays simple, but the order matters; once the butter and sugar are properly creamed, the bread bakes up plush instead of dense.
Below you’ll find the exact pan-filling order that keeps the swirl visible, plus the little glaze trick that makes the top look finished without soaking the loaf into soggy territory.
The cinnamon apples stayed layered instead of sinking, and the glaze set up just enough that each slice held together cleanly. My loaf was gone before it had time to cool completely.
Pin this Amish Apple Fritter Bread for mornings when you want a cinnamon-swirled loaf with a soft apple center and a warm glaze on top.
The Swirl Is What Keeps This Loaf from Eating Like Plain Apple Bread
The biggest mistake with apple fritter bread is treating it like quick bread with a few apples tossed in. That usually gives you a loaf where the fruit sinks, the spice disappears, and the middle turns wet before the top has a chance to brown. This version fixes that by building flavor in layers: cinnamon sugar on the apples, batter in two stages, and another sprinkle of sugar in the center so the loaf bakes into distinct pockets instead of one blended mass.
The other thing that matters is how thick the batter is. If it looks a little heavy after the flour goes in, that’s right. A looser batter lets the apples drop; a slightly sturdier one holds the layers in place long enough for the oven to set them.
What Each Ingredient Is Actually Doing in This Loaf
- Apples — Use firm apples that hold their shape while baking. Soft apples turn mushy and disappear into the crumb. A fine dice works best here because it gives you apple in almost every bite without creating big wet pockets.
- Brown sugar and cinnamon — This is the fritter part of the loaf. Brown sugar adds a little molasses depth and helps the apples soften into a jammy layer. White sugar would taste flatter and won’t give you the same warm edge.
- Butter — Softened butter gives the bread its rich, tender texture. If it’s too cold, it won’t cream properly and the loaf can bake up tight. If you’re tempted to melt it, don’t; creaming traps air that helps the bread rise.
- Whole milk — The extra fat keeps the crumb soft. Lower-fat milk will work in a pinch, but the loaf won’t have the same plush texture. Bring it to room temperature so it blends into the batter without seizing the butter.
- Baking powder and baking soda — They work together to lift the loaf and keep it from feeling heavy under the apples. The baking soda also helps with browning, which matters in a bread that spends a full hour in the oven.
- Powdered sugar glaze — Keep it thin enough to drizzle, not pour. It should sit on top and seep into the warm loaf just a little. If it gets too thick, add milk a few drops at a time until it ribbons off the spoon.
Layering the Batter So the Apples Stay Where They Belong
Build the Cinnamon Sugar First
Mix the brown sugar and cinnamon before you touch the batter. That way the apples get coated evenly and you’re not scrambling to assemble layers once the loaf pan is already waiting. Tossing half the mixture with the diced apples keeps their juices from bleeding straight into the batter, which is what helps the swirl stay defined.
Cream the Butter Until It Looks Light
Beat the butter and granulated sugar until the mixture turns pale and fluffy. That step creates tiny air pockets that give the bread lift, and if you rush it, the loaf will bake up more like a brick than a quick bread. Add the eggs one at a time if you can, then the vanilla, and stop as soon as everything looks smooth.
Alternate the Dry Mix and Milk
Add the flour mixture in batches, alternating with the milk. This keeps the batter from breaking and prevents the gluten from tightening too quickly. When the batter comes together, it should be thick but spreadable. If it looks glossy and loose like cake batter, it’s too thin for the apple layers to hold.
Stack the Loaf in Layers
Pour in half the batter, add half the apples, then sprinkle on the remaining plain cinnamon sugar before the rest of the batter goes in. Finish with the remaining apples on top. This layered order is what gives you those little streaks of cinnamon and soft fruit instead of a loaf with all the apples crowded at the bottom.
Make It With a Streusel Top
If you want more of a coffee-cake feel, mix 2 tablespoons flour, 2 tablespoons brown sugar, 1 tablespoon cold butter, and a pinch of cinnamon into crumbs and scatter them over the top before baking. You’ll lose the smooth glazed finish, but you gain a crisp, sandy topping that plays well with the soft apples.
Gluten-Free Version
A good cup-for-cup gluten-free flour blend can work here, but the loaf may need a few extra minutes in the oven. The texture will be a little more delicate and less springy than the original, so let it cool before slicing or it can crumble at the center.
Dairy-Free Swap
Use a plant-based butter that bakes well and swap in an unsweetened non-dairy milk with some body, like oat milk. The loaf will still be tender, but the flavor will be a touch less rich, so don’t skip the cinnamon sugar layers; they carry more of the character when the dairy is gone.
Storage and Reheating
- Refrigerator: Store covered for up to 4 days. The crumb firms up a bit in the fridge, but the flavor deepens as the cinnamon settles in.
- Freezer: Freeze slices tightly wrapped for up to 2 months. The glaze will soften after thawing, but the bread itself holds up well.
- Reheating: Warm slices in the microwave for 10 to 15 seconds or in a low oven until just heated through. Don’t overheat it or the apples can turn dry and the glaze will melt away completely.
Questions I Get Asked About This Recipe
Amish Apple Fritter Bread
Ingredients
Equipment
Method
- Preheat the oven to 350F, then grease a 9x5 loaf pan so the loaf releases cleanly.
- Mix the brown sugar with 2 tsp cinnamon, then toss half of the mixture with the diced apples until evenly coated.
- Beat the softened butter and granulated sugar until fluffy, about 2-3 minutes, then add the eggs and vanilla and mix until smooth.
- Whisk together the all-purpose flour, baking powder, baking soda, and salt, then alternate adding the dry mix with the whole milk into the butter mixture until just combined.
- Pour half the batter into the pan, then layer half the apple mixture over it.
- Sprinkle the remaining plain cinnamon-sugar over the apple layer so it forms a visible streaky top in the middle.
- Pour the remaining batter over the apples, then top with the remaining apples so pieces show on the surface.
- Bake at 350F for 55-60 minutes, until a toothpick inserted in the center comes out clean and the loaf is golden.
- Mix powdered sugar with 2 tbsp milk to form a thick glaze, then drizzle it over the warm loaf so it clings and slightly sets.