Juicy baked pork tenderloin earns its place in the dinner rotation because it gives you a golden, herb-scented crust and a blush-pink center without a long roast or a fussy marinade. When it’s done right, the slices stay tender and moist instead of turning dry and chalky, which is exactly why this cut deserves a little attention before it goes into the oven.
The trick is to treat the tenderloin like a fast-cooking roast, not a low-and-slow braise. A quick sear builds color and gives the seasoning something to cling to, then the hot oven finishes the job before the meat has time to overcook. The garlic, smoked paprika, thyme, and rosemary work together here in a way that tastes more developed than the ingredient list looks.
Below, I’ll walk you through the part that matters most: how to get that deep golden crust while keeping the center juicy. I’ve also included the best temperature to pull it at, plus a few practical swaps if you need to adjust the seasoning or scale it for a different crowd.
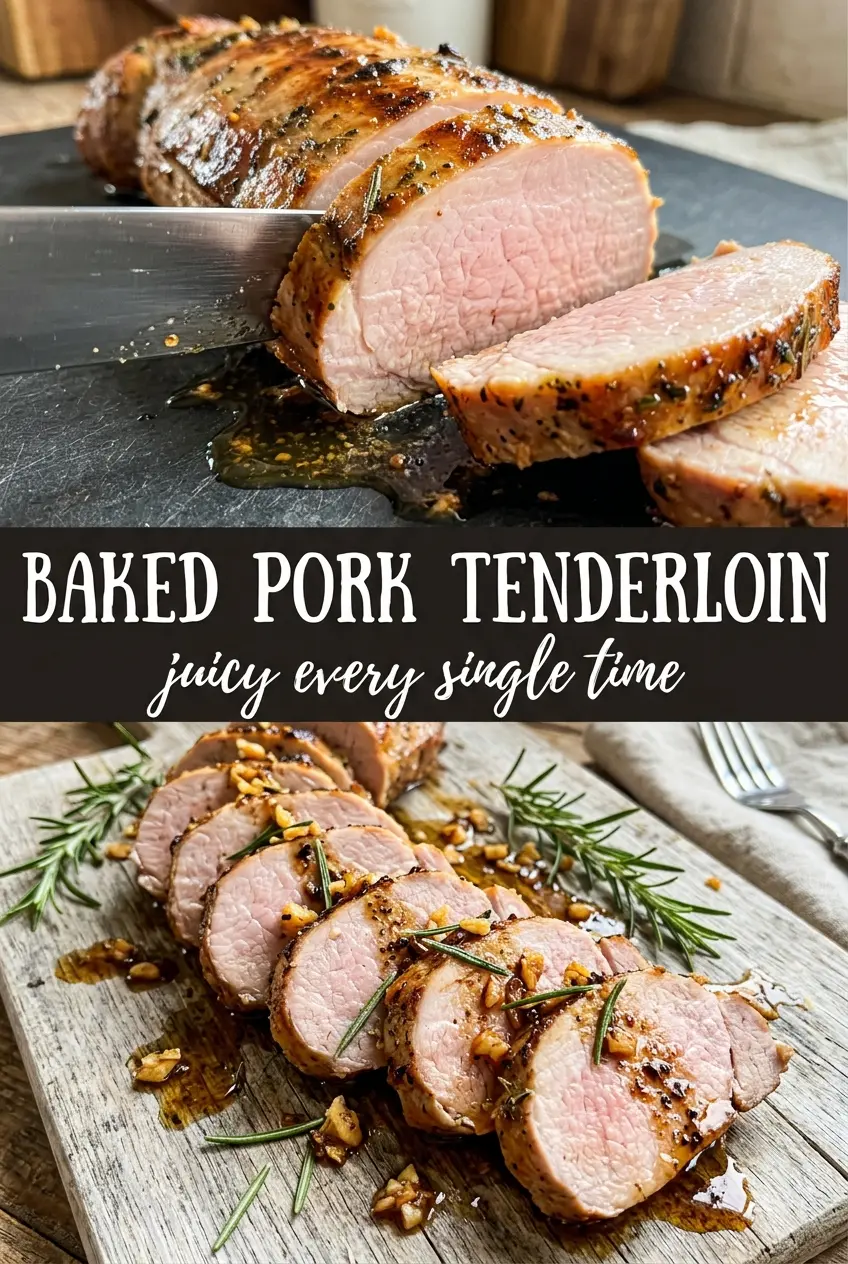
The crust got beautifully browned in the skillet, and the pork stayed juicy after the rest. I followed the temperature exactly and it sliced cleanly without losing all the juices on the board.
Save this baked pork tenderloin for the nights when you want a juicy roast with a garlicky herb crust and almost no cleanup.
The Sear Is What Keeps This Pork Tenderloin Juicy
The biggest mistake with pork tenderloin is treating it like a roast that can sit in the oven until it looks done. This cut is lean and cooks fast. If you skip the sear, the outside stays pale and the inside usually overcooks before it picks up enough color.
Searing does two things here. It builds flavor on the surface, and it gives you a visual cue that the pork is already on its way to being finished before it goes into the oven. Once it has that deep golden crust, the oven only needs to bring the center to 145°F. Pull it there, then rest it. If you wait until it feels firm all the way through, it will slice dry.
The other detail that matters is drying the pork first. Moisture on the surface turns to steam in the pan, and steam is the enemy of browning. A quick pat with paper towels is the difference between a tan, spotty exterior and a crust that looks roasted instead of steamed.
What Each Ingredient Is Actually Doing in This Dish

- Pork tenderloins — Use true tenderloins here, not pork loin. Tenderloin is slimmer, more delicate, and much faster to cook, which is why this method works. If yours are uneven in thickness, tuck the thinner tail end under slightly so the whole piece finishes closer to the same time.
- Olive oil — This helps the seasoning spread evenly and promotes browning in the skillet. You don’t need expensive oil, just one that tastes clean. If you swap in avocado oil, the result is similar and the higher smoke point can be handy for searing.
- Garlic, smoked paprika, thyme, rosemary, and onion powder — This is the flavor backbone. Smoked paprika gives the crust a deeper color and a subtle savory edge, while the herbs make the pork taste roasted even though the cook time is short. Fresh garlic works best here, but if you only have garlic powder, use about 1 teaspoon and mix it in with the dry spices so it doesn’t clump.
- Salt and black pepper — Pork tenderloin needs enough salt to taste seasoned all the way through, not just on the surface. Pepper adds a little bite after the sear. If you season timidly, the meat will taste flat even if the crust looks good.
- Fresh rosemary garnish — This is mostly for aroma and presentation, but it also reinforces the herb notes in the rub. Skip it if you don’t have it; the recipe still works. A few small sprigs on top of the sliced pork give the platter a fresh, finished look.
Getting the Crust Right Before the Oven Takes Over
Mix the rub until it becomes a paste
Stir the olive oil, garlic, paprika, thyme, rosemary, onion powder, salt, and pepper into a loose paste before it goes on the pork. That keeps the seasoning from falling off in the skillet and helps the garlic toast instead of burning in dry spots. If the rub looks too dry, add just enough oil to loosen it.
Sear each side until it turns deep golden
Heat the skillet over medium-high until it’s hot enough that the pork sizzles the moment it touches the pan. Two minutes per side is usually enough, and you’re looking for color, not a full cook through. If the pan is crowded or not hot enough, the meat will gray out before it browns, which robs the finished dish of flavor.
Roast just until the center hits 145°F
Slide the skillet into the oven and start checking early, especially if your tenderloins are on the smaller side. The pork should feel springy, not hard, and an instant-read thermometer is the only reliable way to know when it’s done. Pull it at 145°F; carryover heat will finish the job while it rests.
Rest before slicing, even if it looks ready
Give the pork five minutes on the cutting board before you slice it. That short rest lets the juices settle back into the meat instead of running out onto the board. If you cut immediately, the center can still be tender, but the slices will lose moisture fast.
Three Smart Ways to Adapt This Pork Tenderloin
Make it dairy-free and naturally gluten-free
This recipe already fits both of those lanes as written. The seasoning paste is built on oil, herbs, and spices, so there’s nothing to swap unless your spice blend contains added fillers. That means the texture stays exactly the same while the dish stays light and straightforward.
Use a different herb profile
If you’re out of rosemary, double the thyme or add a little dried sage. The pork will still roast beautifully, but the flavor shifts from piney and bold to softer and more savory. Keep the paprika in place so the crust still gets that warm, roasted color.
Skip the skillet and use the oven only
You can roast the seasoned pork tenderloins directly on a sheet pan, but you’ll lose some of the browned crust and pan flavor. It still works for a lighter hands-off dinner, especially if you’re fine with a softer exterior. Roast at the same temperature and watch the thermometer closely, since oven-only cooking can move a little faster or slower depending on the size of the tenderloins.
Double the batch for a crowd
This scales well as long as the pork still has room in the pan. If the tenderloins are jammed together, they’ll steam instead of sear, so use two skillets or brown them in batches. The oven time may increase slightly, but the thermometer still tells you exactly when they’re ready.
Storage and Reheating
- Refrigerator: Store sliced pork in an airtight container for up to 4 days. It stays juicy if you keep the pieces in their own juices or a little pan drippings.
- Freezer: It freezes well for about 2 months. Wrap tightly and freeze either whole or sliced; sliced portions reheat more evenly later.
- Reheating: Warm gently at 300°F, covered, with a spoonful of broth or pan juices so the pork doesn’t dry out. The most common mistake is blasting it in the microwave until the edges turn tough.
Answers to the Questions Worth Asking
Baked Pork Tenderloin
Ingredients
Equipment
Method
- Preheat oven to 425°F. Set up an oven-safe skillet so it can go from stovetop to oven.
- Pat pork tenderloins dry. Mix olive oil with garlic, smoked paprika, thyme, dried rosemary, onion powder, salt, and black pepper in a small bowl until it forms a paste-like coating.
- Rub the seasoning mixture all over both tenderloins. Press lightly so the herbs cling to the surface for a golden crust.
- Heat an oven-safe skillet over medium-high heat. Sear tenderloins 2 minutes per side until golden all over, adjusting the heat if oil starts to smoke.
- Transfer skillet to the oven and roast 18–22 minutes. Roast until internal temperature reaches 145°F, then look for a set, lightly browned exterior.
- Rest pork tenderloins 5 minutes before slicing and serving. The juices should redistribute, giving a blush-pink interior when sliced.