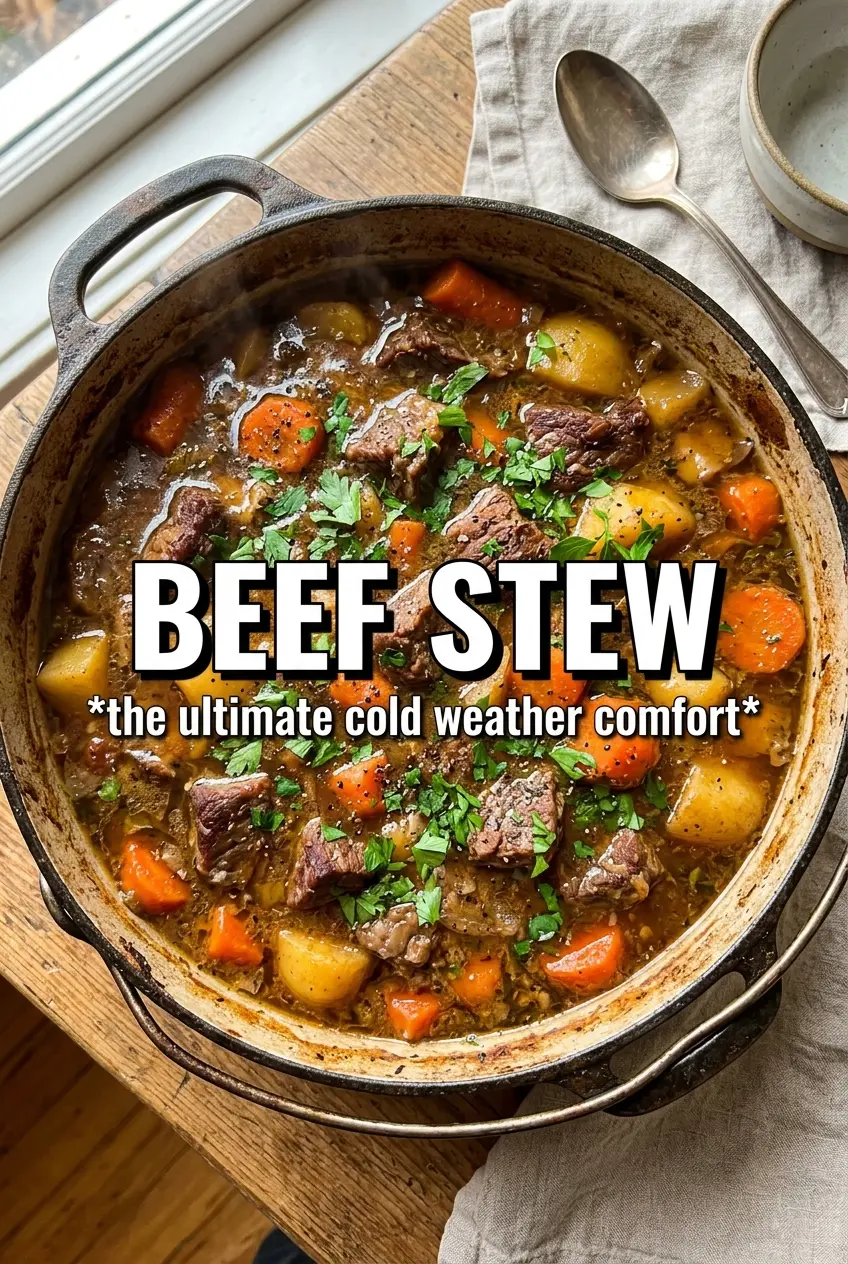
Beef stew earns its place on the table when the broth turns dark and savory, the beef goes spoon-tender, and the potatoes hold their shape without turning chalky. The best bowls have depth in every bite: browned meat, sweet carrots, soft onions, and a glossy sauce that coats the back of a spoon instead of sitting thin and watery at the bottom. This version gets there without shortcuts that flatten the flavor.
The key is building layers in the pot before the liquid goes in. Tossing the beef in flour helps the surface brown and gives the broth a little body later, while a hard sear in batches keeps the meat from steaming. Red wine and tomato paste do a lot of work here, too. They add the kind of richness you taste in the finished broth even before the stew has finished simmering.
Below you’ll find the timing that keeps the vegetables intact, the cue that tells you the beef is ready, and a few swaps that still give you a proper stew instead of a thin soup.
The broth got that deep, rich color from the wine and tomato paste, and the beef was fall-apart tender without the potatoes turning mushy. I used the full simmer time and it was perfect.
Love a stew with deep mahogany broth and tender beef? Save this Beef Stew for the nights when you want something hearty, rich, and dependable.
The Browned Bits Are What Give This Stew Its Depth
Most stew goes flat when the meat gets crowded in the pan. The beef releases moisture, the temperature drops, and you end up with gray cubes in a thin broth instead of the deep, savory base this dish needs. Searing in batches over high heat is what fixes that. The browned crust that sticks to the pan is not a problem; it’s the flavor foundation.
The flour coating helps more than people think. It encourages better browning and gives the stew just enough body once the liquids simmer together. Don’t dump the meat straight into the pot without drying it first, either. Wet beef steams before it sears, and that’s the fastest way to lose the rich taste you want here.
- Beef chuck — This cut has enough connective tissue to turn tender during a long simmer. Lean stew meat can work, but it tends to dry out before the broth has enough time to deepen.
- Red wine — It sharpens the broth and helps lift the browned bits off the bottom of the pan. Use something dry and drinkable; cooking wine gives the stew a dull, salty edge.
- Tomato paste — A quick cook in the pan takes away the raw bite and adds a darker, richer backbone. That step matters more than the canned tomatoes themselves.
- Yukon gold potatoes — They stay creamy without breaking down as fast as russets. If you swap them, choose another waxy potato or add the softer variety later.
What Each Ingredient Is Actually Doing in This Recipe

- Primary ingredient (the star) — Quality matters most. Choose the best you can find.
- Cooking medium (oil, butter, or broth) — This carries flavors and prevents dryness.
- Seasonings (salt, pepper, spices, herbs) — Layer flavors so nothing overpowers. Build depth gradually.
- Aromatics (garlic, onion, herbs) — Cook with fat to bloom flavors. Become the foundation.
- Supporting ingredients — Complement the main ingredient without overpowering it.
- Sauce or liquid (if applicable) — Brings flavors together. Balance richness with acid.
- Acid (lemon, vinegar, wine, or other) — Brightens and prevents flat-tasting results.
- Final finish (garnish, glaze, or sauce) — Prevents one-dimensional taste and adds visual appeal.
Building the Pot in the Right Order
Searing the Beef Without Steaming It
Pat the beef dry, toss it with the flour, salt, and pepper, then sear it in hot oil in small batches. The cubes should pick up a deep brown crust before you move them, and the pan should audibly sizzle the whole time. If the meat starts to look pale and wet, the heat is too low or the pan is too crowded. Pull the browned beef out and leave the drippings in the pot.
Softening the Vegetables Before the Liquid Goes In
Add the onion, carrots, and celery to the same pot and cook them until the onion turns translucent and the edges start to pick up color. Stir in the garlic and tomato paste for a minute or two until the paste darkens slightly and smells sweet instead of sharp. That extra cooking time matters because raw tomato paste tastes tinny, and raw garlic can dominate the whole stew. Use the spoon to scrape the bottom as the vegetables release some moisture and loosen the browned bits.
Letting the Simmer Do the Heavy Lifting
Once the wine, broth, tomatoes, Worcestershire, thyme, bay leaves, and beef go back in, bring the pot just to a boil, then lower it to a gentle simmer and cover it. You want a steady burble, not a hard boil. A rough boil tightens the meat instead of softening it, and the broth can reduce too fast before the chuck has time to turn tender. After about an hour, the beef should yield easily when pressed with a spoon.
Adding the Potatoes and Peas at the End
The potatoes go in after the beef has already had most of its time, because they only need about 20 minutes to cook through. Add the peas in the last few minutes so they stay bright and sweet instead of wrinkled and dull. If you add them earlier, they lose their color and turn mushy. Taste at the end and adjust the salt and pepper only after the broth has reduced and concentrated.
How to Adapt This Stew Without Losing the Soul of It
Dairy-Free and Naturally Gluten-Free
This stew already fits both of those needs as written if you use a gluten-free flour blend or skip the flour and dust the beef lightly with cornstarch instead. The texture will be a little less velvety without wheat flour, but the broth still gets plenty of body from the simmered vegetables and tomato paste.
No Wine Version
Swap the wine for more beef broth plus a teaspoon of red wine vinegar or balsamic at the end. You’ll lose a little of the deep, rounded acidity that wine brings during the simmer, so the finished stew tastes slightly softer and less complex, but it still works.
Make It Thicker
If you want a stew that clings more heavily to the spoon, simmer it uncovered for the last 15 minutes. That reduces the broth without changing the flavor balance, but keep an eye on it so the potatoes don’t overcook and collapse.
Storage and Reheating
- Refrigerator: Keeps well for 4 days. The broth thickens as it chills, and the flavor gets even deeper by day two.
- Freezer: Freezes well for up to 3 months. Cool it completely first, then portion it into airtight containers. The potatoes soften a little after thawing, but the stew still holds up.
- Reheating: Warm it gently on the stove over medium-low heat with a splash of broth or water if needed. Don’t boil it hard again or the beef can tighten and the potatoes can break apart.
Questions I Get Asked About This Recipe
Beef Stew
Ingredients
Equipment
Method
- Toss the beef chuck with the all-purpose flour until lightly coated, then shake off excess flour.
- Heat the olive oil in a Dutch oven over high heat until shimmering, then sear the beef in batches until deeply browned, about 3-5 minutes per batch.
- Remove the browned beef to a plate, leaving any browned bits in the pot.
- Add the diced onion, thickly sliced carrots, and sliced celery, then sauté over medium-high heat for 5 minutes.
- Add the minced garlic and tomato paste, then cook for 2 minutes, stirring, until fragrant and slightly darkened.
- Pour in the red wine to deglaze, scraping up the browned bits, then let simmer 2-3 minutes to reduce slightly.
- Return the beef to the pot and add the beef broth, diced tomatoes, Worcestershire, dried thyme, and bay leaves.
- Bring everything to a boil over high heat, then reduce to low, cover, and simmer for 60-75 minutes until the beef is very tender.
- Add the cubed Yukon gold potatoes, then cover and simmer for 20 minutes until tender.
- Add the frozen peas and cook for 3 minutes until bright green and hot through.
- Remove the bay leaves, then season with salt and pepper to taste.