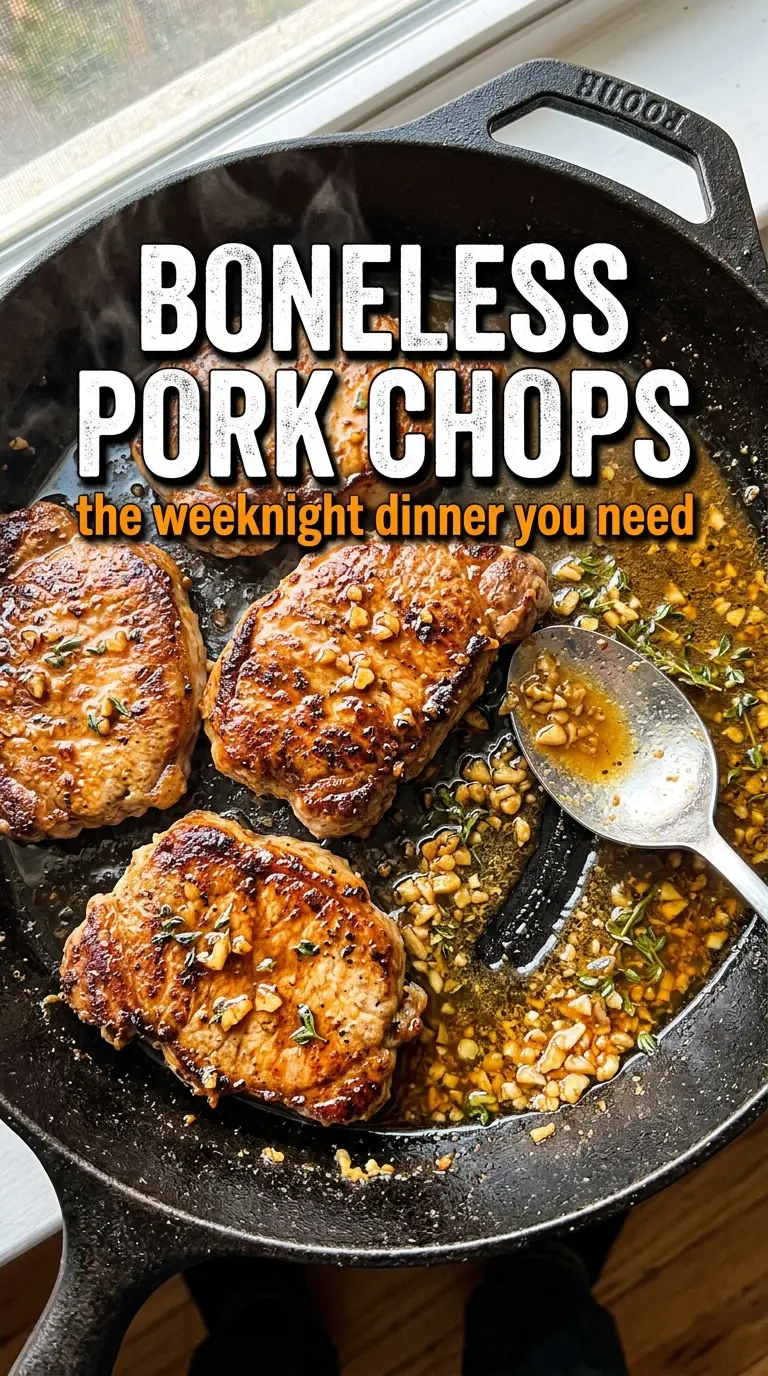
Boneless pork chops get a bad reputation for drying out, but when they’re cooked hard and fast in a hot skillet, they turn into something much better than the pale, bland version most people remember. The outside picks up a deep golden crust, the center stays juicy, and the pan drippings turn into a light, buttery sauce that clings to every slice. It’s the kind of dinner that looks like you paid more attention than you actually did.
The trick is starting with dry chops and seasoning them before they hit the pan. That surface moisture is the enemy of browning, and a properly heated skillet does most of the work for you. The garlic, paprika, and thyme aren’t there to cover the pork; they build a savory shell and give the butter something worth carrying into the pan sauce.
Below, I’ll show you the exact sear you’re looking for, how to baste without burning the garlic, and what temperature tells you the pork is done before it crosses into tough territory.
The chops browned beautifully in the skillet and stayed juicy all the way through. I loved how the butter, garlic, and thyme turned the drippings into a quick sauce instead of letting them burn in the pan.
Save these skillet boneless pork chops for the night you want a fast pan-seared dinner with juicy centers and garlicky butter drippings.
The Reason Boneless Pork Chops Stay Juicy Instead of Turning Dry
Most dry pork chops happen for two reasons: the pan wasn’t hot enough to brown the surface fast, or the chop stayed on the heat long after it was done. Boneless chops are lean and cook quickly, so the difference between juicy and tough can be under two minutes. That’s why the method here leans on a hard sear first, then a short finish with butter and herbs.
Three-quarters-inch chops are the sweet spot for this method. Thin chops overcook before they get much color, and thicker ones need a longer finish that can drag the whole skillet past the right temperature. The final rest matters too; even a three-minute pause keeps the juices from running out the second you cut into them.
- Boneless pork chops — Look for chops that are evenly thick so they cook at the same pace. If yours are thinner than 3/4 inch, cut the first side sear by a minute and watch the center closely.
- Smoked paprika, garlic powder, and onion powder — This seasoning mix gives the chops a savory crust without adding a wet marinade that would block browning. Regular paprika works, but smoked paprika adds a deeper, almost grilled note.
- Olive oil and butter — The oil handles the high heat for the sear, then the butter brings richness and helps baste the top of the chops. Don’t start with butter alone or it’ll brown too fast before the pork has time to color.
- Garlic and thyme — These flavor the butter at the end, which is the safest place for them. If garlic goes in too early, it burns and turns bitter before the chops finish cooking.
- Lemon wedges — A squeeze at the table wakes up the butter and cuts through the richness. It’s not required, but it makes the skillet drippings taste brighter and less heavy.
What Each Ingredient Is Actually Doing in This Pork Dish
- Pork (cut properly for method) — Pat dry so it browns instead of steams. Even thickness ensures uniform cooking.
- Oil or butter (the browning medium) — High-heat oil essential for proper searing. Creates pan flavor.
- Seasonings (salt, pepper, spices) — Build flavor boldly. Pork carries the entire profile.
- Aromatics (garlic, onion, herbs) — Cook with fat to bloom flavors. Become the foundation.
- Sauce or braising liquid (if using) — This keeps lean pork from drying. Balance richness with acid.
- Vegetables (if using) — Layer by cooking time. Hard vegetables first so everything finishes together.
- Acid (vinegar, wine, or citrus) — This brightens sauce and prevents heavy flavor. Add near end.
- Proper doneness (145°F with slight pink center) — Pork is safe here and stays juicy. Higher temps dry it out.
How to Build the Skillet Sear and Finish Without Overcooking the Pork
Seasoning the Surface
Pat the chops dry first, then season both sides evenly. Dry meat browns; damp meat steams. If the seasoning looks uneven, press it lightly into the surface with your hand so it sticks before the pork hits the skillet.
Getting the First Side Deeply Golden
Heat the oil until it shimmers, then lay the chops in and leave them alone. The first side needs 4 to 5 minutes of uninterrupted contact to build that crust. If you move them too early, they’ll stick and pale spots will be all that’s left behind.
Butter Basting at the End
Once you flip the chops, add the butter, garlic, and thyme and tilt the pan so the butter pools. Spoon that butter over the top repeatedly as the pork finishes cooking. If the garlic starts to darken fast, lower the heat; this stage should smell nutty and savory, not sharp or burnt.
Knowing When They’re Done
The safest target is 145°F in the thickest part, then a short rest off the heat. At that point the center may still look faintly pink, and that’s fine. If you keep cooking until every trace of pink disappears, the chops will eat dry by the time they reach the plate.
What to Change When You Want These Pork Chops a Different Way
Dairy-Free Version
Use all olive oil instead of butter and finish with lemon at the table. You lose some of the creamy richness, but the chops still brown well and the pan drippings stay light and clean.
Garlic and Herb Swap
Rosemary works in place of thyme, and fresh sage gives the butter a deeper, earthier edge. Keep the herb amount modest so the pan sauce still tastes like pork first, not like an herb mix.
Lighter Seasoning for Sensitive Palates
Skip the smoked paprika and lean on garlic powder, onion powder, salt, and pepper. The chops will taste cleaner and less smoky, which works well if you’re serving them with mashed potatoes or rice that already has a lot going on.
Scaling Up for More People
Cook in batches if needed. Crowding the pan drops the heat and prevents the crust from forming, so a second round in a hot skillet gives better texture than squeezing everything in at once.
Storage and Reheating
- Refrigerator: Store leftovers in an airtight container for up to 3 days. The crust softens a little, but the pork stays flavorful.
- Freezer: You can freeze cooked pork chops, but the texture comes back a little firmer after thawing. Wrap tightly and freeze for up to 2 months for best results.
- Reheating: Rewarm gently in a covered skillet over low heat with a splash of water or broth. High heat dries out the lean meat fast, so keep the burner low and stop as soon as the chops are warmed through.
Questions I Get Asked About This Recipe
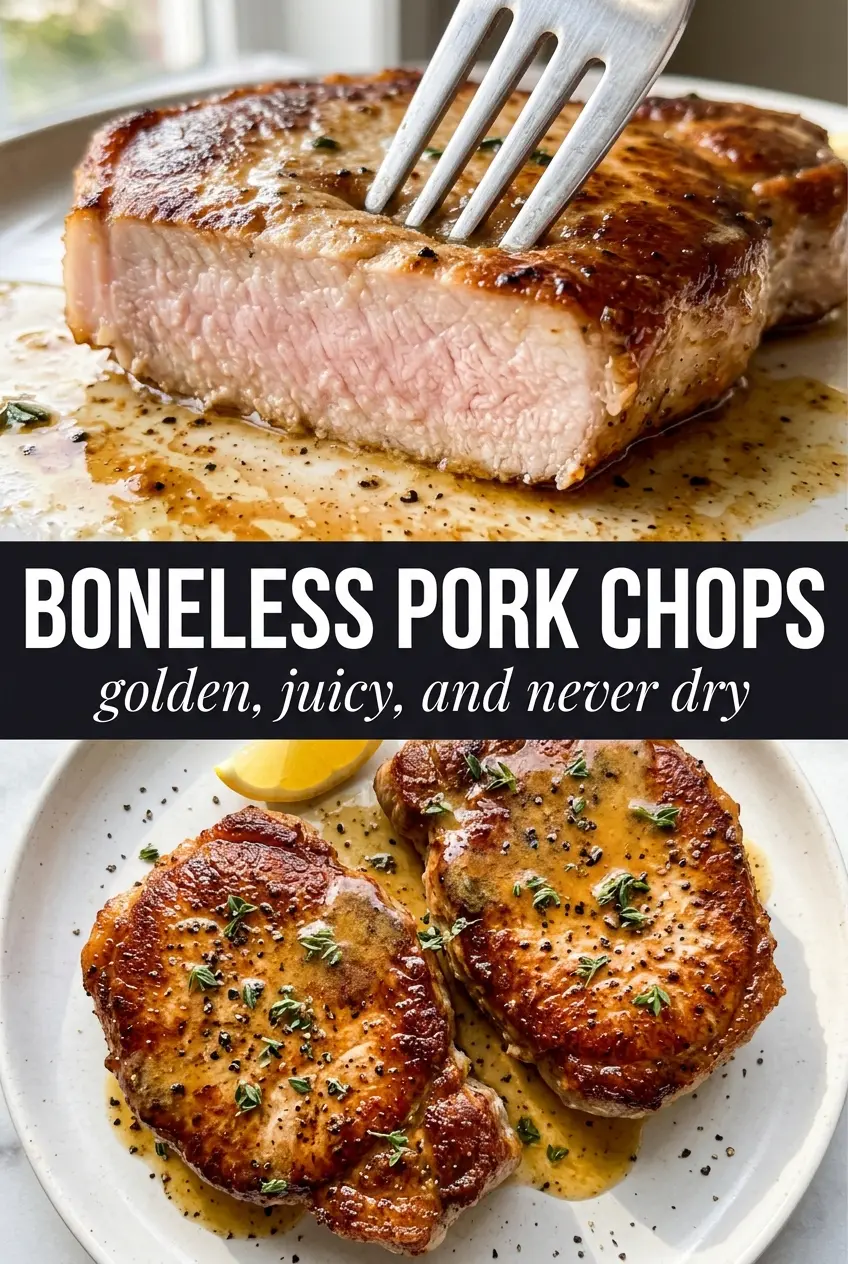
Boneless Pork Chops with Golden Pan-Seared Crust
Ingredients
Equipment
Method
- Pat the pork chops dry, then season both sides with garlic powder, smoked paprika, onion powder, salt, and black pepper.
- Heat the olive oil in a cast iron skillet over medium-high heat until shimmering.
- Add the pork chops and cook without moving for 4–5 minutes until a deep golden crust forms, then flip.
- Add the butter, smashed garlic, and thyme sprigs to the pan, then baste the chops continuously for 3–4 minutes until cooked through and the internal temperature reaches 145°F, with the pan butter bubbling around the meat.
- Rest the pork chops for 3 minutes before serving so the juices redistribute.
- Serve with lemon wedges alongside, spooning the pan drippings over the chops if desired.