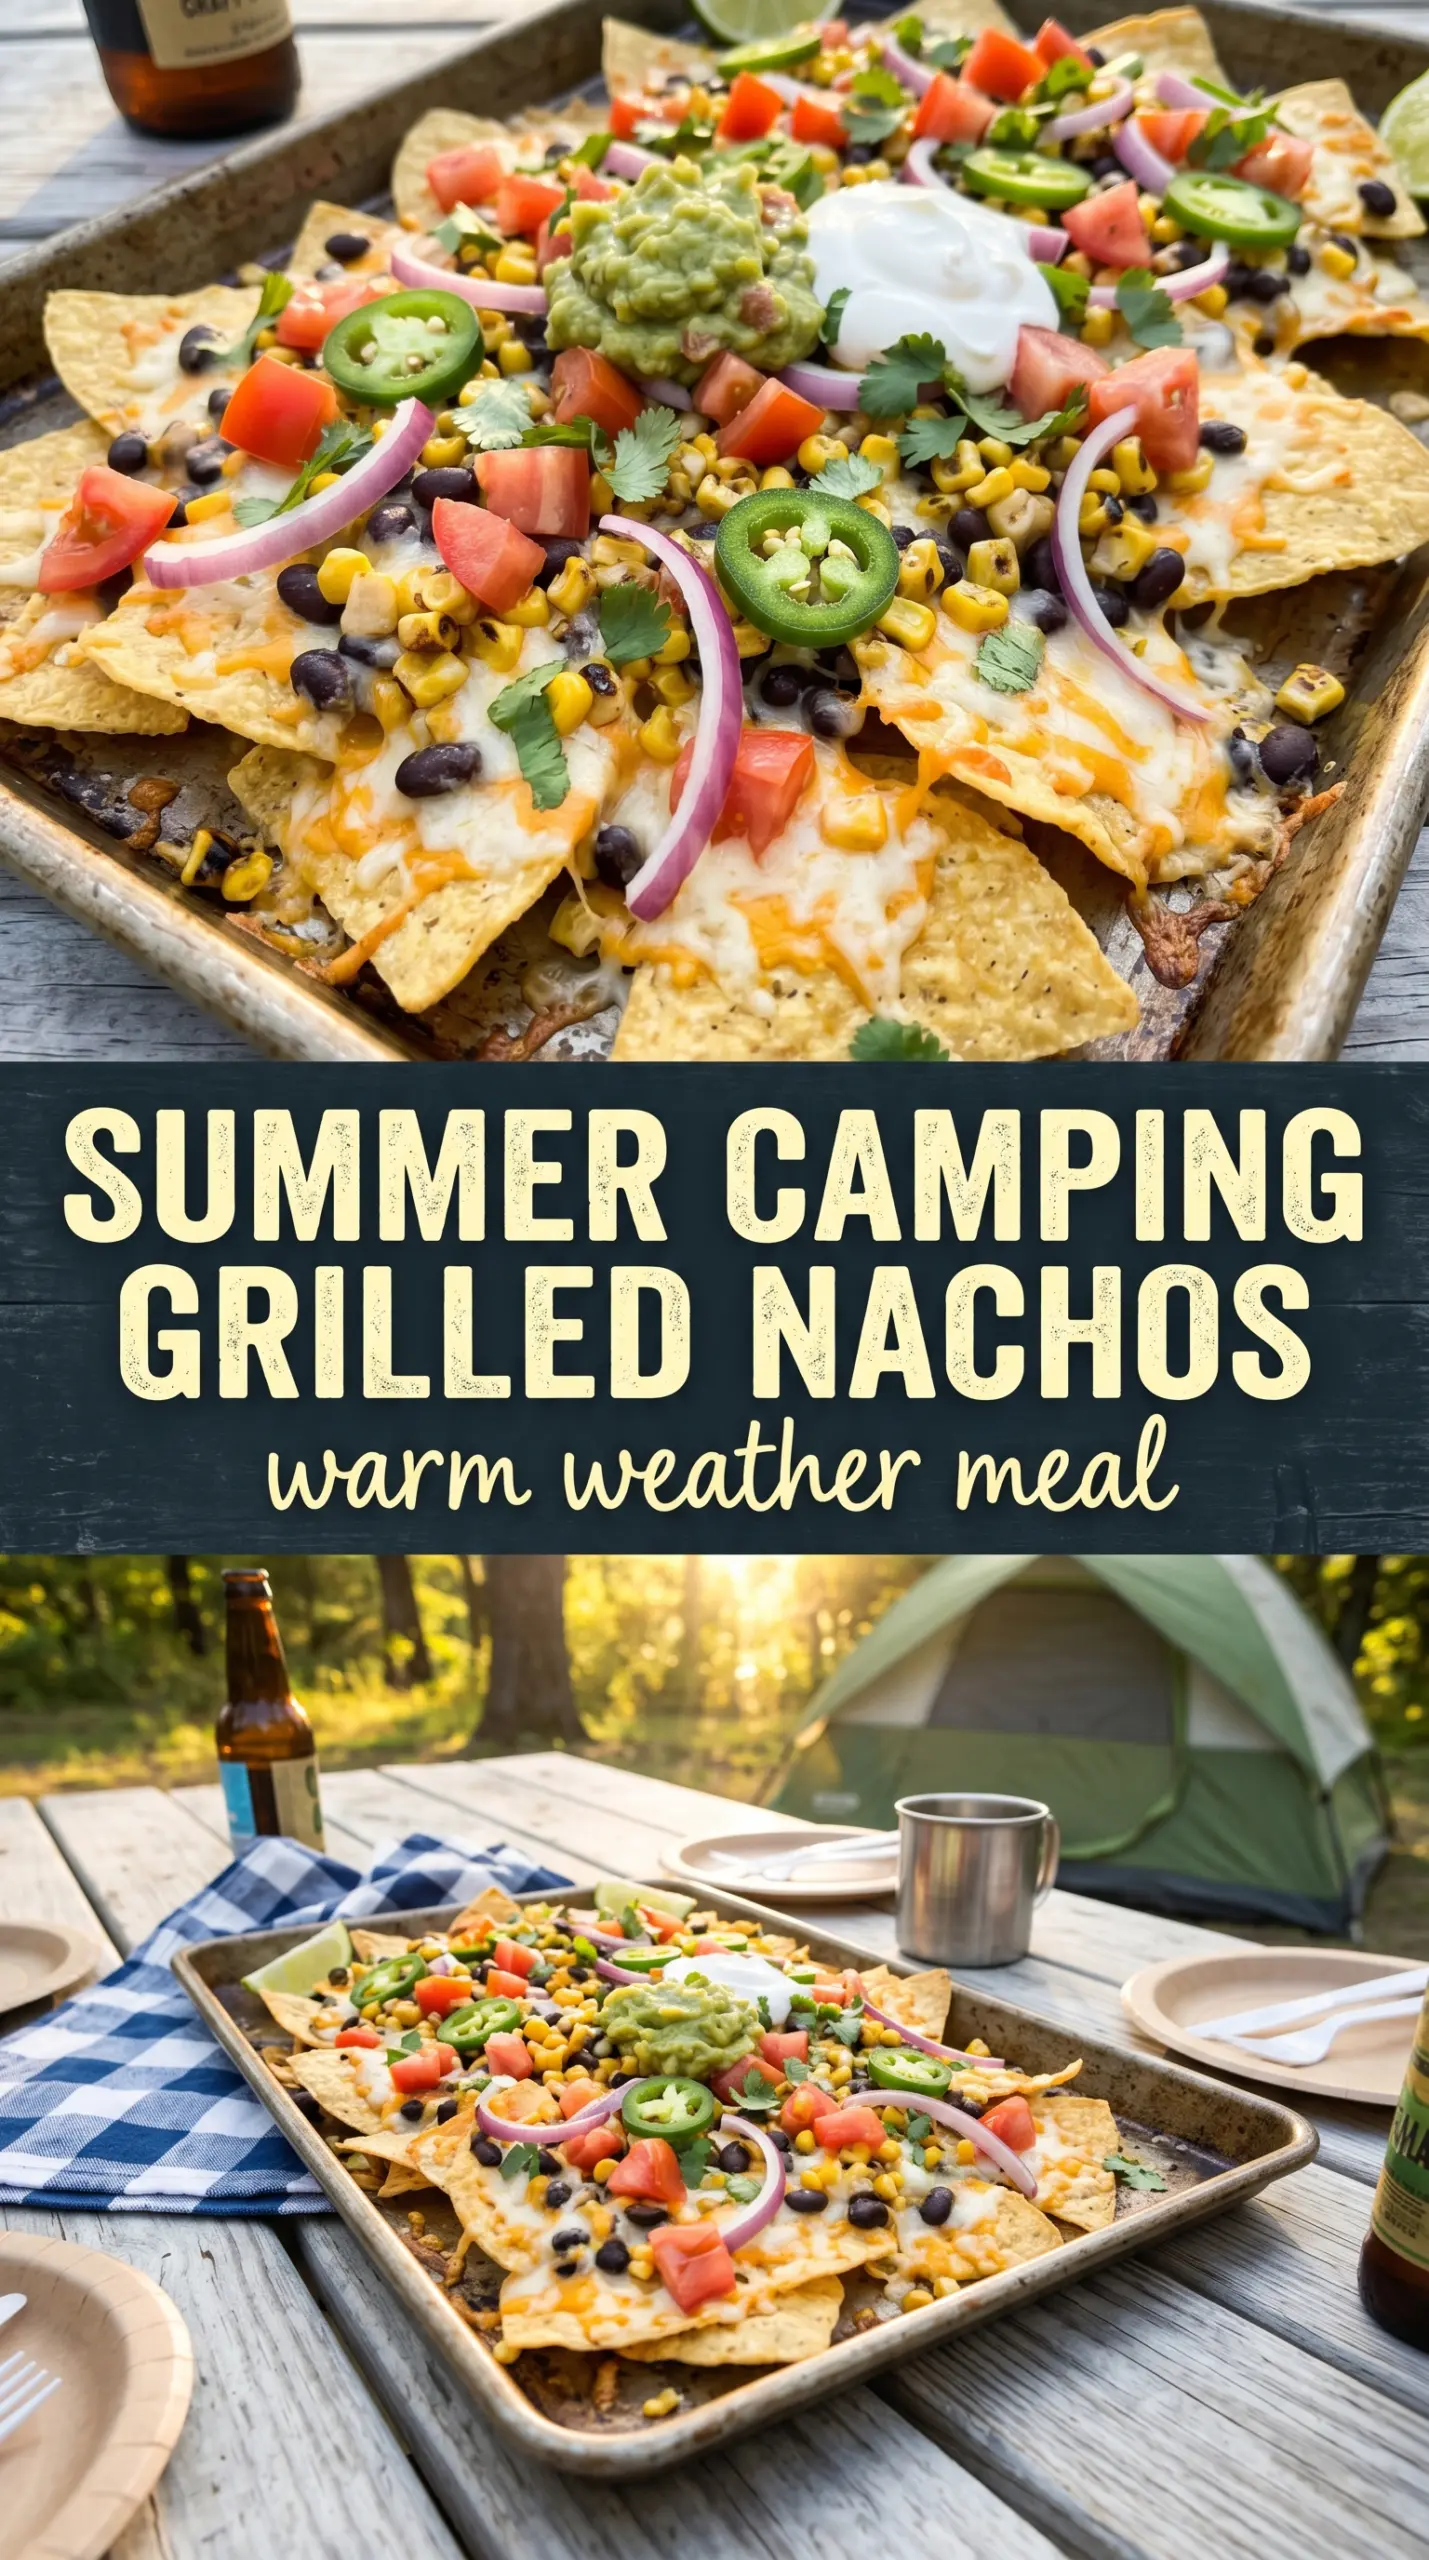
Camping grilled nachos hit the table with the kind of melted, messy payoff that makes people hover around the fire and keep grabbing “just one more” chip. The cheese gets gooey in the middle while the chips on the edges pick up a little toast from the heat, and that mix of textures is exactly what makes this version worth hauling out to the campsite. It’s fast, hands-on, and built for the kind of hungry crowd that appears the second the pan starts bubbling.
The trick is layering. Chips on the bottom catch the drips, but they also turn soft if you bury them under too much wet topping, so this version keeps the salsa and sour cream for the end. The beans and seasoned beef add enough heft that the nachos eat like a meal, not just a snack, and using a disposable aluminum pan makes cleanup easy when the fire dies down. A medium campfire heat matters too; too hot and the cheese scorches before it melts through.
Below, I’ve included the little details that keep campfire nachos from turning soggy or burned, plus a few easy variations if you want to change the protein or make them meatless.
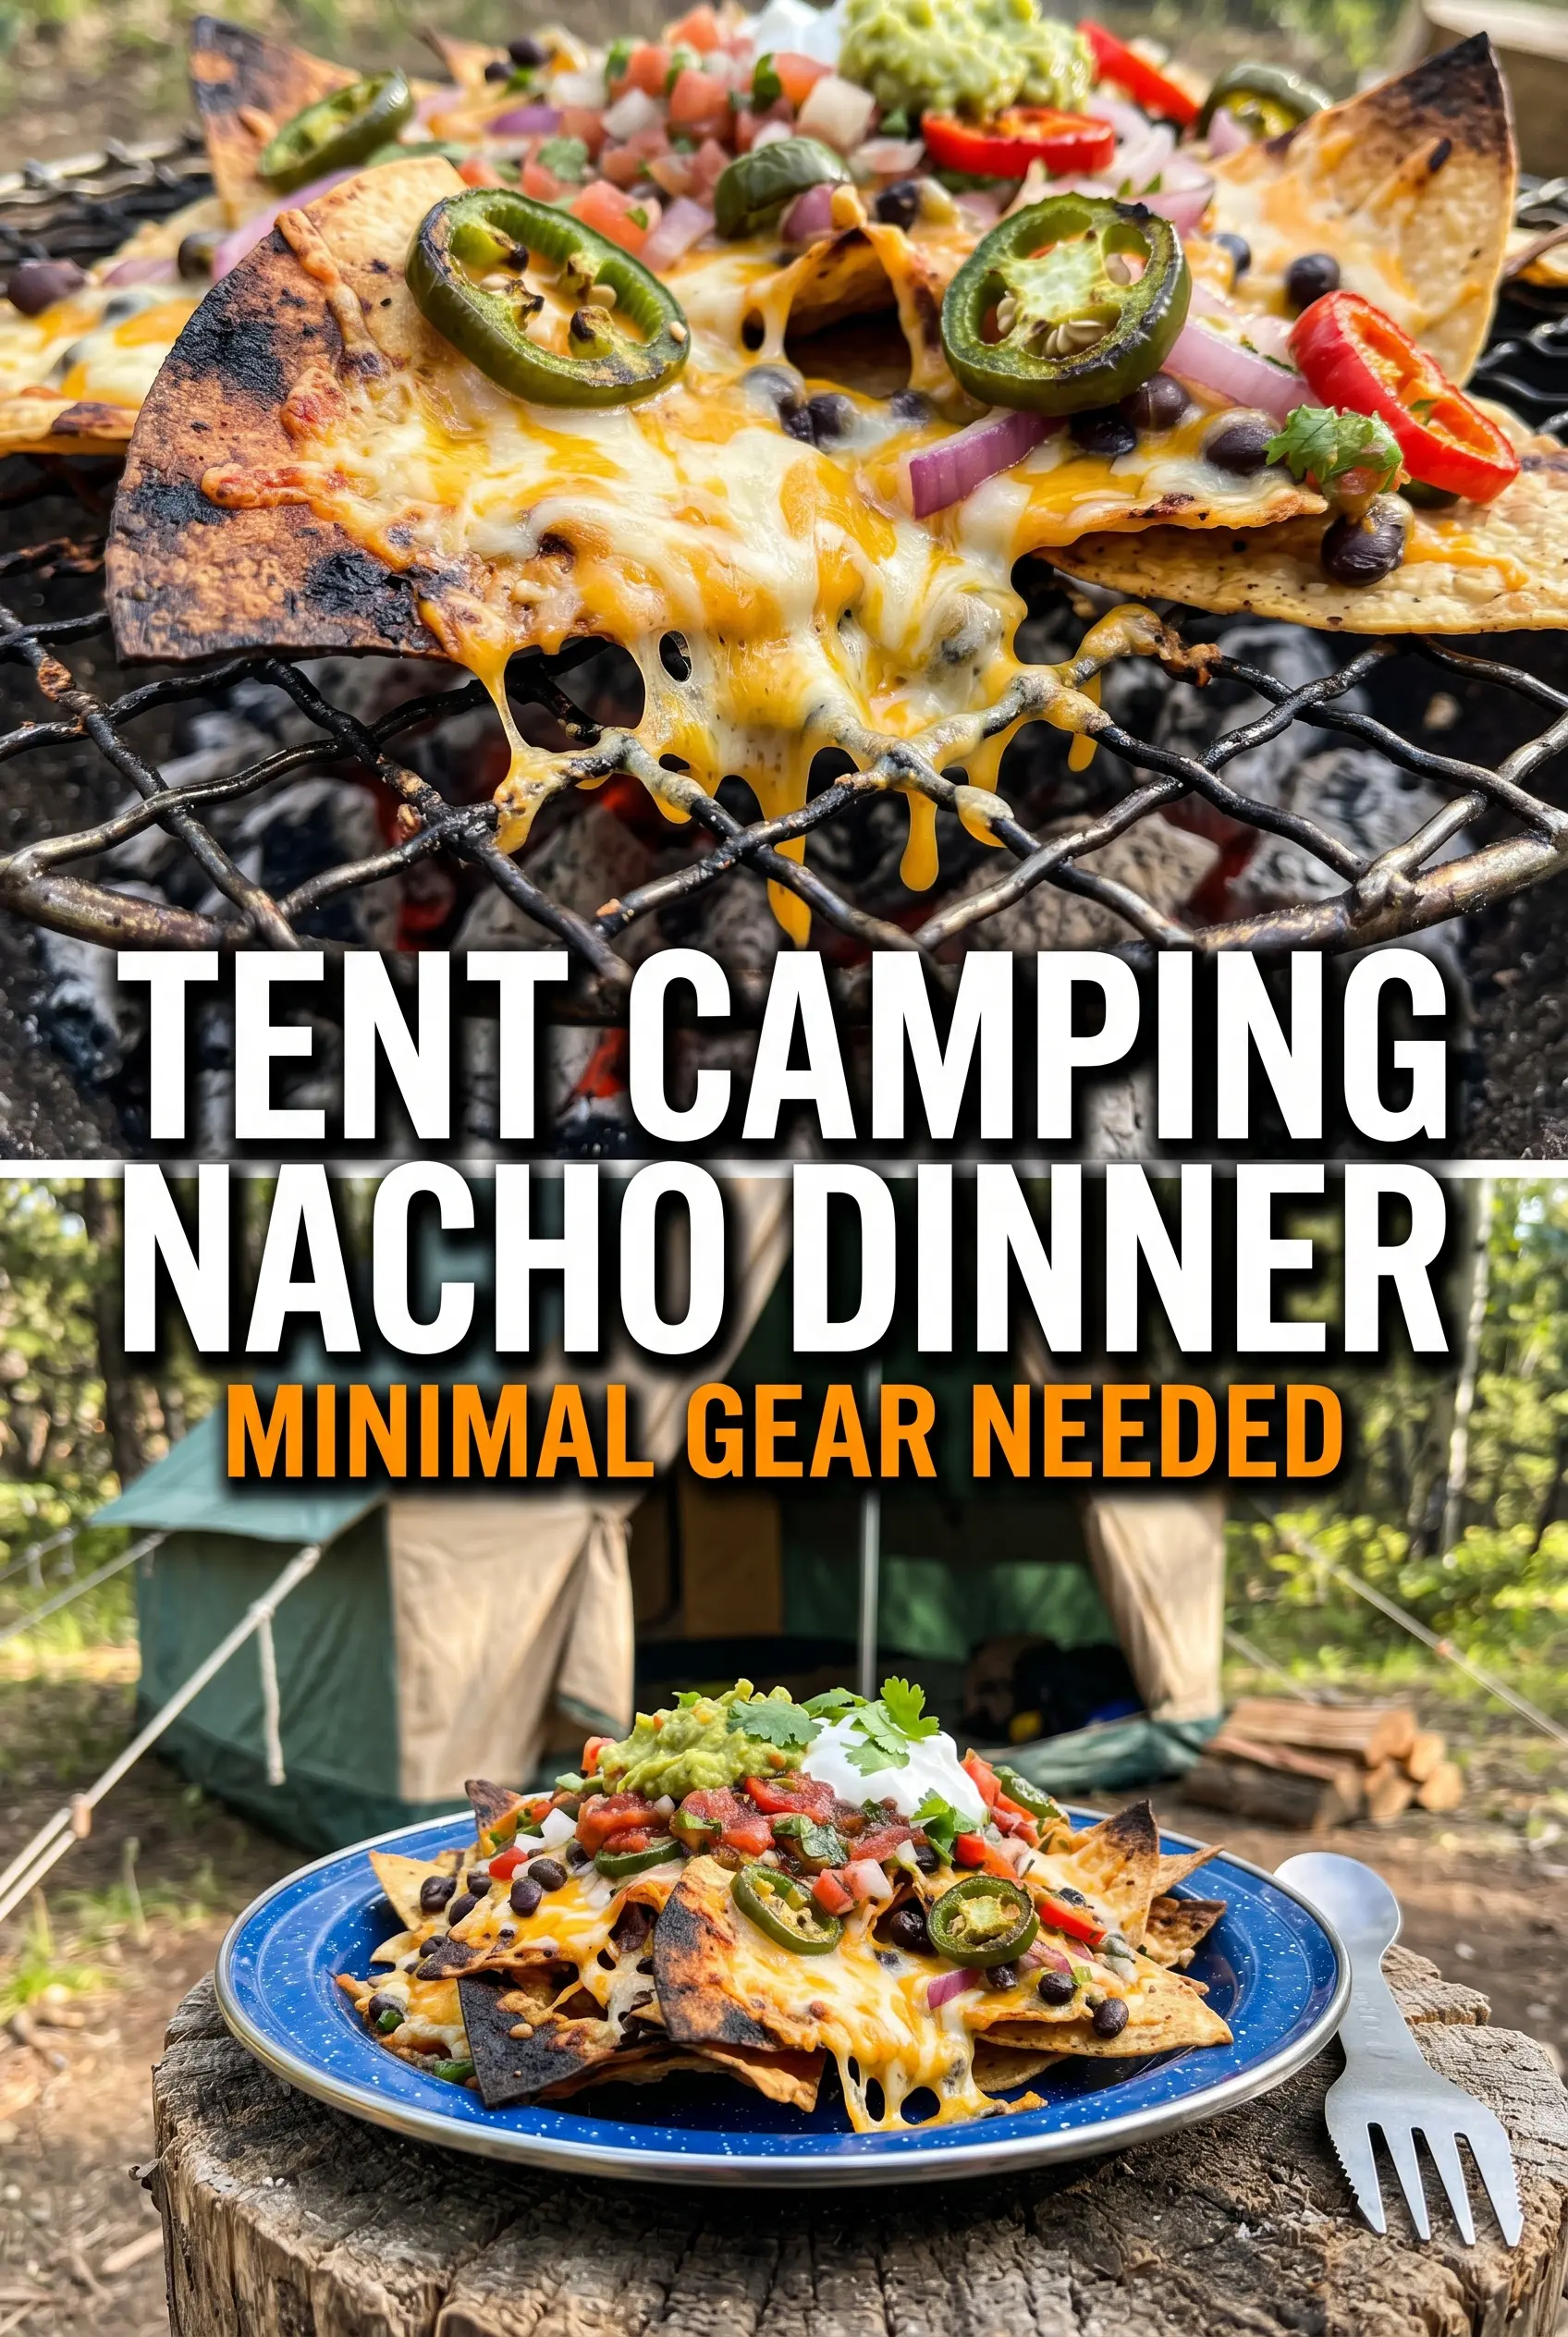
The cheese melted all the way through and the bottom chips stayed crisp enough to scoop instead of collapsing. We made these over the fire after a long hike and everyone went back for seconds.
Loaded campfire nachos with melted cheese, seasoned beef, and a crisp-soft chip edge are the kind of smoky, shareable snack worth pinning for your next outdoor cookout.
The Trick to Keeping Campfire Nachos Crisp Enough to Scoop
The biggest failure with nachos over a fire is obvious: they steam themselves into a soft layer before the cheese has a chance to melt. A disposable aluminum pan helps because it heats quickly and evenly, but the real fix is keeping the heat at medium and limiting the wet toppings until the end. Salsa and sour cream belong on top after the pan comes off the grate, not under the cheese, where they can turn the whole tray soggy.
Layering also matters more than people think. When you build in two thinner layers instead of dumping everything in one pile, the cheese reaches the chips below and the beans and beef stay distributed instead of sinking into the center. That means less digging around for the good stuff and fewer bare chips at the top.
What Each Ingredient Is Actually Doing in These Nachos
- Tortilla chips — Use sturdy chips here. Thin chips break under the weight of the beef and beans before you ever get to the fire, while thicker chips hold their shape and still give you a crisp bite around the edges.
- Mexican cheese blend — This melts smoothly and gives you that stretchy, bubbling top everyone wants. Pre-shredded is fine for camp cooking, and the anti-caking coating actually helps the cheese melt without clumping into one big rubbery mass.
- Black beans — They add body and make the pan feel like a meal. Drain them well so extra liquid doesn’t pool at the bottom and soften the chips.
- Ground beef — Season it before it goes into the pan so the meat carries the flavor instead of relying on toppings. This is the one ingredient that really changes the heartiness of the dish, and you can swap in taco-seasoned turkey if that’s what you have.
- Salsa, sour cream, jalapeño, and cilantro — These finish the nachos after cooking, where they stay bright and fresh. If you add them too early, the salsa runs and the sour cream thins out from the heat.
Building the Pan So the Bottom Chips Don’t Turn to Mush
Layering the Base
Start with half the chips in a single layer across the pan, then add half the cheese, beans, and beef. Repeat with the remaining ingredients so every chip gets some heat and coverage without ending up buried under a wet pile. The pan should look full but not pressed down; if you pack it tight, the center steams before the top melts.
Melting Over the Fire
Set the pan on a grill grate over medium campfire heat and watch for the cheese to go glossy, then soft, then fully bubbling at the edges. If the bottom chips start darkening fast, move the pan to a cooler part of the grate or raise it slightly. You want gentle, even heat here, not direct flame licking the pan.
Finishing at the Table
Pull the pan off the fire as soon as the cheese is melted through and the edges are bubbling. Then spoon on the salsa, sour cream, jalapeños, and cilantro while everything is still hot enough to loosen the cheese but not so hot that the toppings disappear into the pan. Finish with lime wedges for squeezing over each serving; that hit of acid keeps the whole pan from tasting heavy.
How to Adapt These Campfire Nachos for Different Tents and Tastes
Make Them Vegetarian
Skip the ground beef and double the black beans, or add sautéed peppers and onions if you’ve got a skillet at camp. You’ll lose some richness, but the nachos still eat like a full appetizer because the beans give enough heft to stand up to the cheese.
Make Them Gluten-Free
Most tortilla chips are naturally gluten-free, but check the bag if you’re cooking for someone sensitive. The rest of the recipe is already a clean fit, so this is one of the easiest campfire snacks to keep gluten-free without changing the method at all.
Swap the Beef for Turkey or Chorizo
Ground turkey gives you a lighter pan with the same structure, while chorizo brings more spice and a little extra grease, which makes the chips richer but also means you should drain it well. Either one works as long as it’s cooked before it goes into the pan, since the nachos only need enough heat to melt the cheese.
Storage and Reheating
- Refrigerator: Leftovers keep for 2 days, but the chips soften as they sit.
- Freezer: These don’t freeze well once assembled; the chips lose their texture and the sour cream doesn’t hold up.
- Reheating: Reheat the meat, beans, and cheese mixture separately in a skillet or foil pan, then spoon it over fresh chips. Microwaving the whole pan turns the chips limp fast.
Answers to the Questions Worth Asking
Camping Grilled Nachos
Ingredients
Equipment
Method
- Line a large disposable aluminum pan with half the tortilla chips for an even crunchy base.
- Layer in half the shredded Mexican cheese blend, half the black beans, and half the cooked and seasoned ground beef.
- Repeat the layers with the remaining tortilla chips, remaining cheese blend, remaining black beans, and remaining ground beef.
- Place the pan on the grill grate over medium campfire heat to preheat the chips and start melting the cheese.
- Cook for 8-10 minutes, until the cheese is fully melted and actively bubbly at the edges with a lightly toasted top.
- Remove the pan from the heat so the toppings stay fresh and the sour cream doesn’t over-melt.
- Top immediately with salsa, sour cream, sliced jalapeños, and chopped cilantro for bright, layered flavor.
- Serve right away with lime wedges on the side to squeeze over each bite.