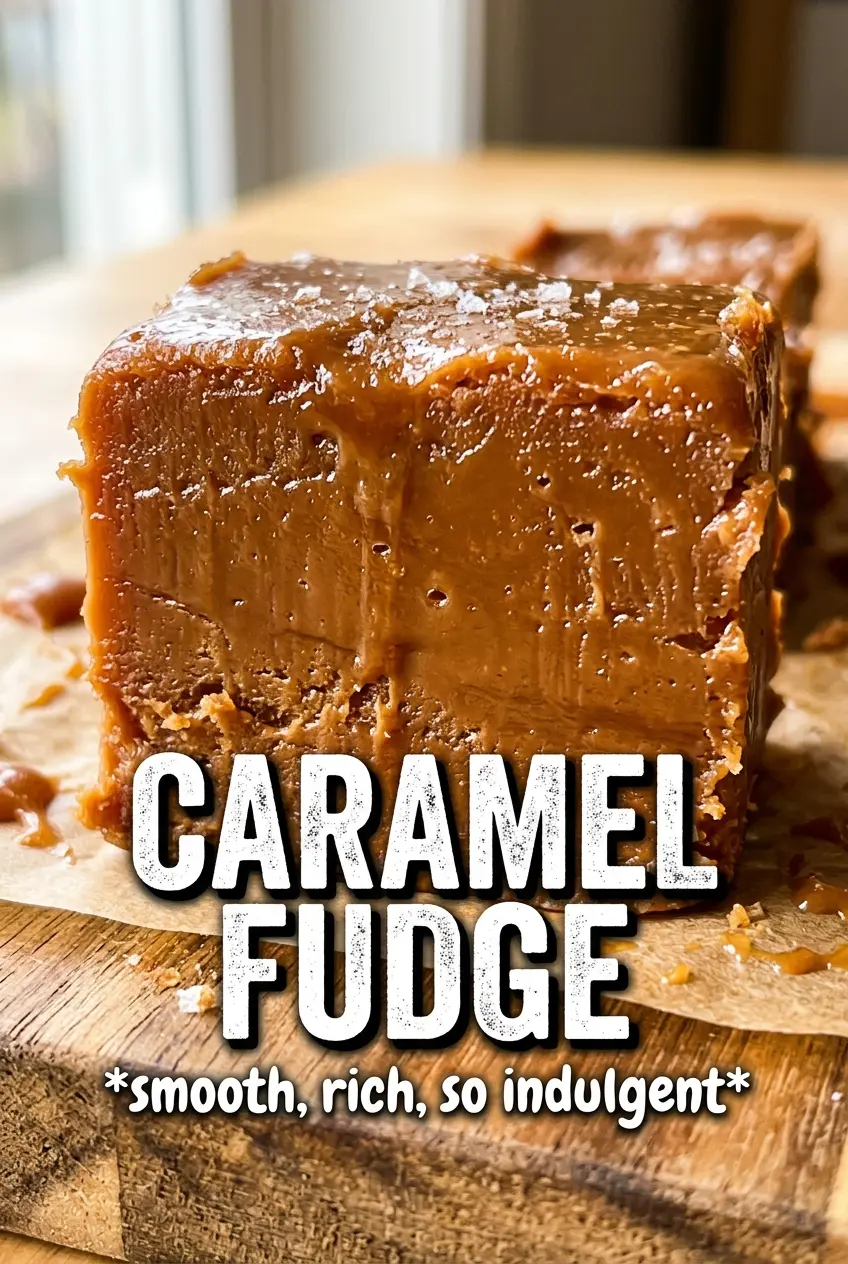
Caramel fudge lands right in the sweet spot between candy and dessert: dense, silky, and sliceable with a clean caramel finish that melts as soon as it hits your tongue. The texture is what makes it worth making. When it’s cooked to the right temperature, it sets into glossy squares with a firm bite that still gives easily, and the flaky sea salt on top keeps each piece from leaning too sweet.
This version works because the sugar, corn syrup, butter, cream, and sweetened condensed milk all do different jobs in the pot. The corn syrup helps keep the sugar from crystallizing, while the condensed milk adds body and that deep, cooked-milk richness that makes the fudge taste fuller than a basic caramel candy. The candy thermometer matters here. Once the mixture hits soft-ball stage, you’re setting the texture, not just finishing the cooking.
Below, I’ve included the temperature cue that matters most, a few smart ingredient notes, and the storage details that help the fudge cut neatly instead of turning sticky at the edges.
The caramel came out smooth and glossy, and once it hit 239°F it set up perfectly after chilling. The sea salt on top made each square taste like a proper candy shop fudge.
Save this caramel fudge for the glossy soft-ball stage and that salty-sweet finish that cuts cleanly into perfect squares.
The Soft-Ball Stage Is the Whole Game Here
With fudge, the difference between creamy and sticky comes down to the exact temperature, not just how long it cooked. If you pull it too early, the squares stay loose and won’t hold a clean edge. Go too far, and the texture turns dry and a little sandy instead of smooth and dense. The candy thermometer gives you the one cue that matters more than the clock.
This recipe is also built to resist graininess. Corn syrup helps keep the sugar molecules from locking up, and the condensed milk gives the mixture enough body that it can take the heat without separating. Stirring constantly at the start keeps everything evenly dissolved, then frequent stirring near the end keeps the bottom from scorching while the fudge thickens.
- Candy thermometer — This is the easiest way to land on 238-240°F without guessing. If your thermometer runs hot or cold, test it in boiling water before you start.
- Light corn syrup — It doesn’t make the fudge taste like corn syrup; it keeps the sugar smooth and helps the texture stay glossy instead of grainy.
- Sweetened condensed milk — This adds richness and helps the fudge set with a creamy bite. Evaporated milk won’t give the same result here.
- Flaky sea salt — Use the good stuff. It sits on top, so the texture matters just as much as the flavor.
What Each Ingredient Is Actually Doing in This Recipe

- Primary ingredient (the star) — Quality matters most. Choose the best you can find.
- Cooking medium (oil, butter, or broth) — This carries flavors and prevents dryness.
- Seasonings (salt, pepper, spices, herbs) — Layer flavors so nothing overpowers. Build depth gradually.
- Aromatics (garlic, onion, herbs) — Cook with fat to bloom flavors. Become the foundation.
- Supporting ingredients — Complement the main ingredient without overpowering it.
- Sauce or liquid (if applicable) — Brings flavors together. Balance richness with acid.
- Acid (lemon, vinegar, wine, or other) — Brightens and prevents flat-tasting results.
- Final finish (garnish, glaze, or sauce) — Prevents one-dimensional taste and adds visual appeal.
What Each Ingredient Is Doing in the Pan
The sugar is the structure, but the butter and cream keep it from feeling hard and brittle. Butter adds flavor and helps the finished candy feel smooth on the palate, while the heavy cream keeps the mixture rich enough to cook into fudge instead of a simple caramel sauce. If you swap in milk, the mixture will be thinner and less forgiving at the stove.
The vanilla goes in off the heat so it stays fragrant instead of cooking off, and the salt inside the fudge sharpens the caramel notes before the flaky salt even hits the top. That topping salt is not decoration. It gives the first bite a little snap and keeps the sweetness from flattening out.
- Heavy cream — Use real heavy cream here. Half-and-half can work in a pinch, but the fudge won’t feel as lush or set as cleanly.
- Unsalted butter — Unsalted butter lets you control the salt level. If you only have salted butter, reduce the added salt slightly.
- Sweetened condensed milk — This is the ingredient that makes the fudge taste cooked and creamy instead of just sugary. Don’t replace it with plain milk and sugar.
- Vanilla extract — Stir it in after the heat is off. If you add it too early, the aroma gets muted.
Getting the Fudge to Set Cleanly, Not Grainy or Sticky
Building the Base Without Crystals
Line the pan first and butter it generously so you’re not scrambling when the fudge is ready. Combine everything except the vanilla and flaky salt in a heavy-bottomed saucepan, then bring it up over medium heat while stirring constantly. The goal is to dissolve the sugar evenly before the mixture has a chance to boil hard around the edges. If you see sugar clinging to the sides of the pan, brush it down or it can seed crystallization later.
Cooking to the Right Temperature
Once the mixture boils, keep stirring frequently and watch the thermometer, not the bubbles. You’re looking for 238-240°F, which is soft-ball stage; that’s what gives the fudge enough structure to cut into squares after chilling. If you stop at 230°F, it may never set firmly. If it shoots past 240°F, the texture gets drier and less creamy.
Finishing Before It Grabs
Take the pan off the heat the second it reaches the target temperature, then stir in the vanilla and salt right away. The mixture will still be hot enough to thin slightly as you work, so pour it into the pan without delay. Sprinkle the flaky salt over the top while the surface is still warm enough for it to cling. Let it cool at room temperature first, then refrigerate to finish setting so the center firms without becoming brittle.
How to Adapt This Caramel Fudge Without Ruining the Texture
Dairy-Free Version
This recipe depends on dairy for both texture and flavor, so a straight dairy-free swap changes the result a lot. If you use plant-based butter and coconut cream, the fudge will still set, but the finish tastes a little less round and more coconut-forward. It’s workable, just not as classic.
Extra Salted Caramel Finish
Add an extra pinch of flaky sea salt after the fudge goes into the pan if you want the caramel note to read darker and less sweet. That tiny amount changes the whole bite because the salt sits on the surface and hits first. Don’t overdo it or the top turns sharp instead of balanced.
Smaller or Larger Batch
You can double the recipe, but use a much larger saucepan so the boil doesn’t creep over the sides. The cooking time will be longer, but the temperature target stays the same. A wider pot also helps the mixture cook evenly instead of scorching before the center is ready.
Storage and Reheating
- Refrigerator: Store in an airtight container for up to 2 weeks. Separate layers with parchment so the squares don’t stick together.
- Freezer: Freezes well for up to 2 months. Wrap tightly and thaw in the fridge so condensation doesn’t make the surface tacky.
- Reheating: This fudge is meant to be eaten cold or at cool room temperature, not reheated. If it feels too firm straight from the fridge, let it sit on the counter for 15 to 20 minutes before serving so the texture softens naturally.