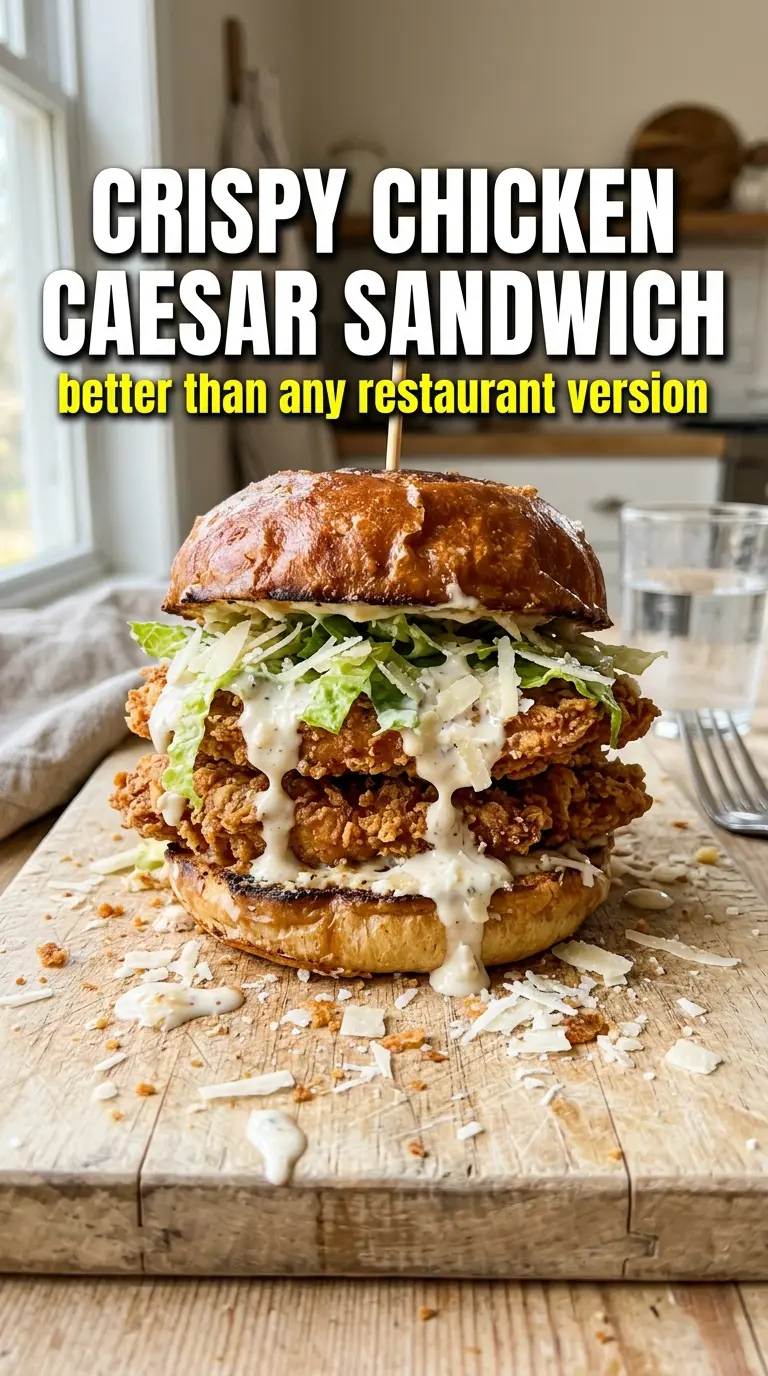
Crispy chicken, cool romaine, and creamy Caesar dressing turn this sandwich into something that eats like a full meal instead of a quick lunch. The best part is the contrast: a shattering panko crust on the outside, juicy chicken in the middle, and just enough dressing to coat the lettuce without turning the bun soggy before the first bite.
This version works because the breading is built for crunch. Parmesan goes straight into the panko, which adds salt and helps the crust brown fast, while the chicken gets pounded thin so it cooks through at the same pace the coating turns golden. If you’ve ever ended up with chicken that’s dark outside and underdone inside, the cutlet was probably too thick or the oil was too cool. Both problems are fixed here.
Below, I’ll show you how to keep the crust crisp, how to assemble the sandwich so it holds together, and the swaps that still give you a proper Caesar-style bite when you need them.
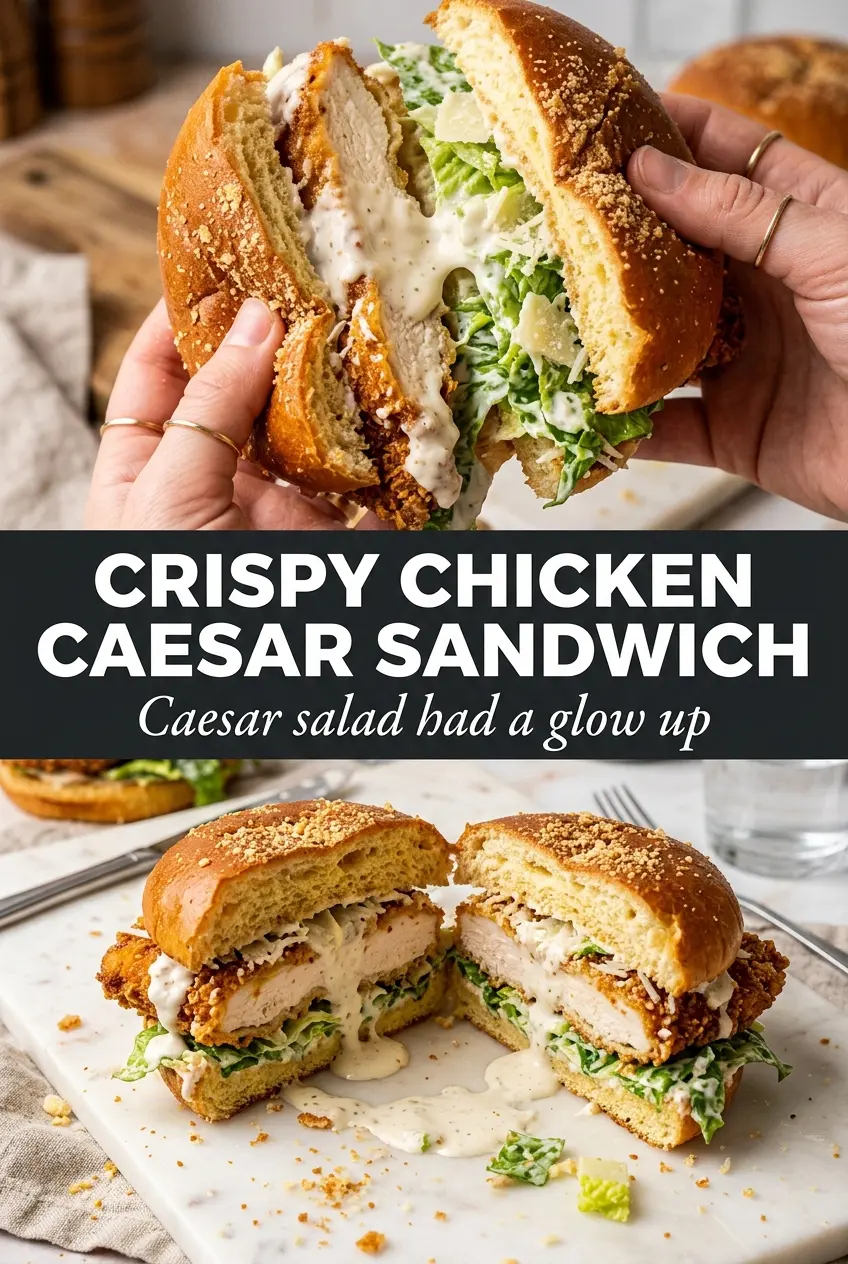
The chicken stayed crunchy even after I added the Caesar-dressed lettuce, and the parmesan in the coating gave it a great salty edge. Mine were done right around 5 minutes per side, and the brioche buns held up without getting greasy.
Crispy Chicken Caesar Sandwich with golden panko crust, creamy Caesar, and piled-high romaine
The Crunch Dies When the Sandwich Sits Too Long
The biggest failure point here isn’t the chicken itself. It’s assembly. A fried cutlet can be perfect coming out of the pan and turn soft fast if it sits under wet lettuce and dressing for too long. That’s why the romaine gets tossed lightly, not drenched, and the sandwich gets built right before serving.
Temperature matters too. If the oil isn’t hot enough, the panko absorbs grease instead of crisping, and the coating goes sandy instead of shattery. If the chicken is pounded evenly, each cutlet finishes at the same time and you don’t have to choose between a raw center and an overbrowned crust.
- The coating needs pressure. When you press the panko mixture onto the chicken, the crumbs cling better and fry into a sturdier crust.
- Romaine is the right lettuce here because it stays crisp under dressing. Soft greens collapse and make the bun soggy.
- Brioche gives you a little sweetness and enough structure to hold the chicken without falling apart after the first bite.
What Each Ingredient Is Actually Doing in This Sandwich
Panko breadcrumbs are the difference between a light crisp and a heavy bread crust. Standard breadcrumbs work in a pinch, but panko keeps more air between the crumbs, which is what gives you that rough, crunchy shell.
Parmesan shows up twice here, and that’s on purpose. Grated parmesan goes into the coating for salt and browning, while shavings go into the sandwich for a sharper bite. If all you have is the grated kind, use it in both places, but the texture won’t be as nice.
Chicken breasts need to be pounded thin so they cook through before the crust burns. You want even cutlets, not just thinner edges and a thick center. If your breasts are large, slice them in half horizontally first, then pound them out.
Caesar dressing does more than add flavor. It seasons the lettuce and ties the sandwich together. Use one you actually like eating on its own, because there isn’t enough of it here to hide a flat or overly sweet dressing.
Building the Breading and Frying It to a Deep Golden Crust
Set Up the Three-Part Dredge
Line up flour, beaten eggs, and the panko-parmesan mixture before you touch the chicken. Season the flour well with salt and black pepper, because that layer is the first chance to season the meat itself. If the chicken goes into dry flour without enough seasoning, the crust tastes good but the center can taste flat.
Press for Contact
Coat each cutlet in flour, then egg, then the crumb mixture, pressing the crumbs on with your fingers. The goal is a thick, even layer with no bare spots. If the coating looks patchy before frying, those thin spots will turn pale and soft in the pan.
Fry at the Right Pace
Use about 1/2 inch of oil and keep it at medium-high heat so the chicken sizzles as soon as it hits the pan. You’re looking for a steady, lively bubble around the edges, not a violent splash or a lazy simmer. Four to five minutes per side is usually enough for thin cutlets, and the crust should be deeply golden before you flip.
Drain Without Steaming
Set the chicken on paper towels or a rack as soon as it comes out of the oil. If you stack it or cover it too early, the trapped steam softens the crust you just worked for. Let it rest a minute or two, then assemble while it still has that just-fried crunch.
Three Ways to Adapt the Sandwich Without Losing What Makes It Work
Gluten-Free Version with the Same Crunch
Use a gluten-free flour blend and gluten-free panko. The flavor stays close to the original, and the crust still fries up crisp as long as the oil is hot enough. Don’t swap in almond flour here; it browns too fast and gives you a denser coating.
Baked Instead of Fried
Brush or spray the breaded cutlets with oil and bake on a rack so air can circulate underneath. You’ll lose some of the blistered, fried texture, but you still get a good crunch if the coating is well pressed and the oven is hot. Flip once halfway through for even browning.
Lighter Lunch Version
Serve the crispy chicken over romaine instead of in a bun and add extra Caesar dressing plus parmesan shavings. You keep the whole Caesar-salad feel, but it eats cleaner and cuts the bread down to zero. This works especially well if you want the same texture contrast without the heft of a sandwich.
Storage and Reheating
- Refrigerator: Store the chicken, lettuce, and buns separately for up to 3 days. The crust softens if it sits in the fridge assembled.
- Freezer: The cooked chicken freezes well for up to 2 months. Freeze it in a single layer first, then wrap it tightly so the coating doesn’t get crushed.
- Reheating: Reheat the chicken in a 375°F oven or air fryer until hot and crisp again. The common mistake is microwaving it, which turns the crust rubbery and pulls moisture into the breading.
Questions I Get Asked About This Recipe
Crispy Chicken Caesar Sandwich
Ingredients
Equipment
Method
- Set up a three-stage breading station: place all-purpose flour seasoned with salt and black pepper in one container, beaten eggs in a second, and panko breadcrumbs mixed with grated parmesan, garlic powder, and Italian seasoning in a third. Keep them in order so each cutlet moves from flour to egg to crumbs without pausing.
- Coat each chicken breast cutlet in the flour, shake off excess, dip into the beaten eggs, then press firmly into the panko-parmesan mixture until fully coated. Place breaded cutlets on a tray as you work.
- Heat oil to about 1/2 inch deep in a cast iron skillet over medium-high heat until hot. Fry each cutlet for 4–5 minutes per side until deeply golden and cooked through, then drain on paper towels.
- Toss chopped romaine lettuce with Caesar dressing until glossy and evenly coated.
- Assemble sandwiches with the toasted brioche buns: bottom bun, Caesar-dressed romaine, crispy chicken cutlet, parmesan shavings, and top bun.
- Serve immediately with extra Caesar dressing on the side so the dressing stays creamy instead of soaking in.