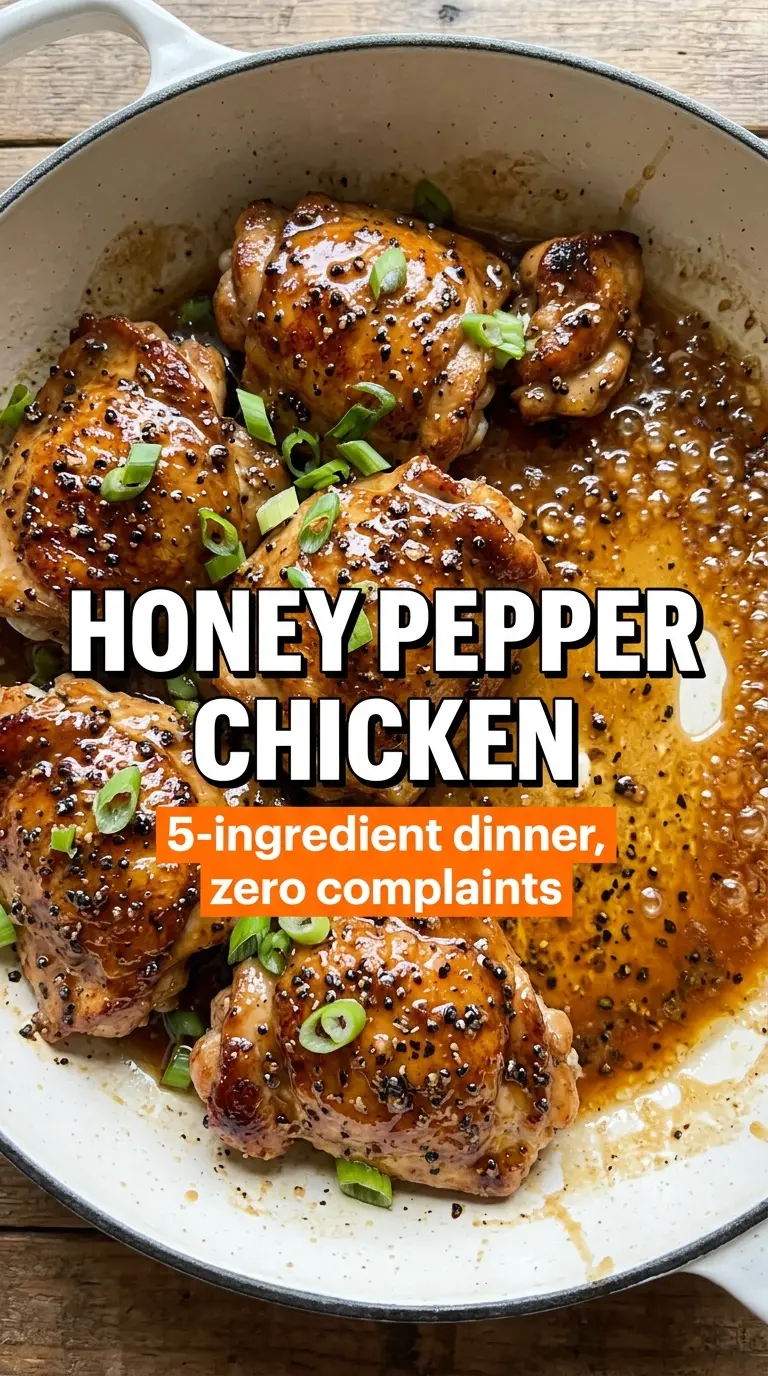
Glossy honey pepper chicken earns its keep fast: the chicken stays juicy, the sauce turns sticky and lacquered, and every bite lands with that sweet heat that makes you want to swipe up every last bit from the pan. The trick isn’t complicated, but it does matter. You’re building a skillet sauce that clings instead of running off, and you’re using enough cracked pepper to taste it without turning the whole dish harsh.
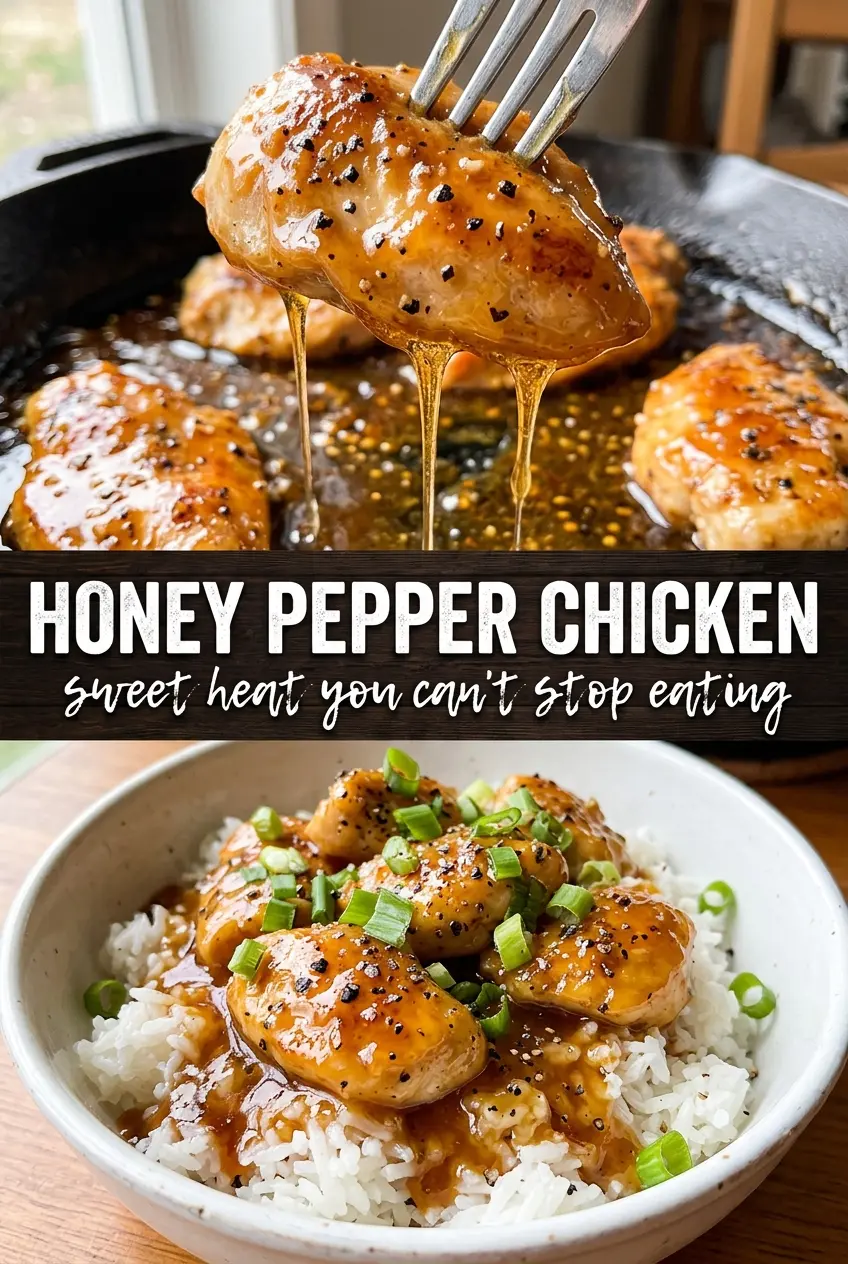
Pounding the chicken to even thickness is what keeps the breasts from drying out before the center is done. The sauce also behaves best when the cornstarch slurry goes into a true simmer, not a lazy warm pan. That’s what gives you that deep amber glaze with a little body, the kind that coats the back of a spoon and settles into the edges of the chicken instead of pooling underneath it.
Below, I’ve included the small details that make this copycat-style chicken work in a home kitchen, plus a few swaps if you need to adjust the heat or serve it with what’s already in your pantry.
The sauce thickened up fast and clung to the chicken instead of sliding off, which is exactly what I wanted. I served it over rice and my husband went back for seconds before I even sat down.
Save this honey pepper chicken for the nights when you want a sticky skillet dinner with sweet heat and a pan sauce that actually coats the chicken.
The Reason the Glaze Sticks Instead of Sliding Off
Honey pepper chicken lives or dies on the sauce texture. If the pan is too cool, the cornstarch never fully activates and the glaze stays thin. If the heat is too high once the honey goes in, the sugars grab the pan and turn bitter before the chicken is coated. The sweet spot is a real simmer after the slurry is added, with small bubbles across the surface and the sauce noticeably thickening in under two minutes.
The other mistake is saucing plain chicken that hasn’t had a proper sear. You want those browned bits in the skillet because they deepen the sauce and keep it from tasting flat. That same sear also gives the chicken a little structure, so the glaze can cling to a surface that has some texture instead of a slippery, steamed finish.
What Each Ingredient Is Actually Doing in This Dish
- Chicken breasts — Pounding them to even thickness matters more than the exact size. It helps the meat cook at the same rate, which keeps the outside from overcooking while the center comes up to temperature.
- Honey — This is the backbone of the glaze. It gives you shine, body, and that sticky finish, so swap it only with another syrup if you’re okay with changing the flavor.
- Soy sauce — This brings salt and depth in a way table salt alone can’t. Use low-sodium if that’s what you keep, but don’t skip it; the sauce needs that savory edge to balance the honey.
- Apple cider vinegar — The acid keeps the sauce from tasting one-note sweet. If you’re out, rice vinegar works well, though it lands a little softer.
- Cracked black pepper — This is the signature note, so use freshly cracked pepper instead of fine ground if you can. It gives the sauce a sharper bite and the visible flecks that make the dish taste bold.
- Cornstarch slurry — This is what turns the sauce into a true glaze. Stir the cornstarch with cold water first; if it goes in dry, it clumps before it can thicken the sauce evenly.
Getting the Sear, Simmer, and Final Coat Right
Pounding and Seasoning the Chicken
Lay the chicken between sheets of plastic wrap or parchment and pound it until each breast is the same thickness from end to end. Season both sides generously with salt and cracked black pepper so the meat starts with flavor before it ever meets the sauce. If one end is much thicker than the other, that thin part dries out while you wait for the center to finish.
Building the Golden Sear
Heat the olive oil until it shimmers, then add the chicken and leave it alone long enough to form a deep golden crust. If you try to move it too soon, it will stick and tear. Five to six minutes per side is a guide, but the real cue is color and firmness: the chicken should release cleanly and feel springy, not loose and translucent in the middle.
Turning the Pan Drippings Into Sauce
Take the chicken out and keep the heat at medium so the honey doesn’t scorch. Whisk the sauce ingredients together in the same skillet and scrape up the browned bits as it comes to a simmer. Once the slurry goes in, stir constantly for about two minutes until the sauce looks glossy and coats the spoon in a thin, sticky layer.
Coating the Chicken Without Overcooking It
Return the chicken to the pan and turn it in the sauce until every surface is lacquered. You’re only giving it a minute or two here, just long enough for the glaze to cling and the chicken to finish bathing in the heat. If you leave it in too long, the sauce tightens too far and the chicken can turn dry.
How to Adapt This Sticky Skillet Chicken for Different Nights
Make It Spicier Without Losing the Glaze
Increase the cayenne to 1/2 teaspoon and add an extra few cracks of black pepper at the end. That gives the sauce more heat without changing the sticky texture. If you want the heat to linger, a tiny pinch of red pepper flakes in the simmering sauce works well.
Gluten-Free Version
Use a gluten-free soy sauce or tamari and keep the rest of the recipe the same. The cornstarch slurry is already gluten-free, so the sauce still thickens and shines the way it should. Check labels on the soy sauce if you’re cooking for someone with celiac disease.
Chicken Thigh Swap
Boneless skinless thighs work well if you want a juicier result and don’t mind a slightly richer bite. They need a few extra minutes in the pan, and they don’t need pounding as much as breasts do. The sauce clings just as well, but the finished dish will taste a little deeper and less lean.
Storage and Reheating
- Refrigerator: Store in an airtight container for up to 3 days. The glaze will thicken more as it chills.
- Freezer: It freezes well for up to 2 months, though the sauce may loosen slightly after thawing. Freeze the chicken and sauce together in a sealed container.
- Reheating: Warm it gently in a covered skillet over low heat with a splash of water. High heat can make the honey burn and the chicken dry out before the center is hot.
Questions I Get Asked About This Recipe
Honey Pepper Chicken
Ingredients
Equipment
Method
- Pound the chicken breasts to an even thickness, then season generously with salt and cracked black pepper.
- Set the seasoned chicken aside while you heat the skillet.
- Heat olive oil in a skillet over medium-high heat until shimmering, then sear the chicken for 5–6 minutes per side until golden and cooked through.
- Transfer the chicken to a plate or tray and set aside.
- In the same pan, whisk honey, soy sauce, apple cider vinegar, brown sugar, cracked black pepper, garlic powder, and cayenne until smooth.
- Bring the sauce to a simmer, then stir in the cornstarch slurry and cook for about 2 minutes until thickened and glossy.
- Return the chicken to the pan and coat in the honey pepper sauce on all sides until the glaze clings and caramelizes at the edges.
- Serve over mashed potatoes or rice, drizzling extra sauce on top.